Create and display SSRS Report in ASP.NET MVC
SQL Database part
Here, find the scripts to create the database and table.
Create Database
 USE [master]
GO

/****** Object: Database [DbEmployee] Script Date: 9/29/2016 2:37:24 AM ******/
CREATE DATABASE [DbEmployee]
CONTAINMENT = NONE
ON PRIMARY
( NAME = N'DbEmployee', FILENAME = N'c:\Program Files (x86)\Microsoft SQL Server\MSSQL11.MSSQLSERVER\MSSQL\DATA\DbEmployee.mdf' , SIZE = 3072KB , MAXSIZE = UNLIMITED, FILEGROWTH = 1024KB )
LOG ON
( NAME = N'DbEmployee_log', FILENAME = N'c:\Program Files (x86)\Microsoft SQL Server\MSSQL11.MSSQLSERVER\MSSQL\DATA\DbEmployee_log.ldf' , SIZE = 1024KB , MAXSIZE = 2048GB , FILEGROWTH = 10%)
GO

ALTER DATABASE [DbEmployee] SET COMPATIBILITY_LEVEL = 110
GO

IF (1 = FULLTEXTSERVICEPROPERTY('IsFullTextInstalled'))
begin
EXEC [DbEmployee].[dbo].[sp_fulltext_database] @action = 'enable'
end
GO

ALTER DATABASE [DbEmployee] SET ANSI_NULL_DEFAULT OFF
GO

ALTER DATABASE [DbEmployee] SET ANSI_NULLS OFF
GO

ALTER DATABASE [DbEmployee] SET ANSI_PADDING OFF
GO

ALTER DATABASE [DbEmployee] SET ANSI_WARNINGS OFF
GO

ALTER DATABASE [DbEmployee] SET ARITHABORT OFF
GO

ALTER DATABASE [DbEmployee] SET AUTO_CLOSE OFF
GO

ALTER DATABASE [DbEmployee] SET AUTO_CREATE_STATISTICS ON
GO

ALTER DATABASE [DbEmployee] SET AUTO_SHRINK OFF
GO

ALTER DATABASE [DbEmployee] SET AUTO_UPDATE_STATISTICS ON
GO

ALTER DATABASE [DbEmployee] SET CURSOR_CLOSE_ON_COMMIT OFF
GO

ALTER DATABASE [DbEmployee] SET CURSOR_DEFAULT GLOBAL
GO

ALTER DATABASE [DbEmployee] SET CONCAT_NULL_YIELDS_NULL OFF
GO

ALTER DATABASE [DbEmployee] SET NUMERIC_ROUNDABORT OFF
GO

ALTER DATABASE [DbEmployee] SET QUOTED_IDENTIFIER OFF
GO

ALTER DATABASE [DbEmployee] SET RECURSIVE_TRIGGERS OFF
GO

ALTER DATABASE [DbEmployee] SET DISABLE_BROKER
GO

ALTER DATABASE [DbEmployee] SET AUTO_UPDATE_STATISTICS_ASYNC OFF
GO

ALTER DATABASE [DbEmployee] SET DATE_CORRELATION_OPTIMIZATION OFF
GO

ALTER DATABASE [DbEmployee] SET TRUSTWORTHY OFF
GO

ALTER DATABASE [DbEmployee] SET ALLOW_SNAPSHOT_ISOLATION OFF
GO

ALTER DATABASE [DbEmployee] SET PARAMETERIZATION SIMPLE
GO

ALTER DATABASE [DbEmployee] SET READ_COMMITTED_SNAPSHOT OFF
GO

ALTER DATABASE [DbEmployee] SET HONOR_BROKER_PRIORITY OFF
GO

ALTER DATABASE [DbEmployee] SET RECOVERY SIMPLE
GO

ALTER DATABASE [DbEmployee] SET MULTI_USER
GO

ALTER DATABASE [DbEmployee] SET PAGE_VERIFY CHECKSUM
GO

ALTER DATABASE [DbEmployee] SET DB_CHAINING OFF
GO

ALTER DATABASE [DbEmployee] SET FILESTREAM( NON_TRANSACTED_ACCESS = OFF )
GO

ALTER DATABASE [DbEmployee] SET TARGET_RECOVERY_TIME = 0 SECONDS
GO

ALTER DATABASE [DbEmployee] SET READ_WRITE
GO
Create Table
USE [DbEmployee]
GO

/****** Object: Table [dbo].[Employee_tbt] Script Date: 9/29/2016 2:38:05 AM ******/
SET ANSI_NULLS ON
GO

SET QUOTED_IDENTIFIER ON
GO

SET ANSI_PADDING ON
GO

CREATE TABLE [dbo].[Employee_tbt](
[id] [int] IDENTITY(1,1) NOT NULL,
[Name] [varchar](50) NULL,
[Designation] [varchar](50) NULL,
[Gender] [varchar](50) NULL,
[JoinDate] [date] NULL,
[Salary] [float] NULL,
[City] [varchar](50) NULL,
[State] [varchar](50) NULL,
[Zip] [int] NULL,
CONSTRAINT [PK_Employee_tbt] PRIMARY KEY CLUSTERED
(
[id] ASC
)WITH (PAD_INDEX = OFF, STATISTICS_NORECOMPUTE = OFF, IGNORE_DUP_KEY = OFF, ALLOW_ROW_LOCKS = ON, ALLOW_PAGE_LOCKS = ON) ON [PRIMARY]
) ON [PRIMARY]

GO

SET ANSI_PADDING OFF
GO
Create your MVC application
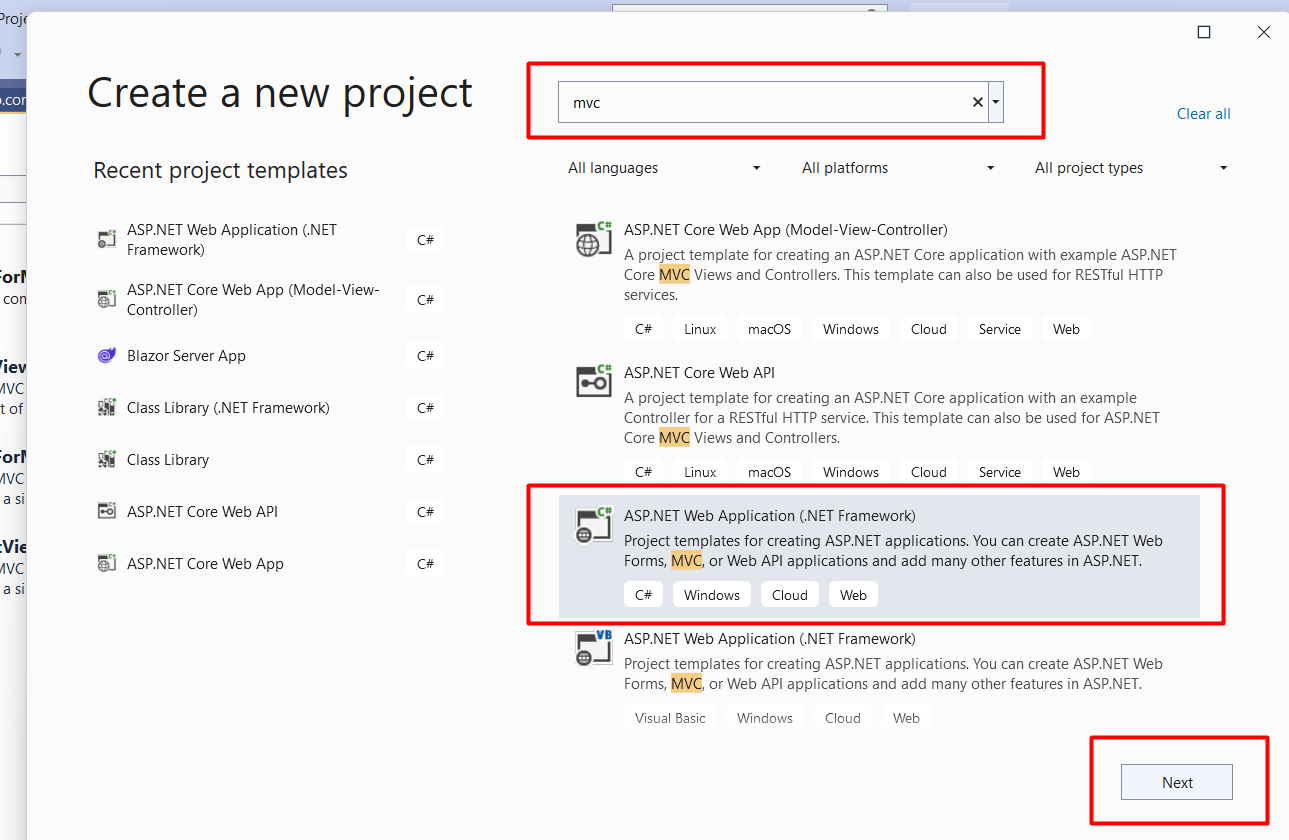
Open Visual Studio and select File >> New Project.
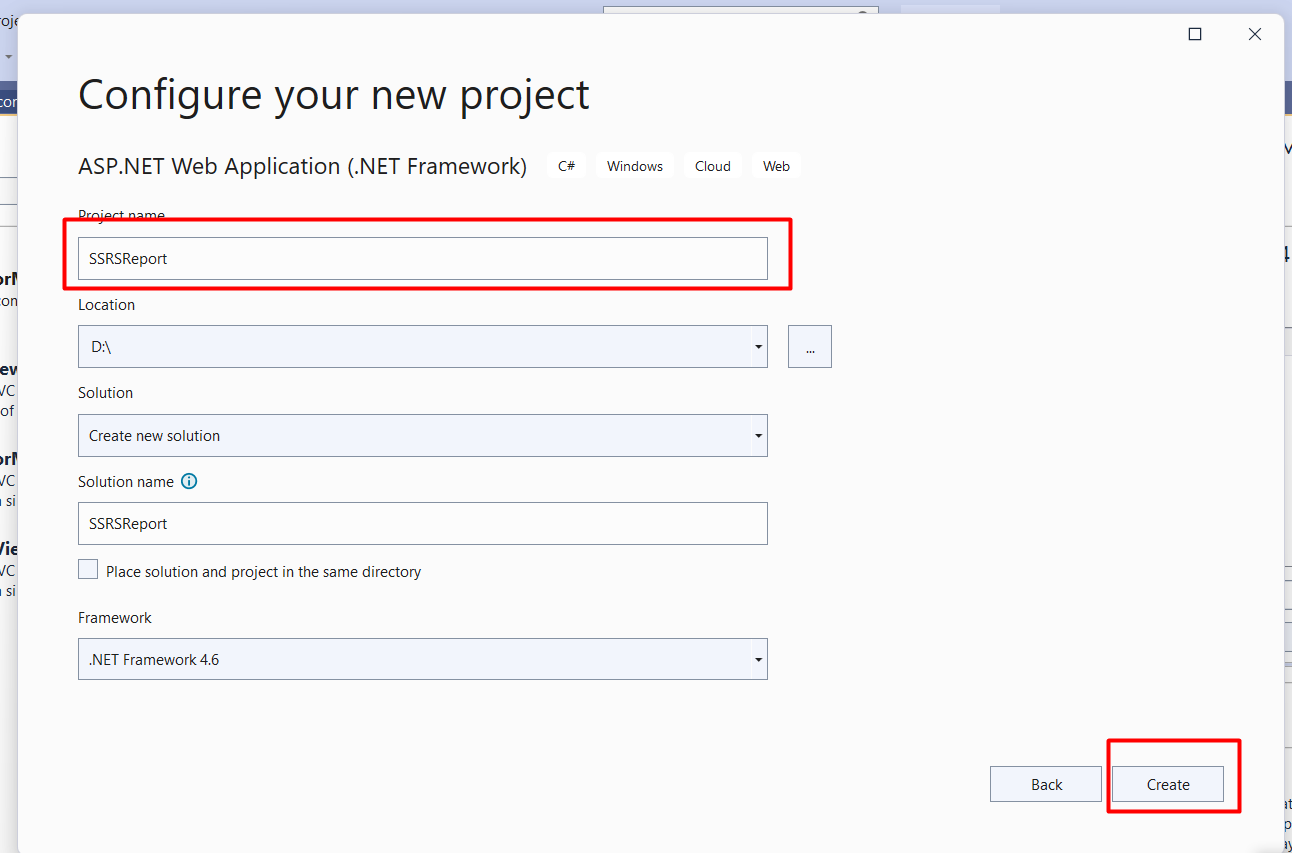
The "New Project" window will pop up. Select ASP.NET Web Application (.NET Framework), name your project, and click OK.
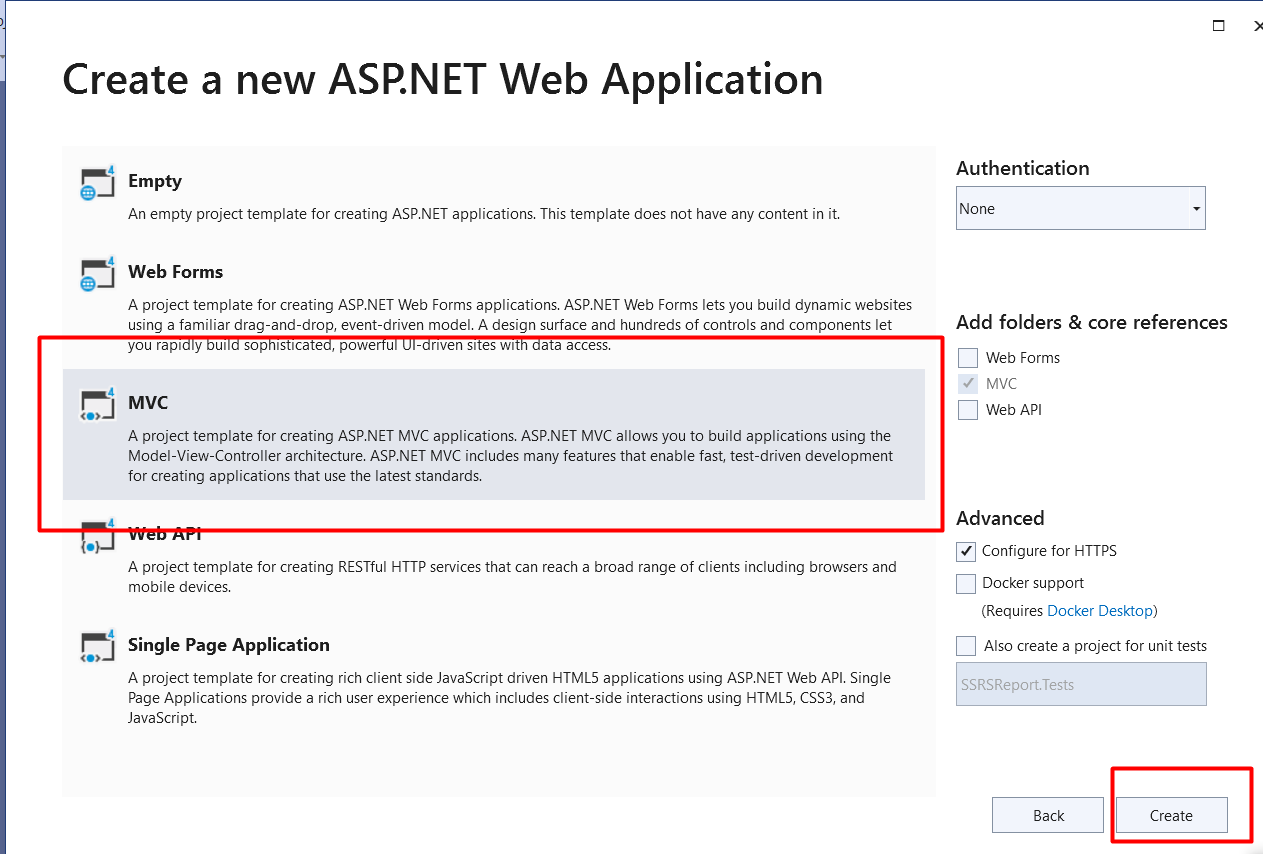
Now, a new dialog will pop up for selecting the template. We are going to choose the MVC template and click the OK button.
After creating our project, we are going to add DataSet.
Create DataSet
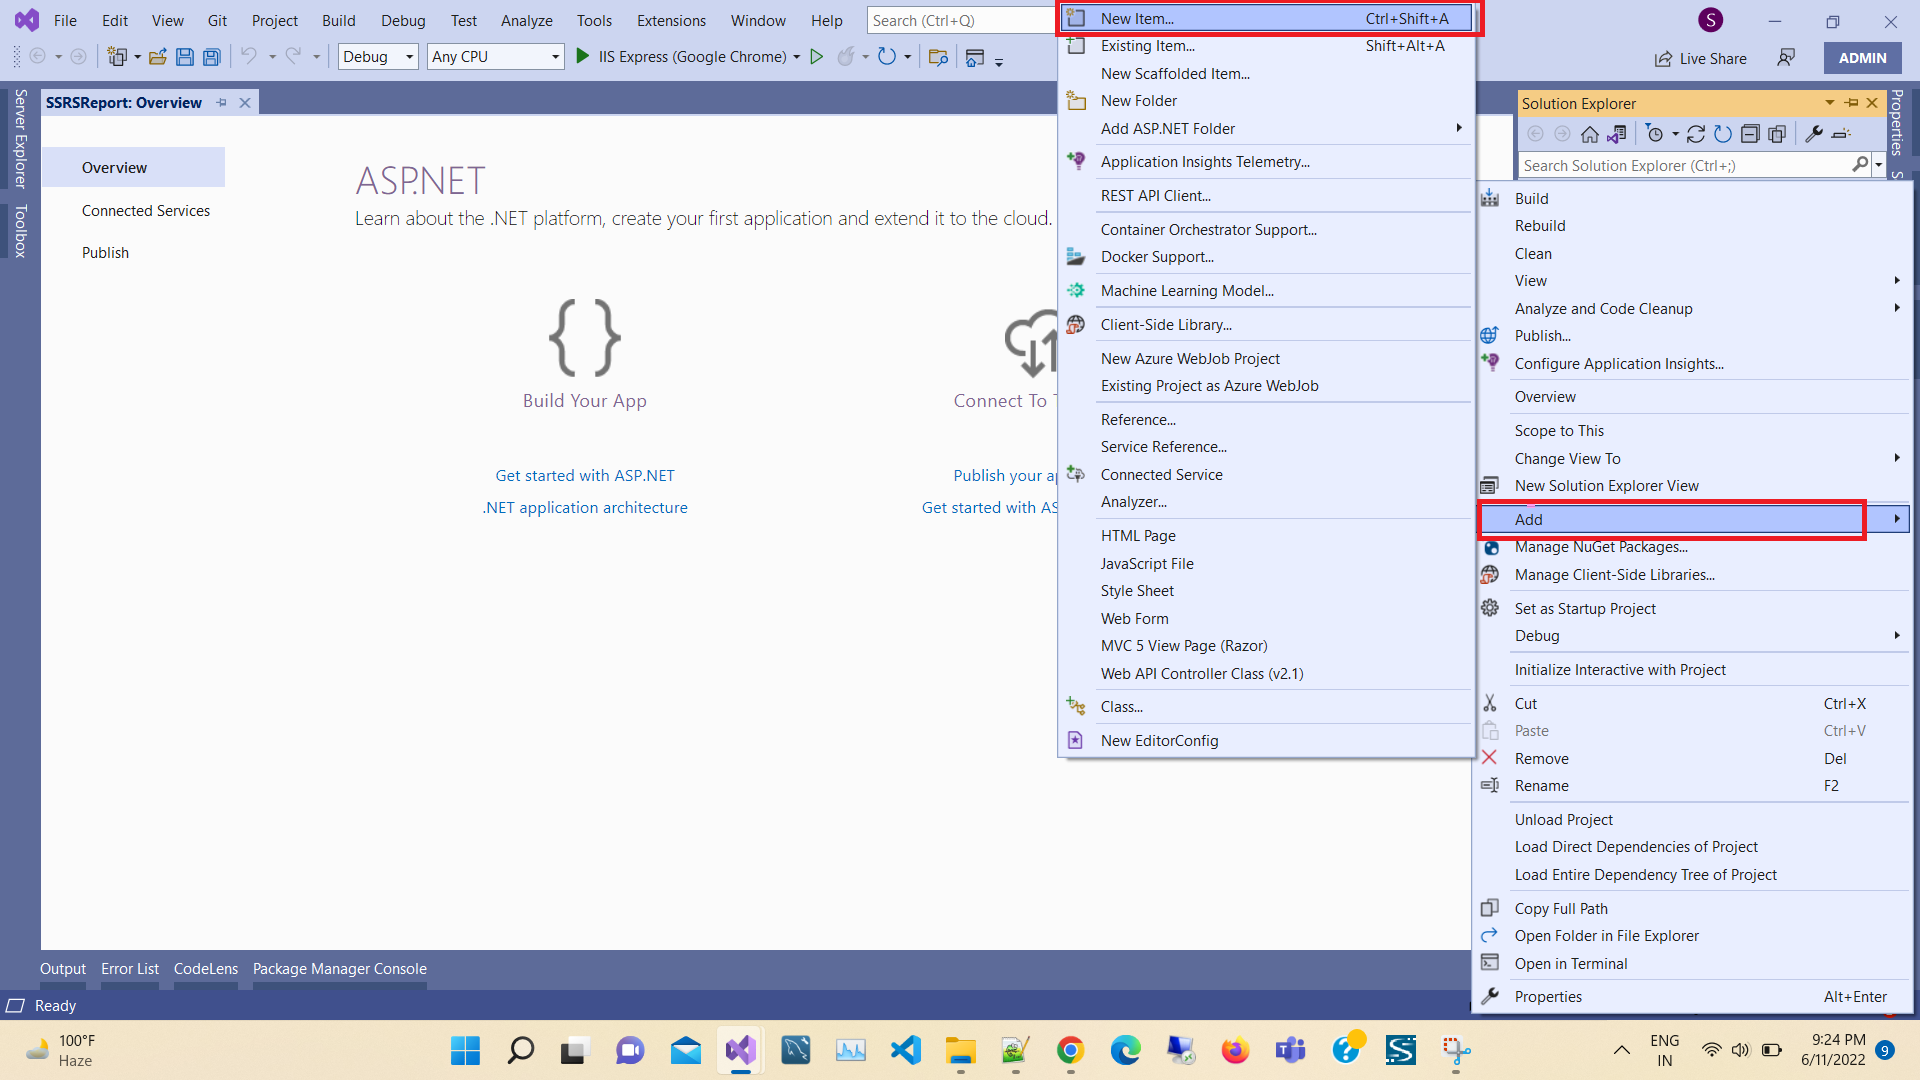
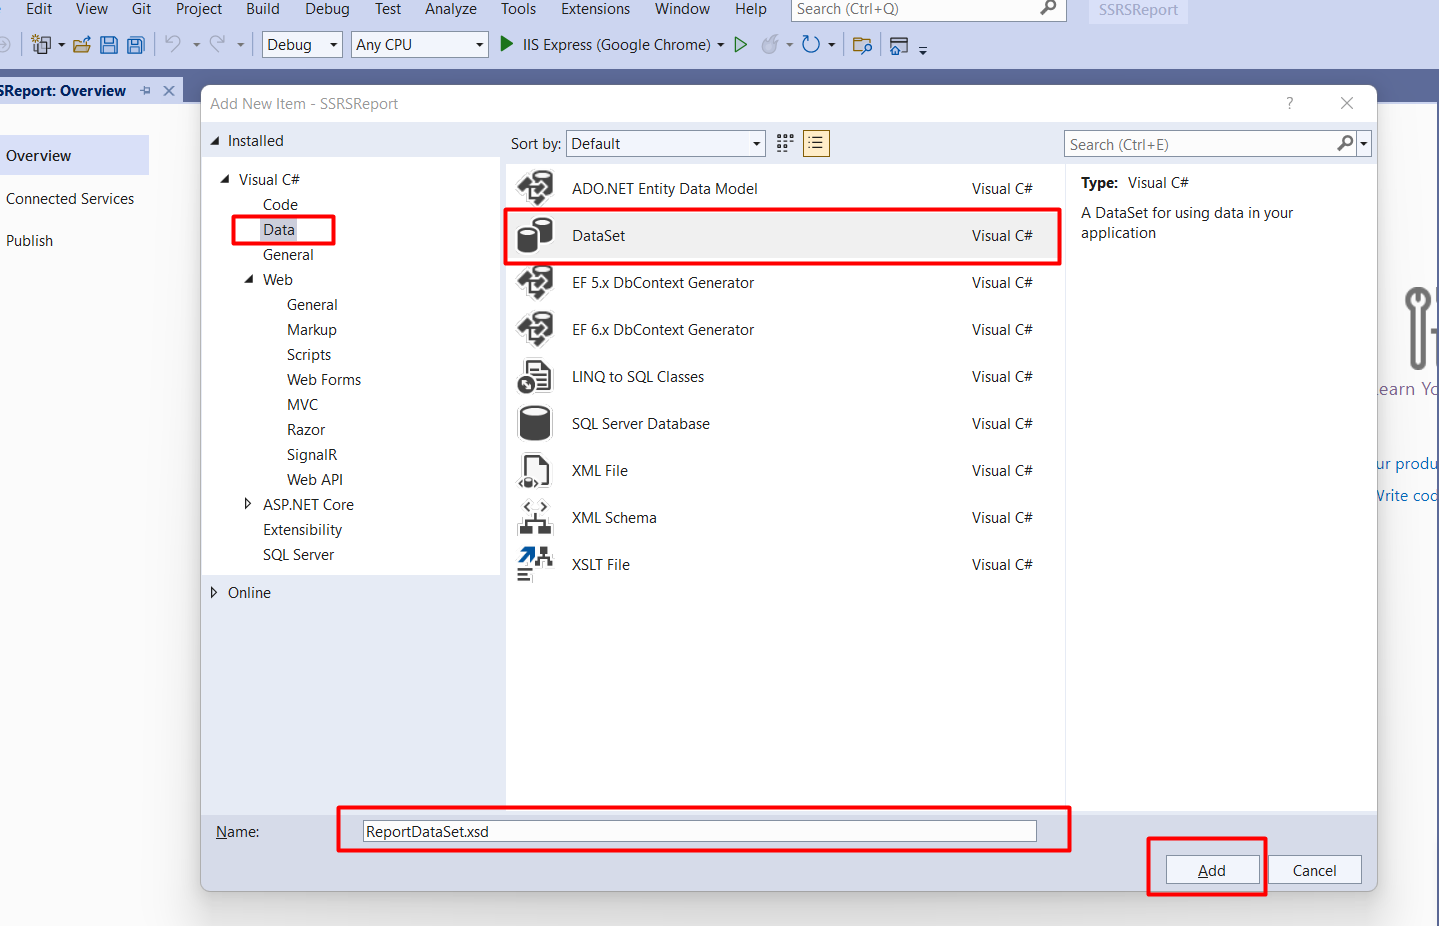
In order to add DataSet component, right click on Reports
folder > Add > New Item > Select DataSet > click Add button.
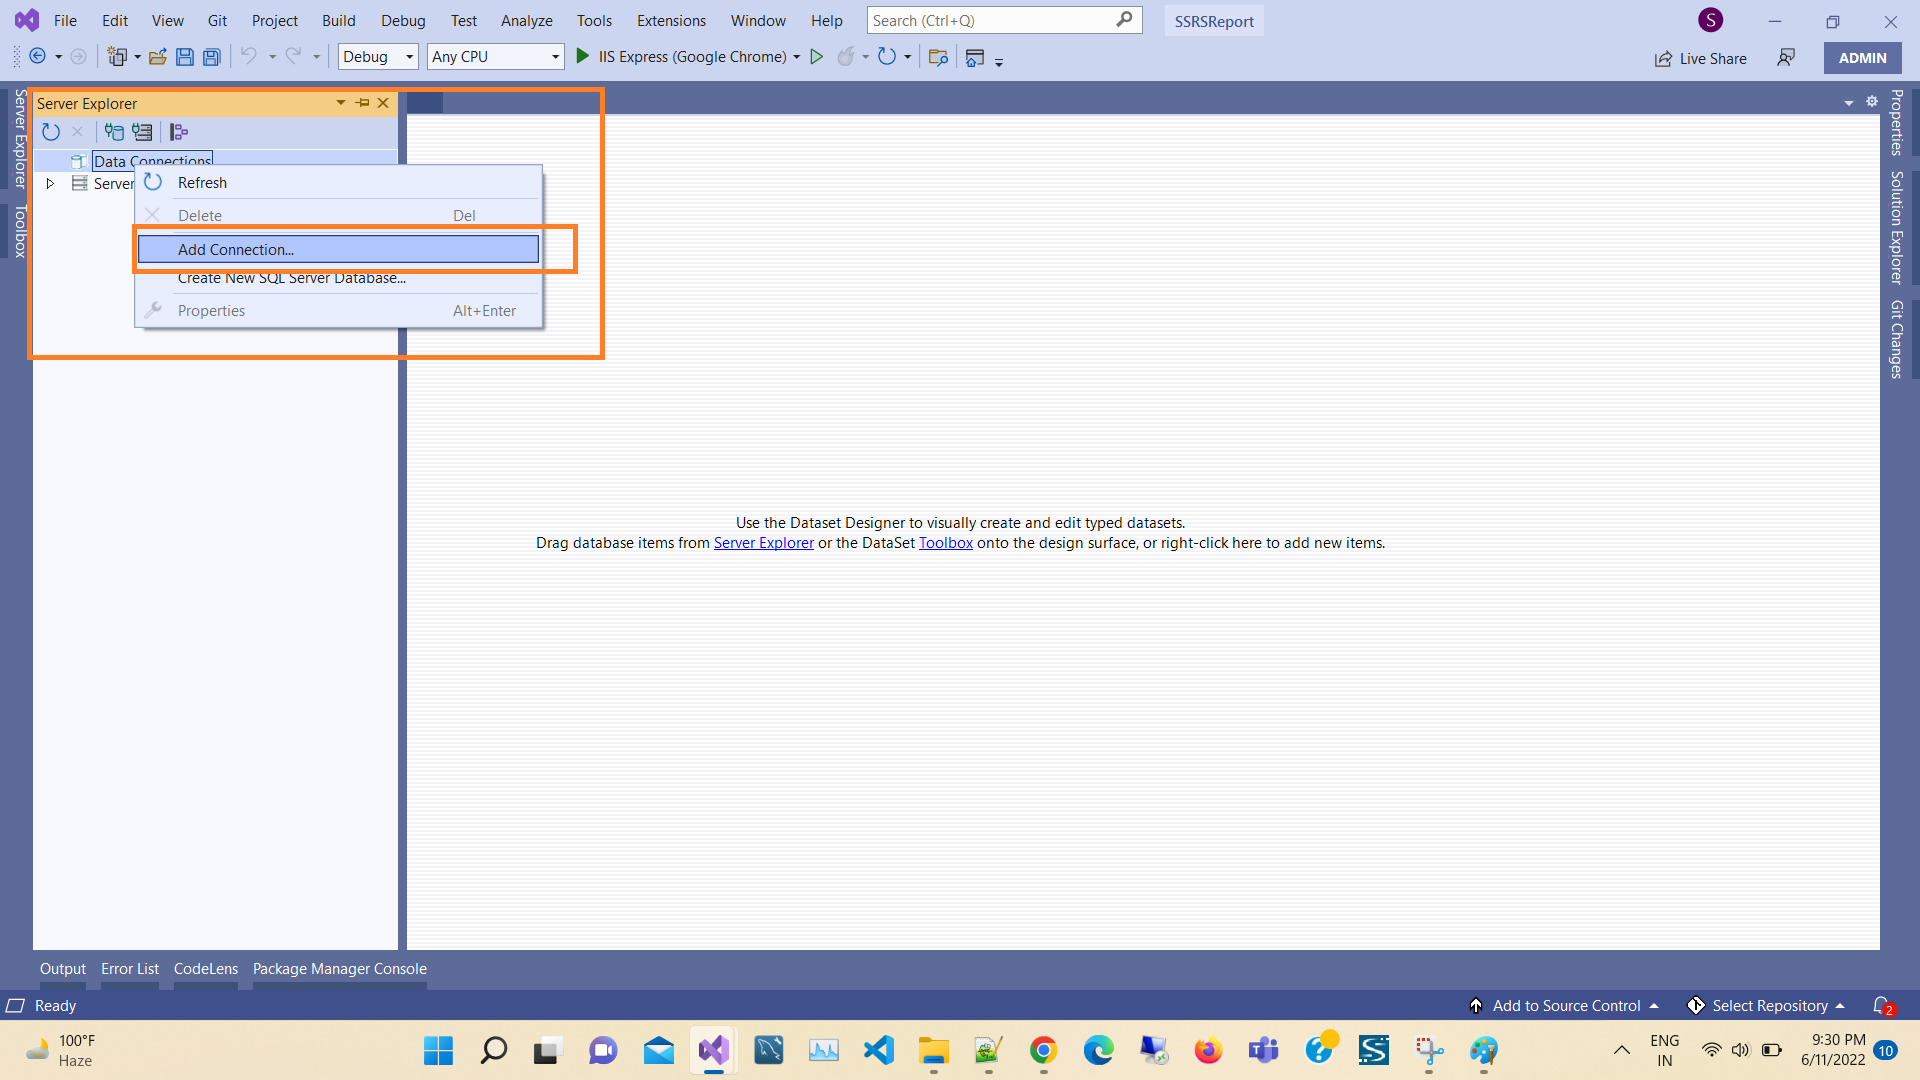
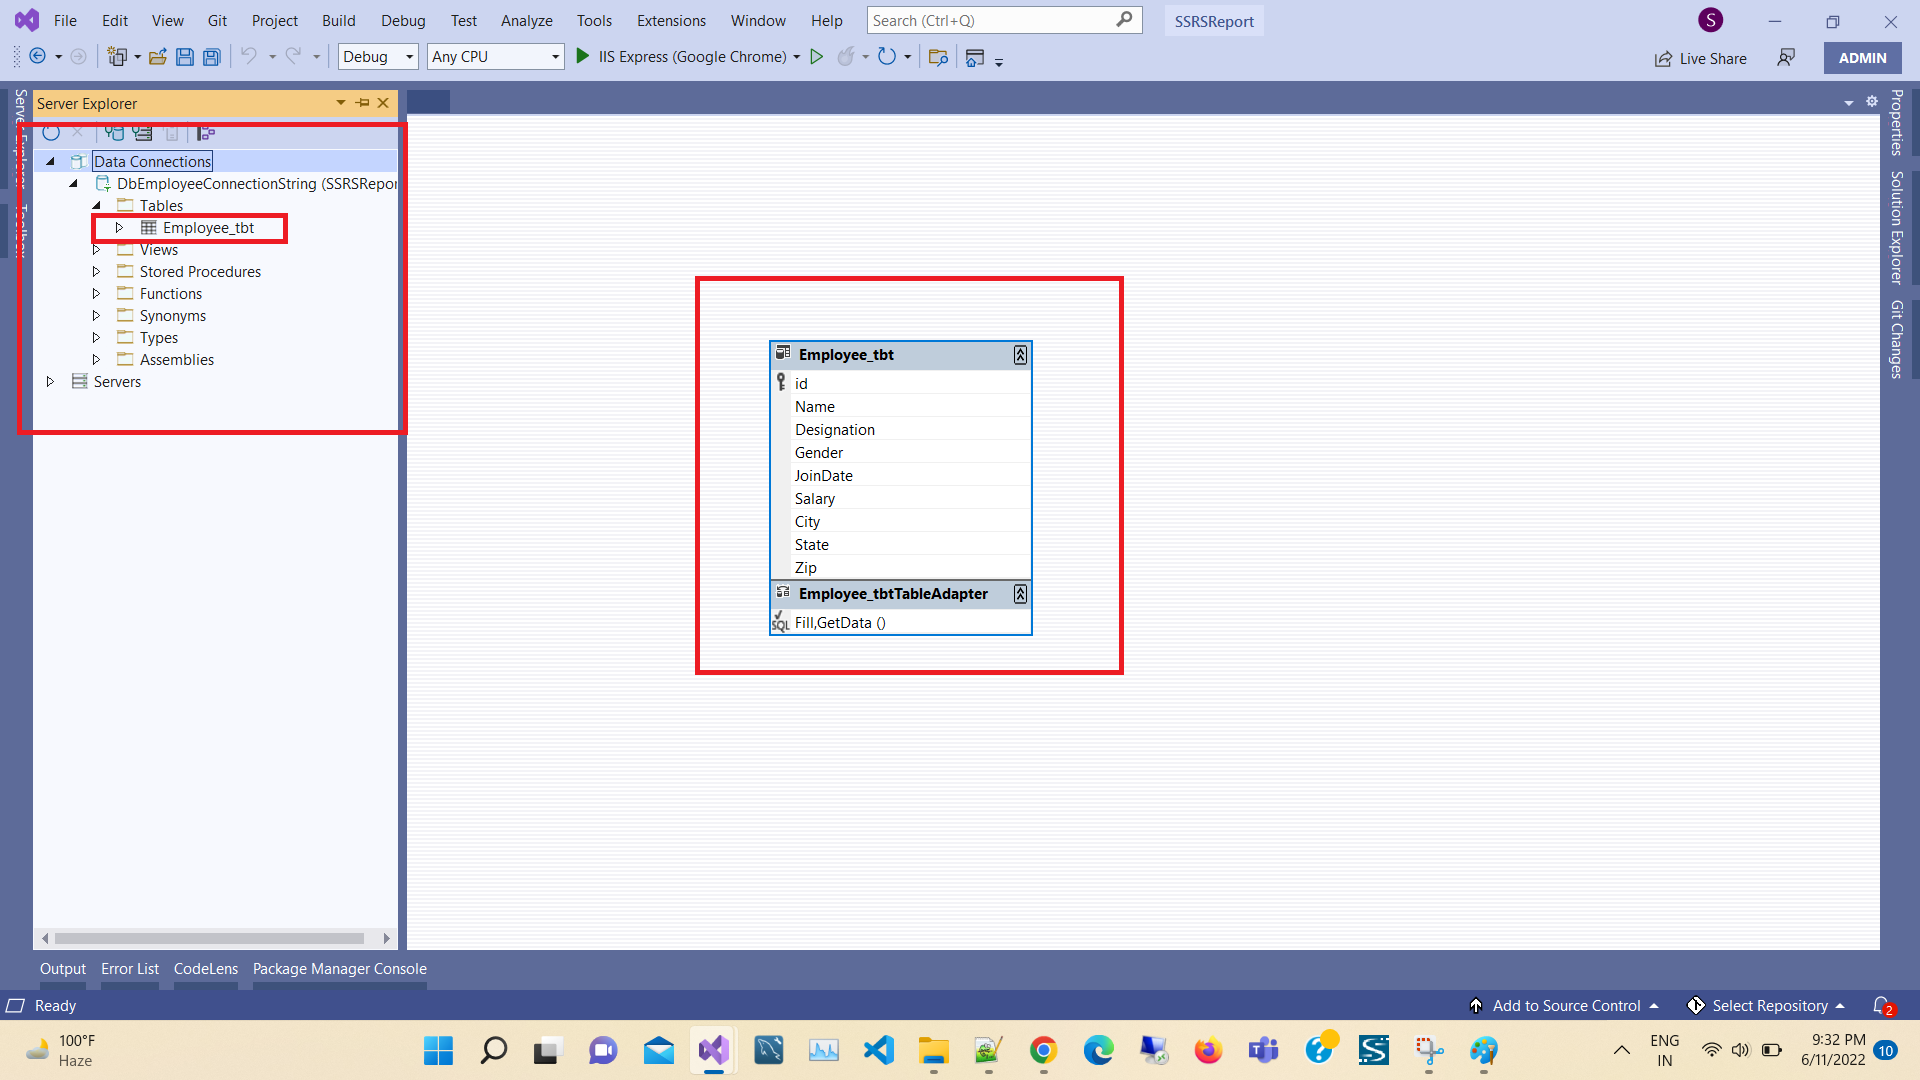
Next, click on Server Explorer link.
Now, the Server Explorer section will be shown as given below. Right click on Data connections > Select Add Connection
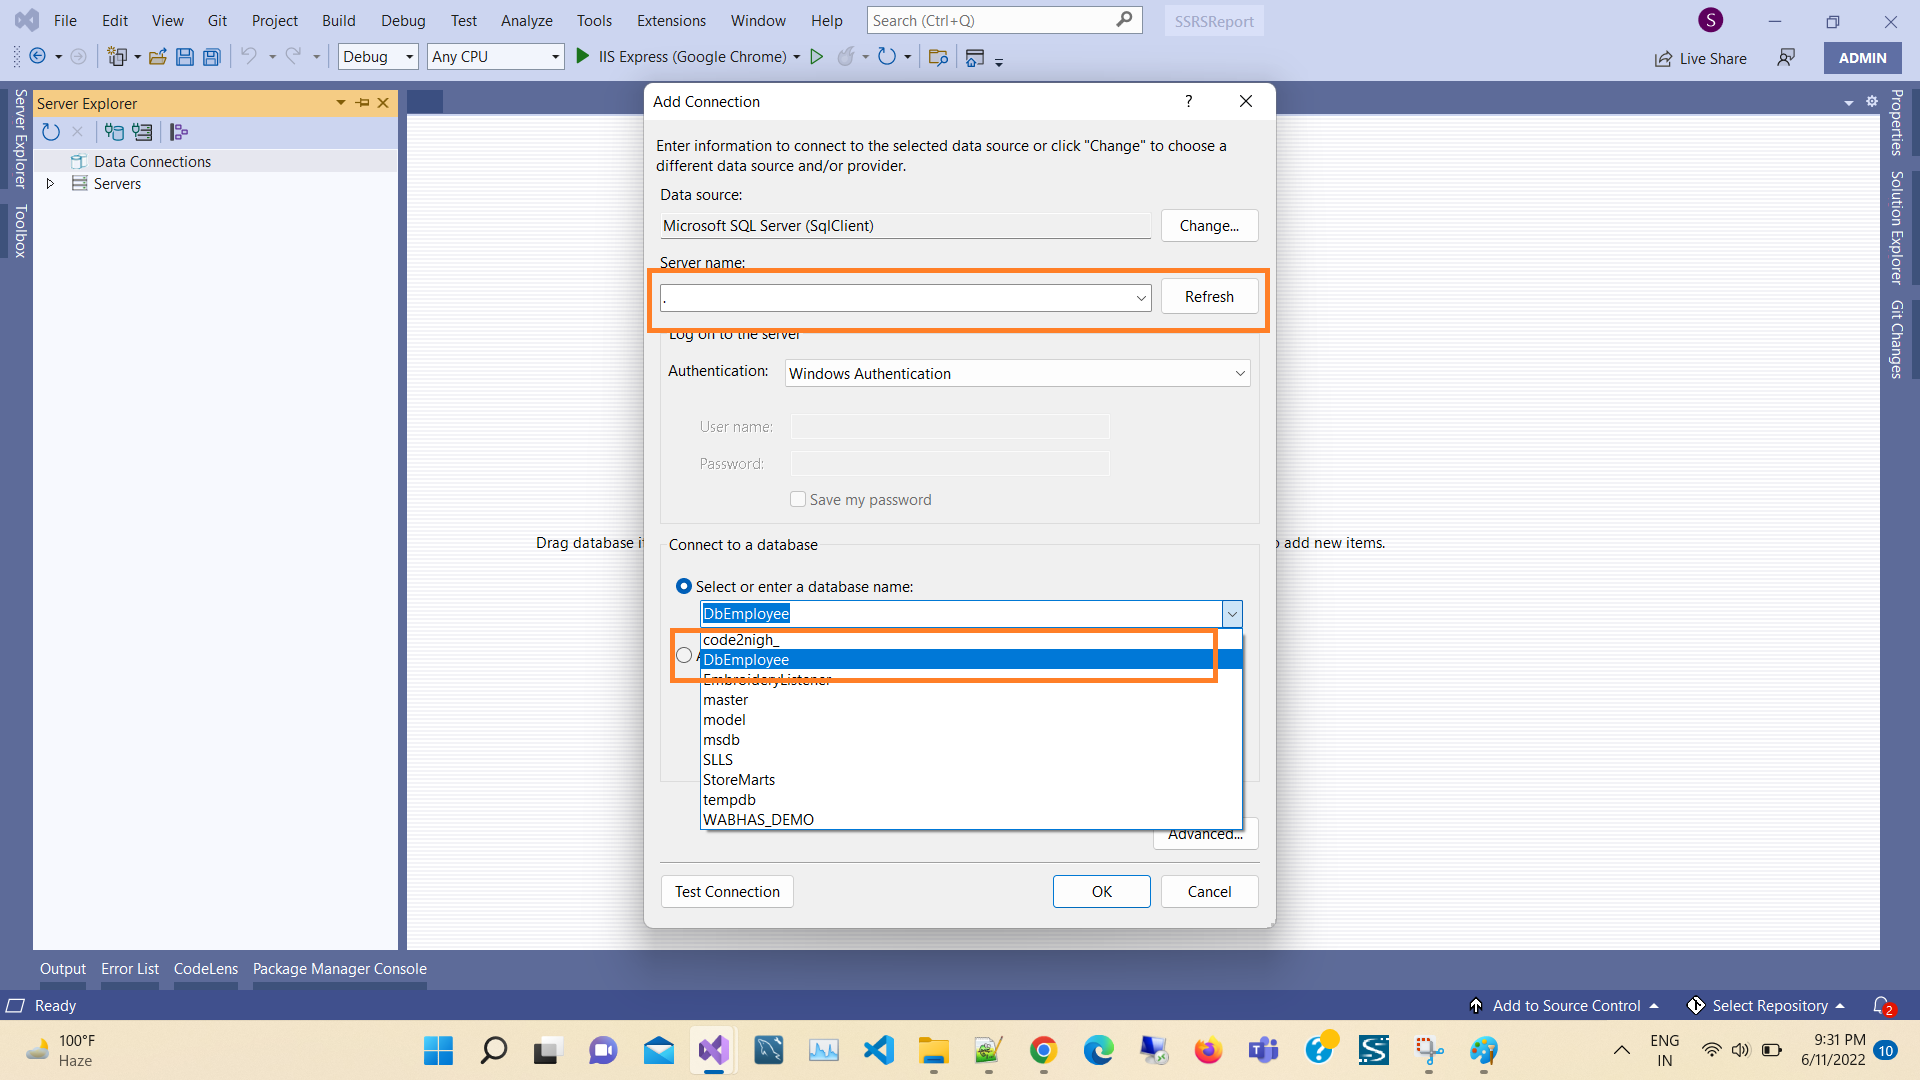
As you can see below, we need to select the server name, then via a drop-down list in connect to a database panel. You should choose your database name. Finally, click OK.
Here, we will work with the Employee_tbt table. For this, the next step is to drag our table, as shown below.
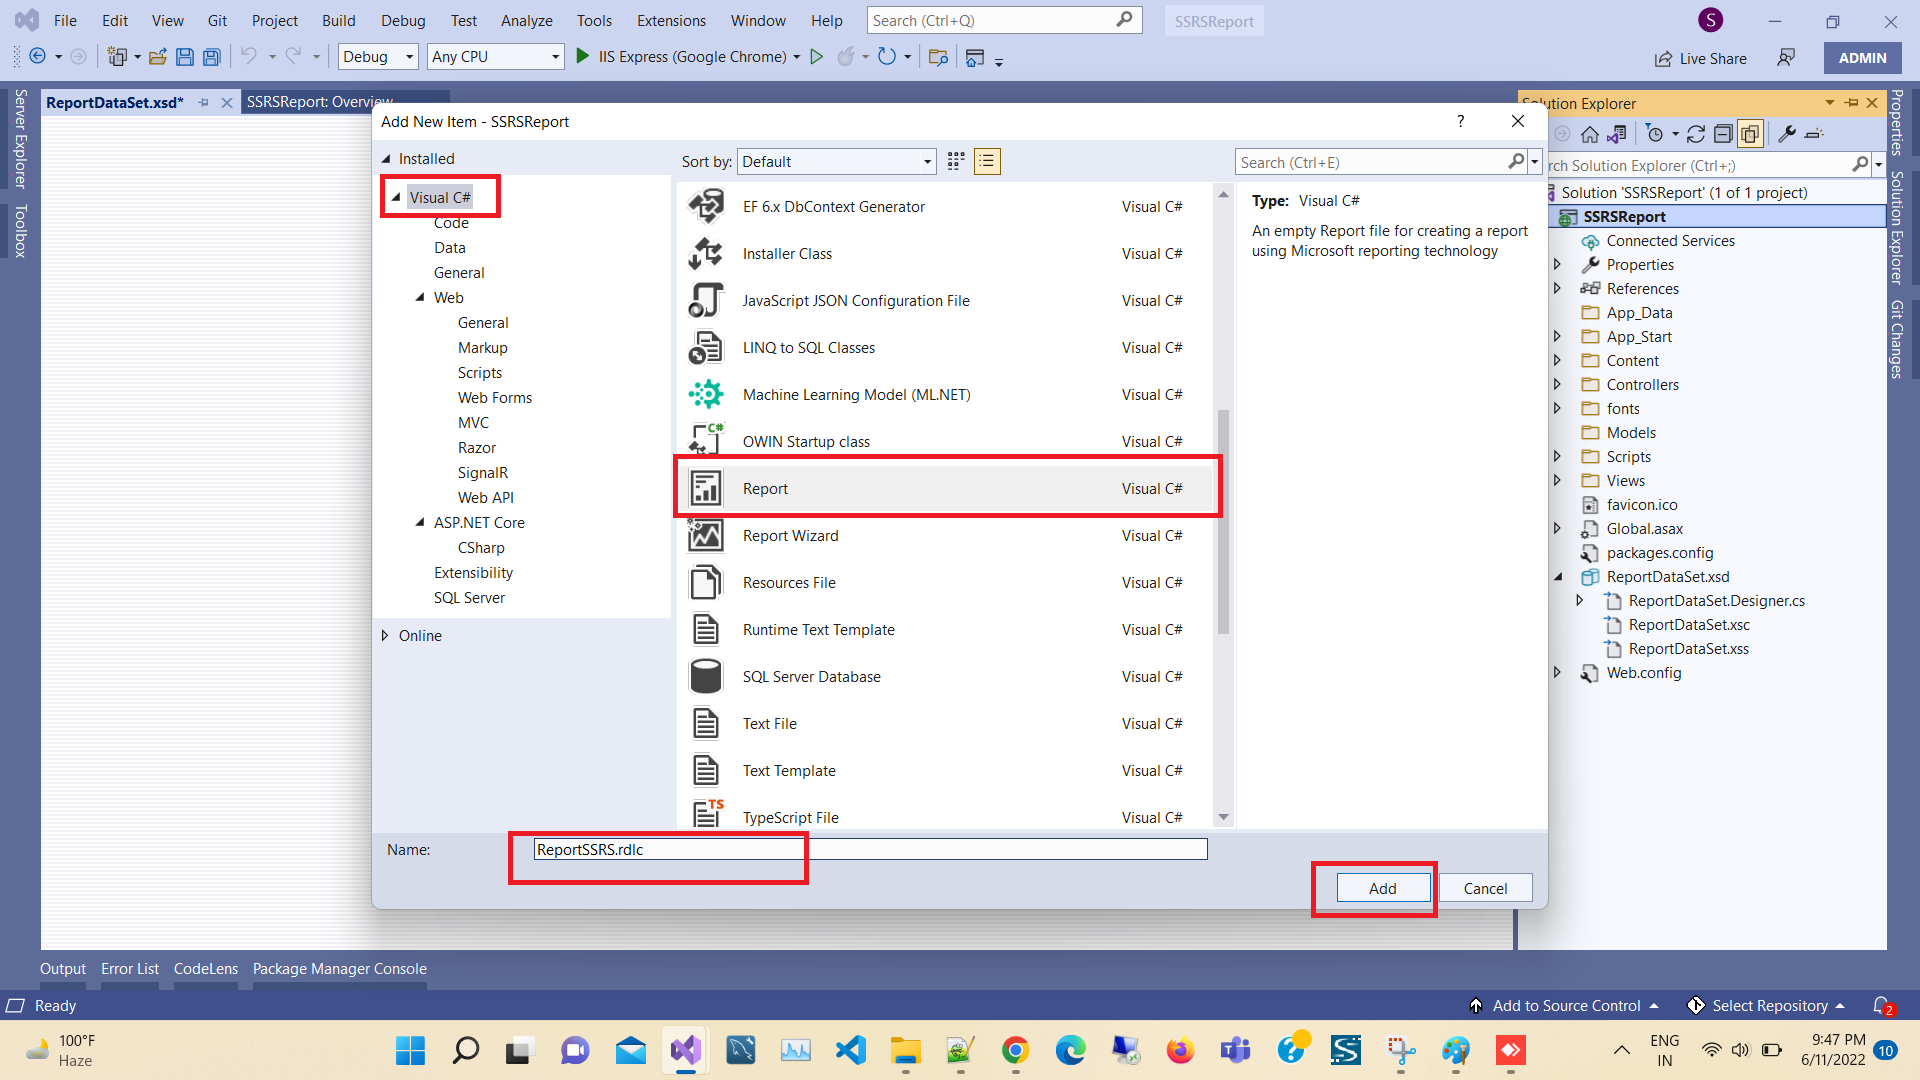
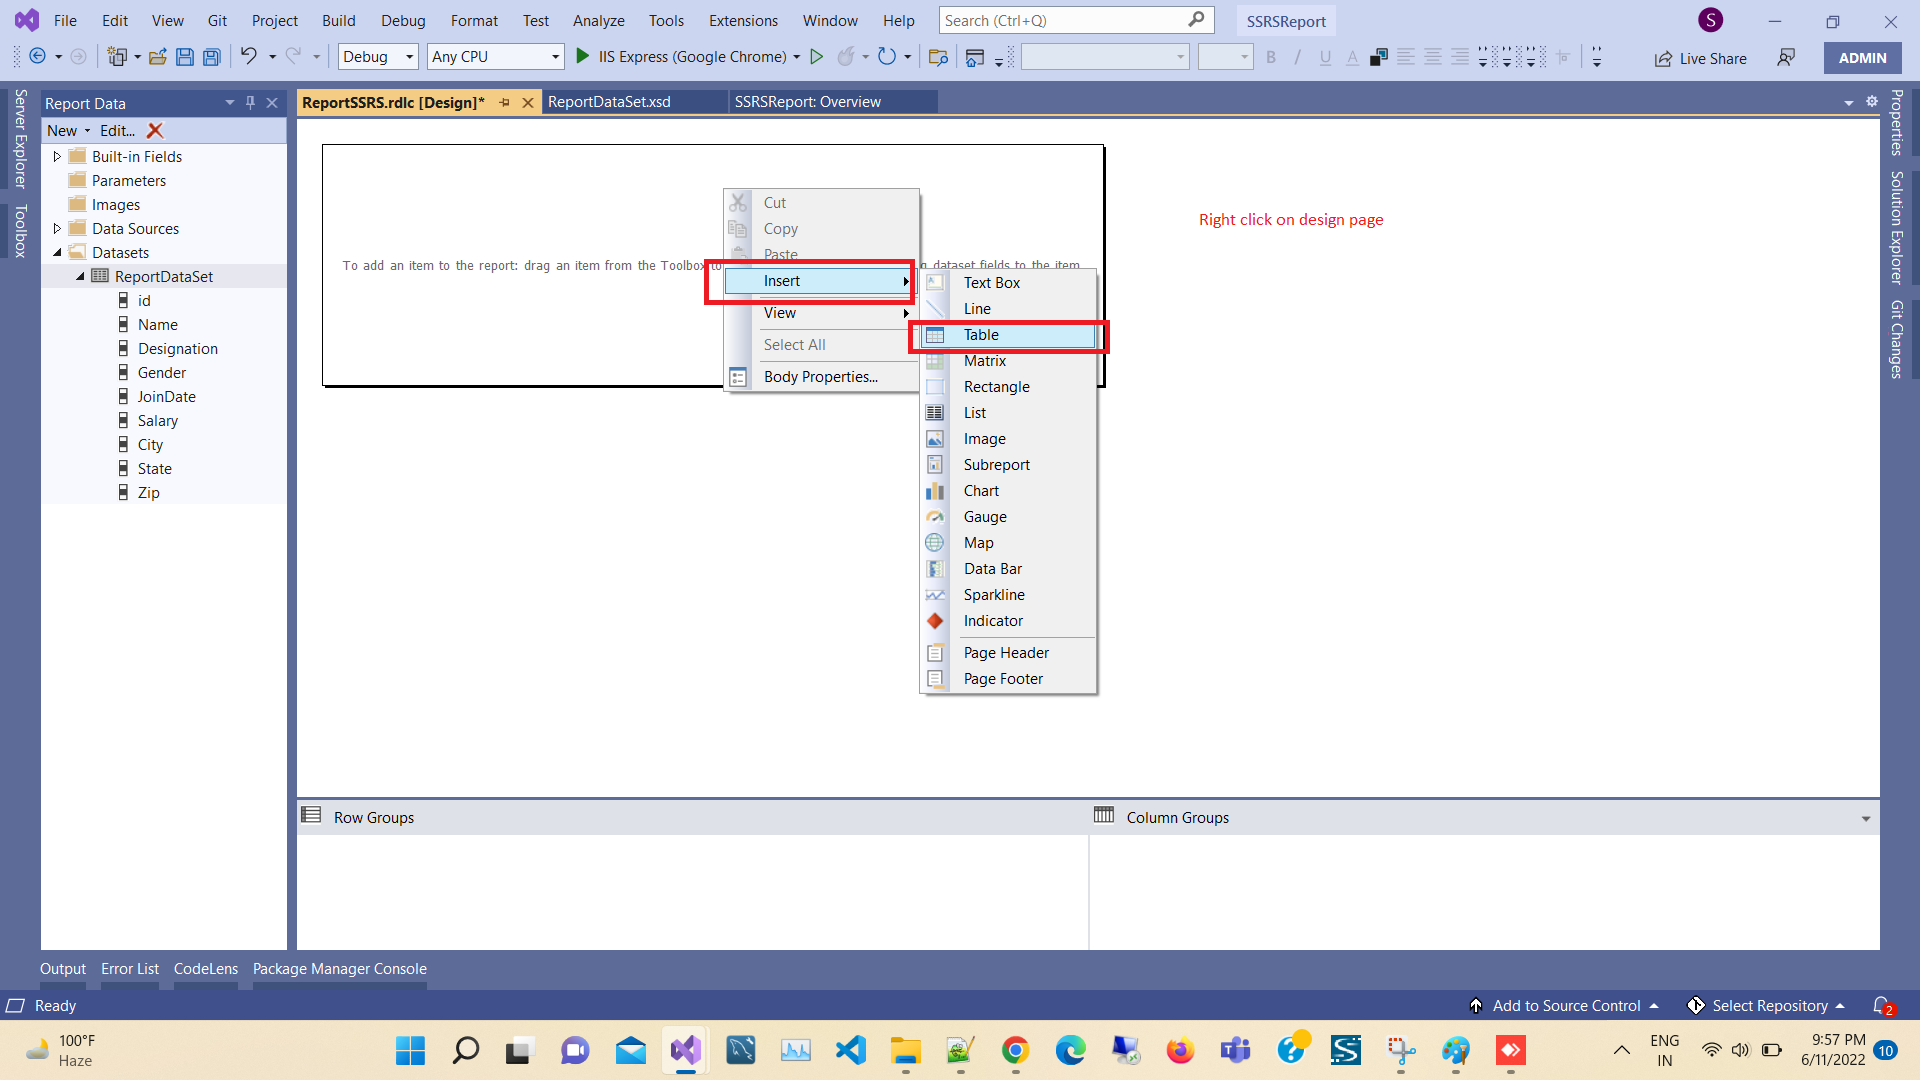
Create Report
For creating a report, right click on Reports folder > Add > New Item > Select Reporting. Here, we have three components. Select Report, and finally click Add.
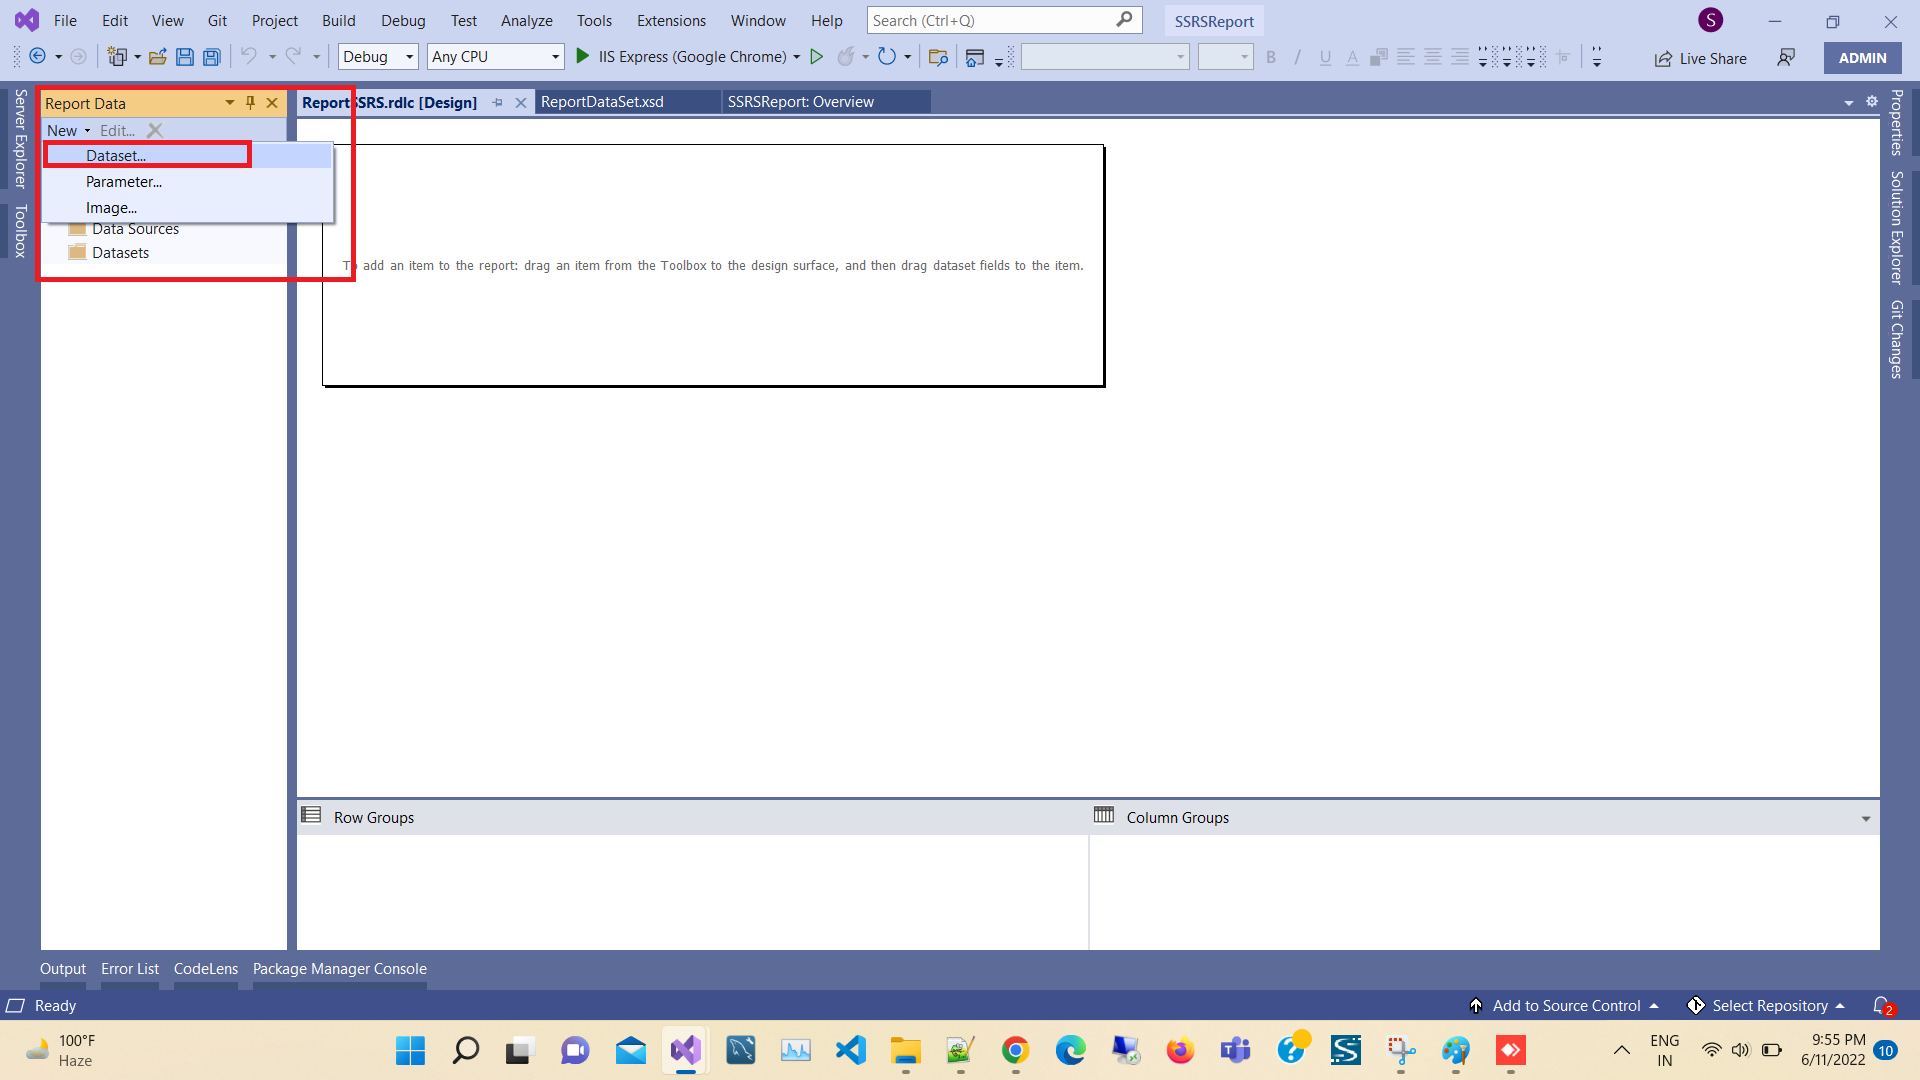
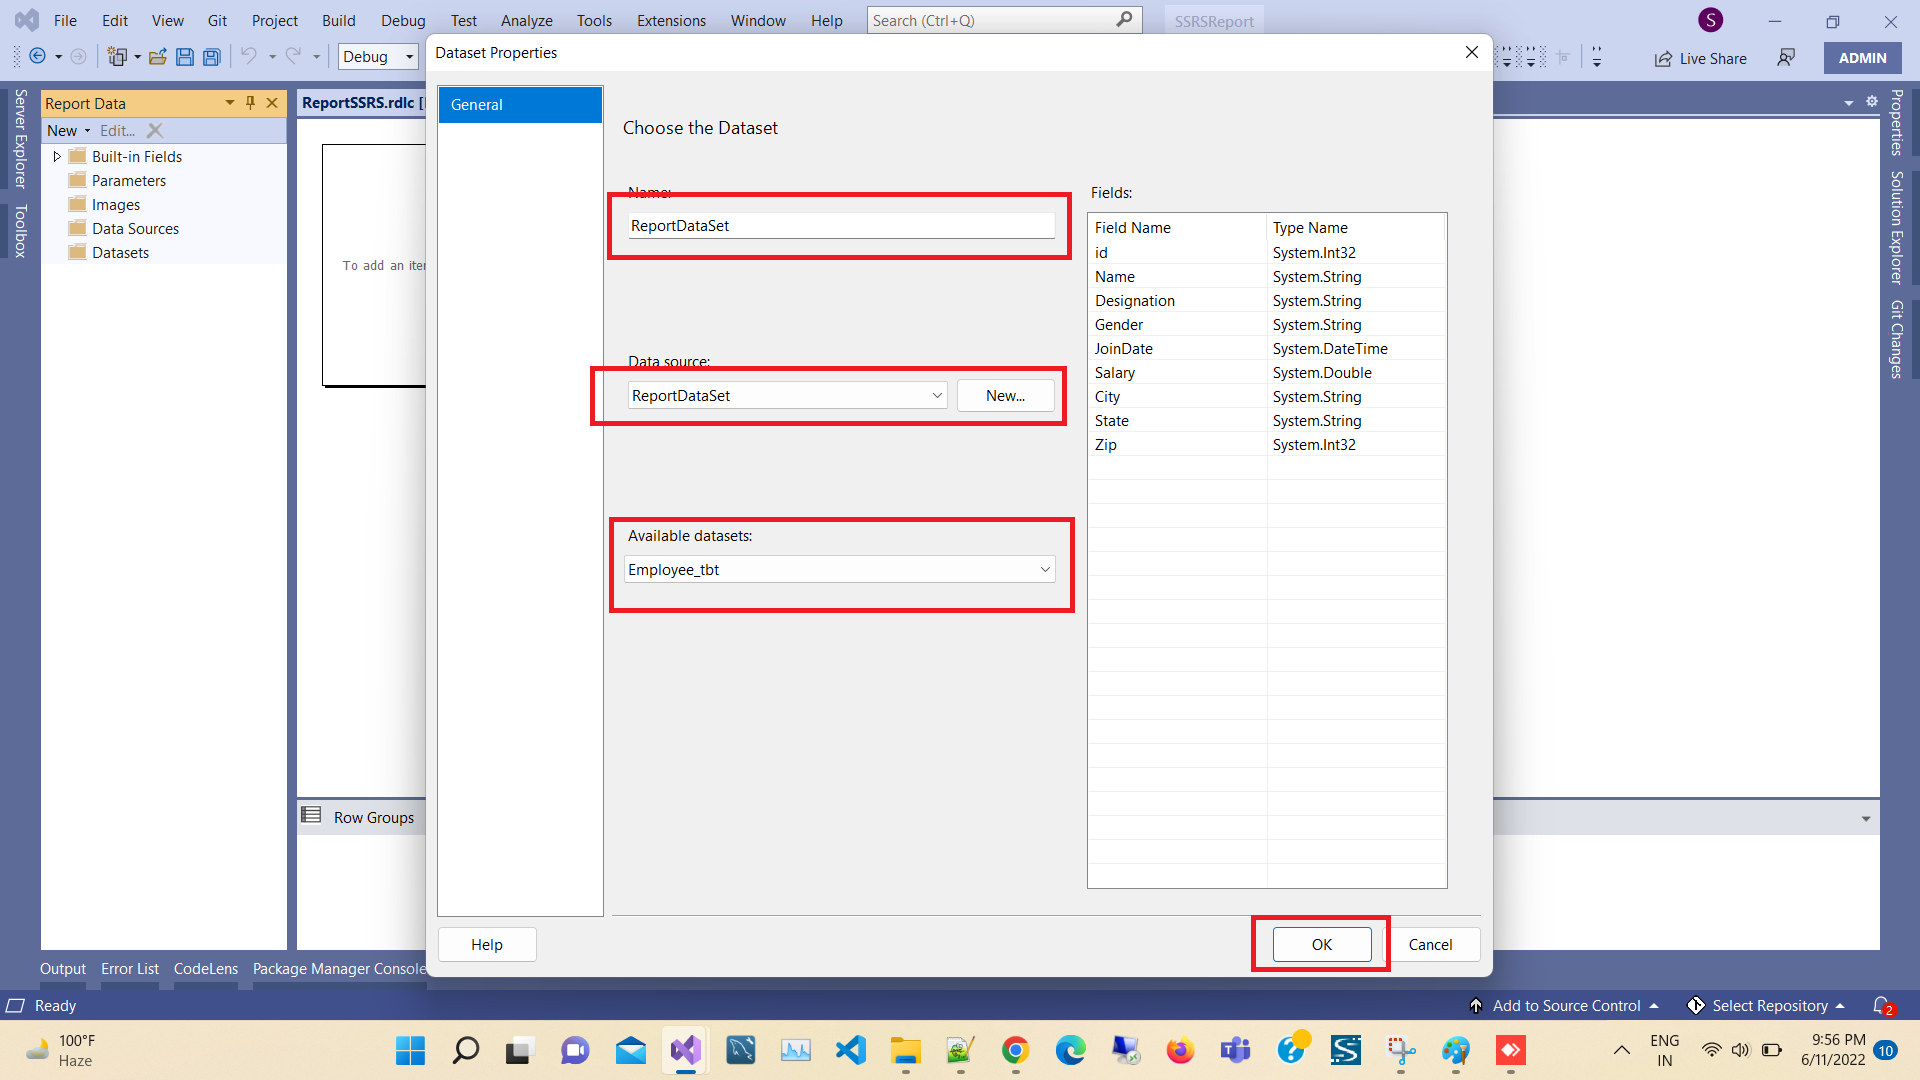
After clicking on Add, a new window will pop up. We need to name our Dataset and choose the data source (in this case, via a dropdown list, select MyDataSet, which has been created previously).
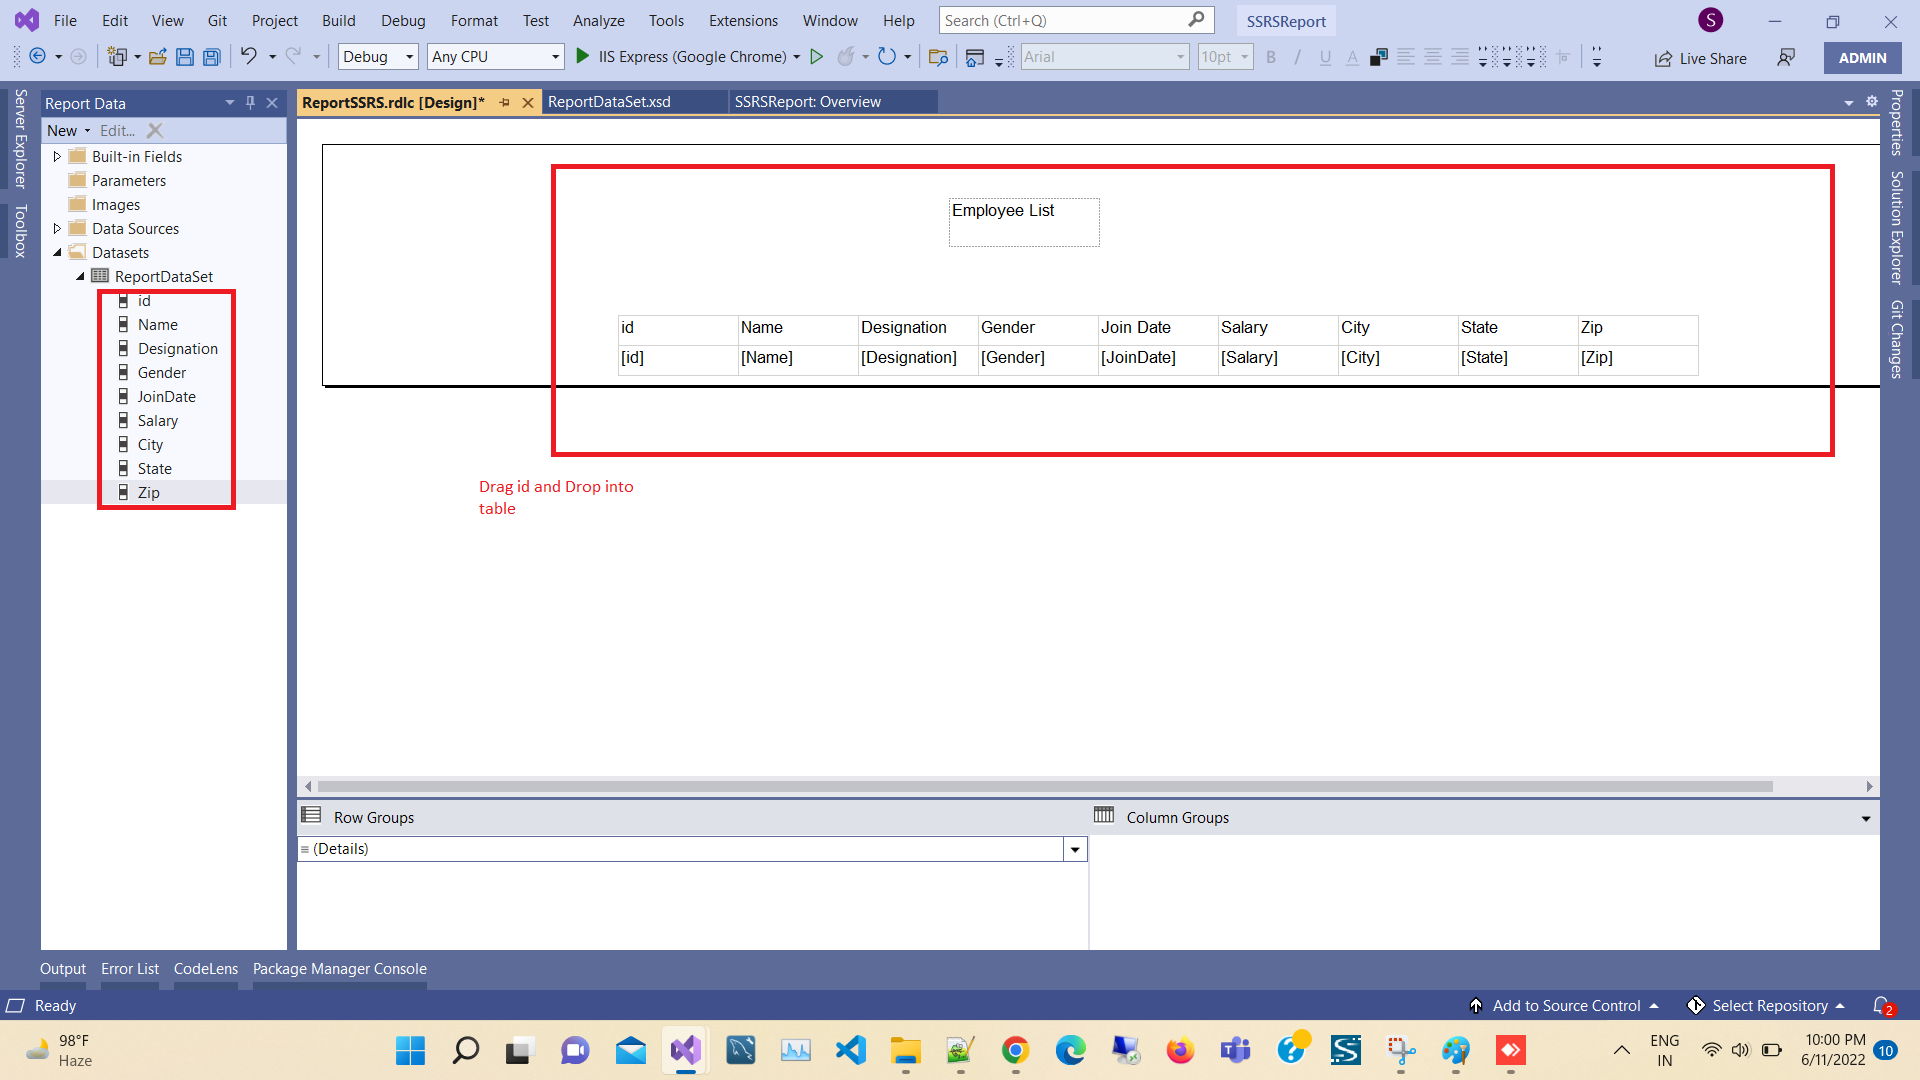
Next, we will design a table. Specify all fields that you want to display in your report.
Note - In order to start, you will need to install the ReportViewer for MVC. Run the following command in the Package Manager Console Or Manage the NuGet package from the solution
search - ReportViewerForMvc
PM> Install-Package ReportViewerForMvc
Create a Controller
Now, we are going to create a Controller. Right-click on the Controllers folder > Add > Controller> selecting MVC 5 Controller – Empty > click Add.
using Microsoft.Reporting.WebForms;
using System;
using System.Collections.Generic;
using System.Configuration;
using System.Data.SqlClient;
using System.Linq;
using System.Web;
using System.Web.Mvc;
using System.Web.UI.WebControls;
namespace SSRSReport.Controllers
{
public class HomeController : Controller
{
MyDataSet ds = new MyDataSet();
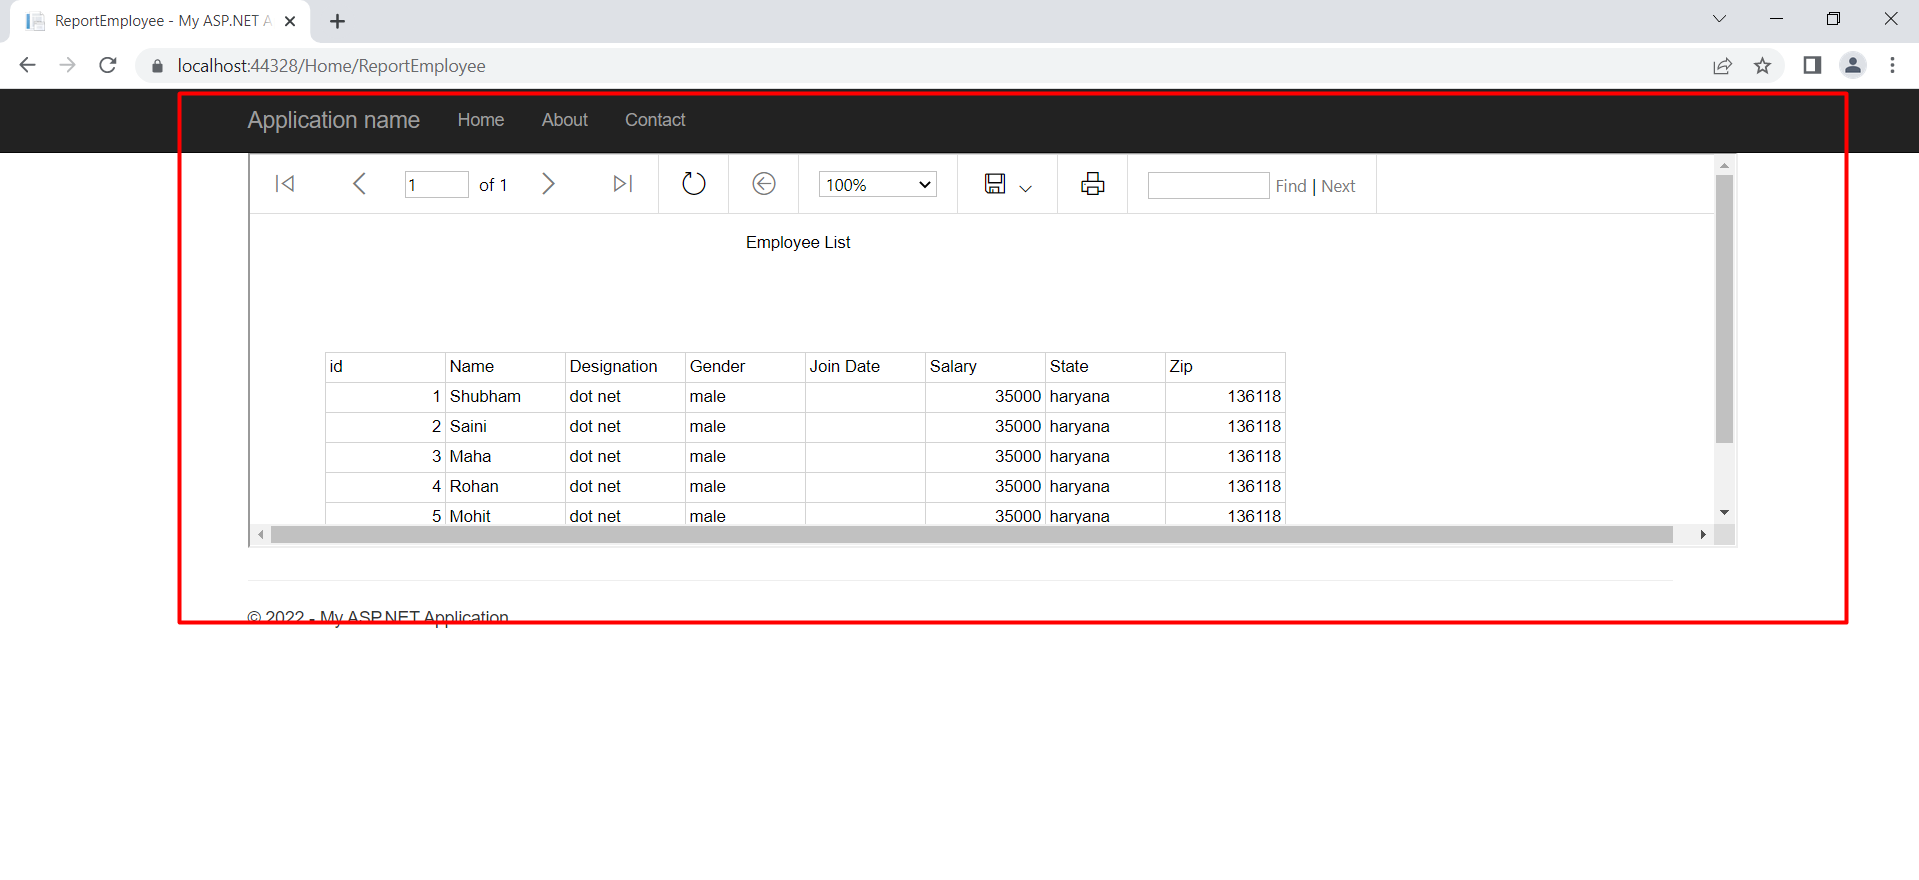
public ActionResult ReportEmployee()
{
ReportViewer reportViewer = new ReportViewer();
reportViewer.ProcessingMode = ProcessingMode.Local;
reportViewer.SizeToReportContent = true;
reportViewer.Width = Unit.Percentage(15000);
reportViewer.Height = Unit.Percentage(15000);
var connectionString = "Data Source=.;Initial Catalog=DbEmployee;Integrated Security=True";
SqlConnection conx = new SqlConnection(connectionString);
SqlDataAdapter adp = new SqlDataAdapter("SELECT * FROM Employee_tbt", conx);
adp.Fill(ds, ds.Employee_tbt.TableName);
reportViewer.LocalReport.ReportPath = Server.MapPath(@"/MyReport.rdlc");
reportViewer.LocalReport.DataSources.Add(new ReportDataSource("MyDataSet", ds.Tables[0]));
ViewBag.ReportViewer = reportViewer;
return View();
}
}
}
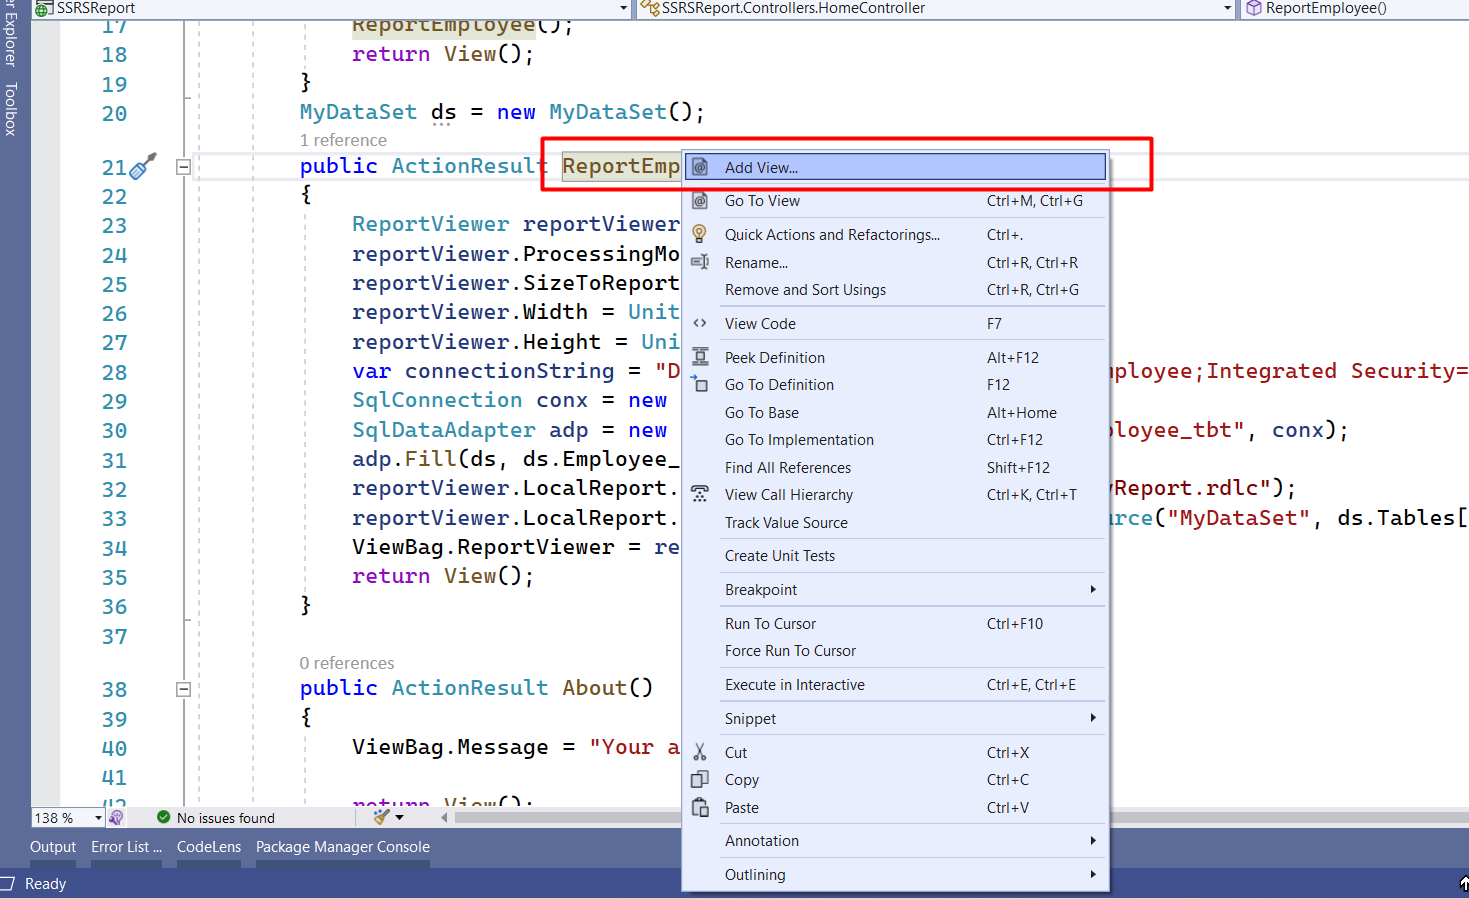
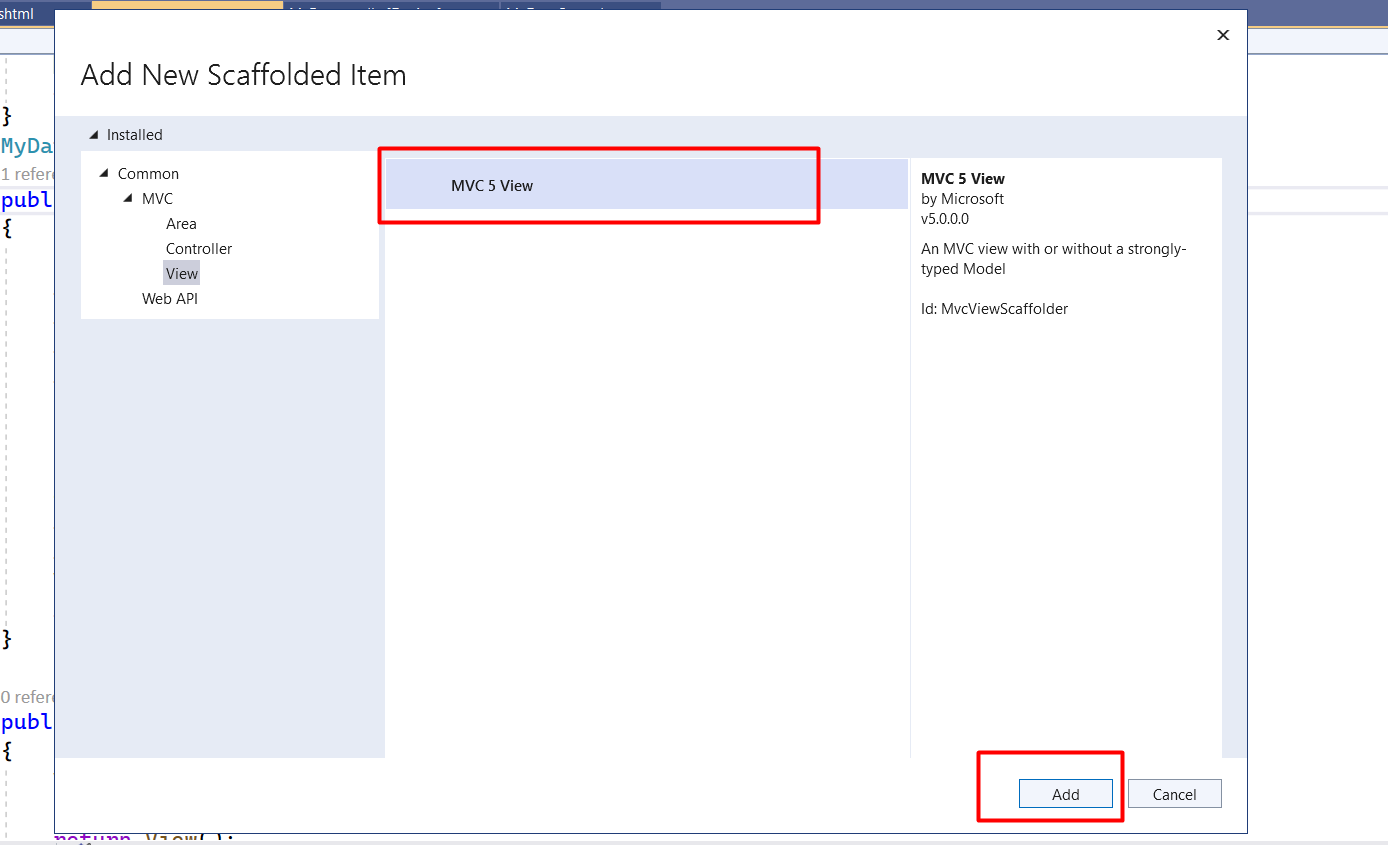
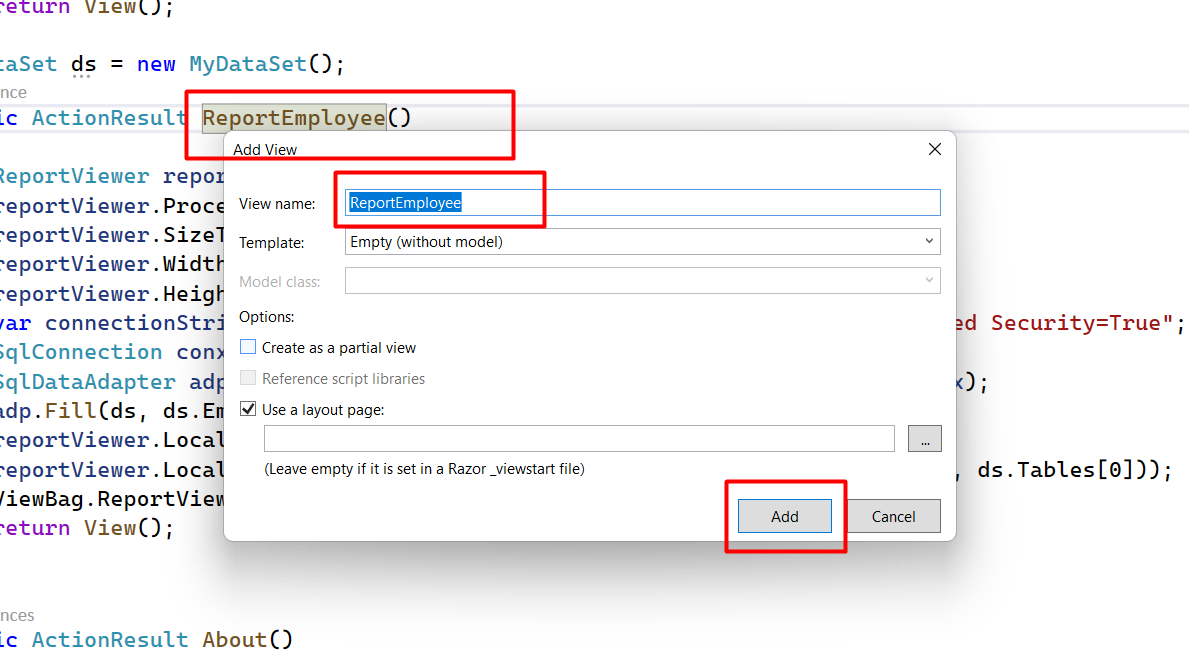
Adding View
In Employee Controller, right-click on ReportEmployee() action. Select Add View and a dialog will pop up. Write a name for your View and click Add.
Here, I’m creating the ReportEmployee() action which will select all data from the Employee_tbt table.
@using ReportViewerForMvc;
@{
    ViewBag.Title = "ReportEmployee";
}
@Html.ReportViewer(ViewBag.ReportViewer as Microsoft.Reporting.WebForms.ReportViewer)