How to create and merge branches on github
What is a Branch in Git?
A branch in Git is a lightweight movable pointer to a commit. The default branch is usually called master or main. When you create a new branch, you create a diverging path from the main codebase where you can work on features, fixes, or experiments without affecting the stable code. This is particularly useful in collaborative projects, as it allows developers to work independently before merging their changes back into the main codebase.
Branches are essential in version control systems like Git because they enable parallel development. For example, if one developer is working on a new feature while another is fixing a bug, they can do so in their respective branches without interfering with each other's work. This separation of concerns is crucial for maintaining the integrity of the codebase.
Creating a New Branch
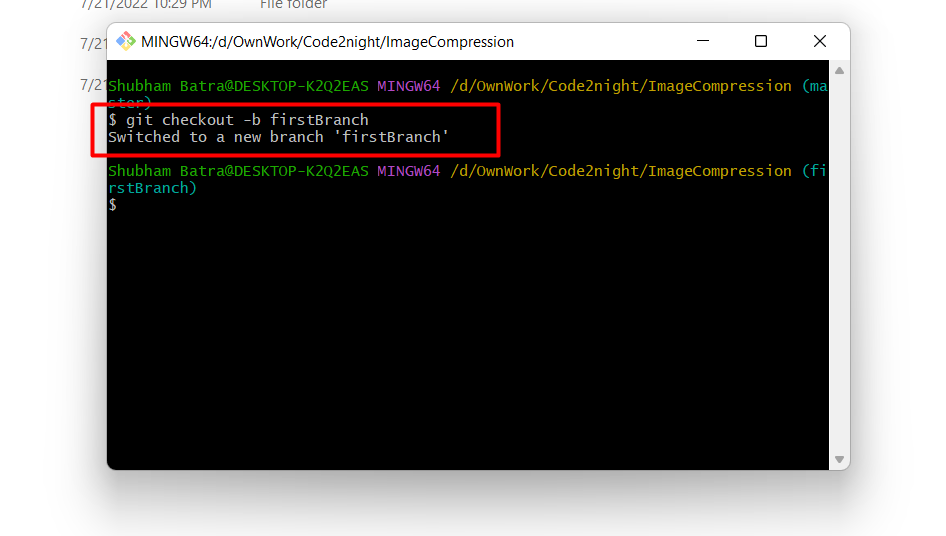
To create a new branch, you use the git checkout command along with the -b flag, which stands for 'branch'. This command creates a new branch and immediately switches to it. Here's how you can do it:
git checkout -b firstBranchAfter executing this command, you will be on the firstBranch. You can verify that you have switched branches by using the git branch command, which lists all branches and highlights the current one.
Adding and Committing Changes
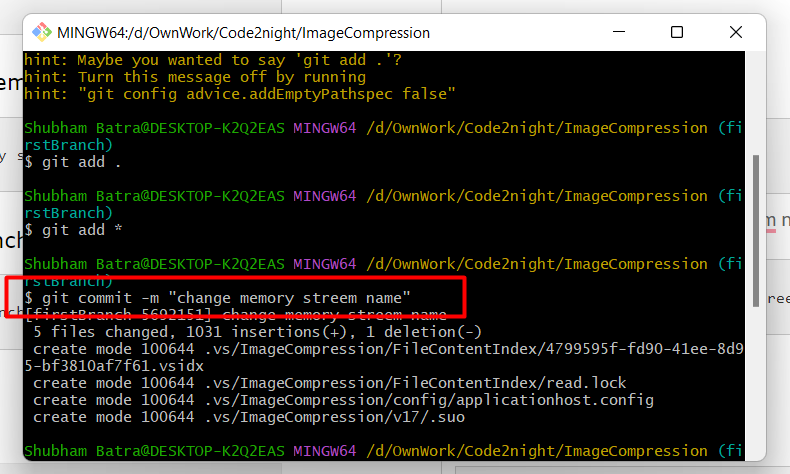
After creating a branch, the next step is to make changes to your files. Use the git add command to stage your changes. You can add all modified files with the following command:
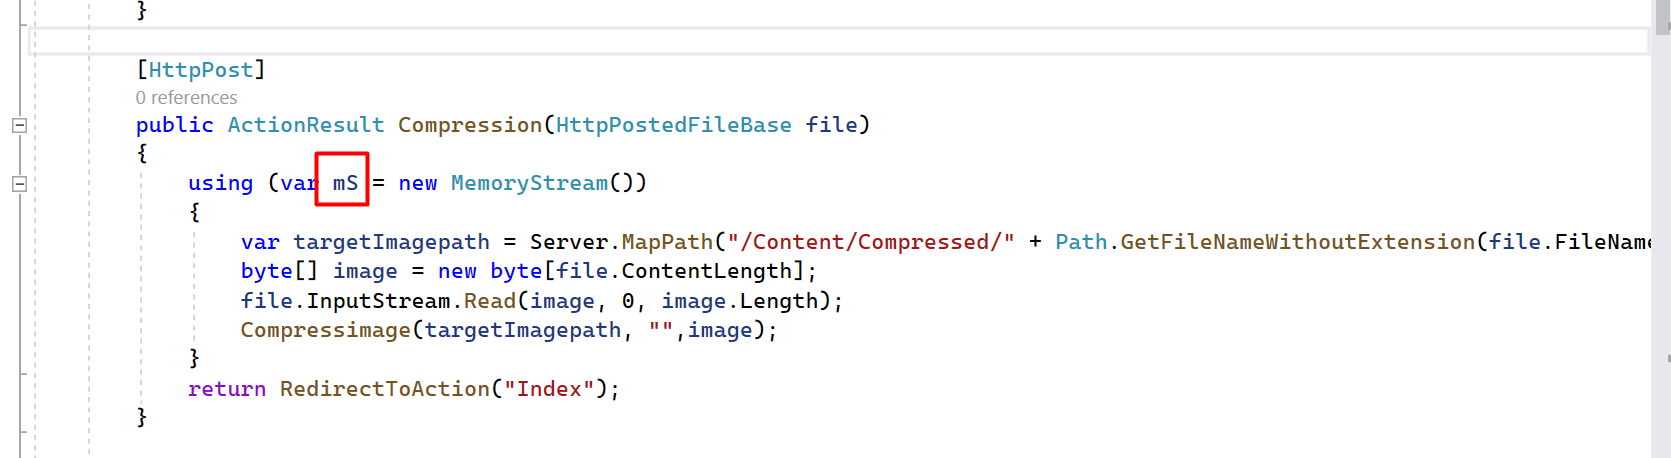
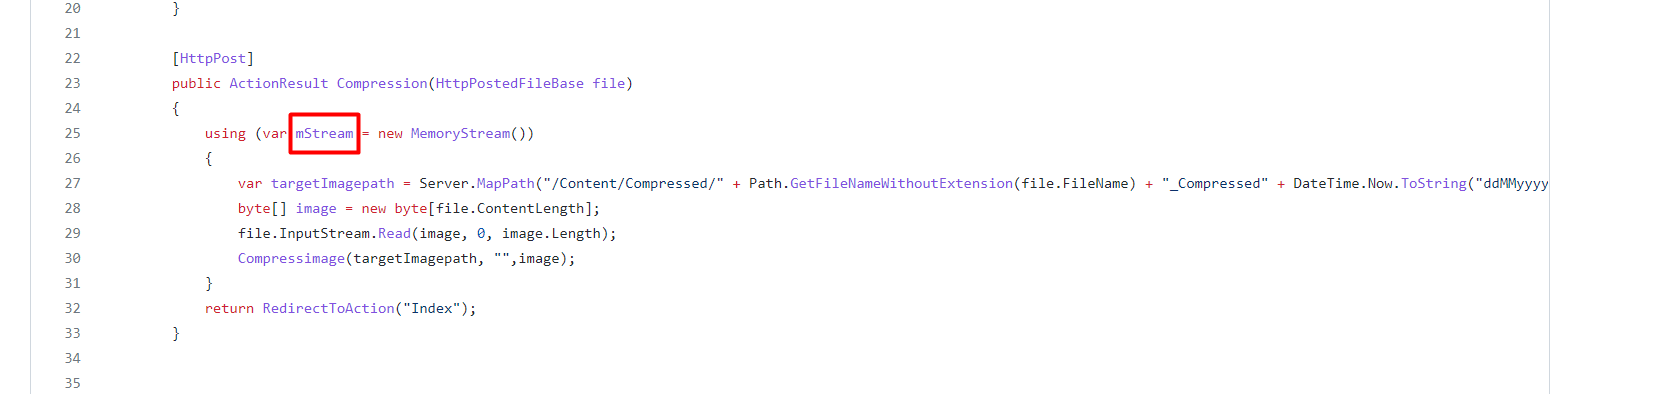
git add *Once you've added the necessary files, you need to commit your changes to save them in your local repository. The commit message should be descriptive enough to remind you of what changes were made. Here’s how you can commit your changes:
git commit -m "change memory stream name"Committing your changes is crucial because it finalizes your modifications and prepares them to be pushed to the remote repository. Always remember to commit your changes before pushing them.
Pushing Changes to GitHub
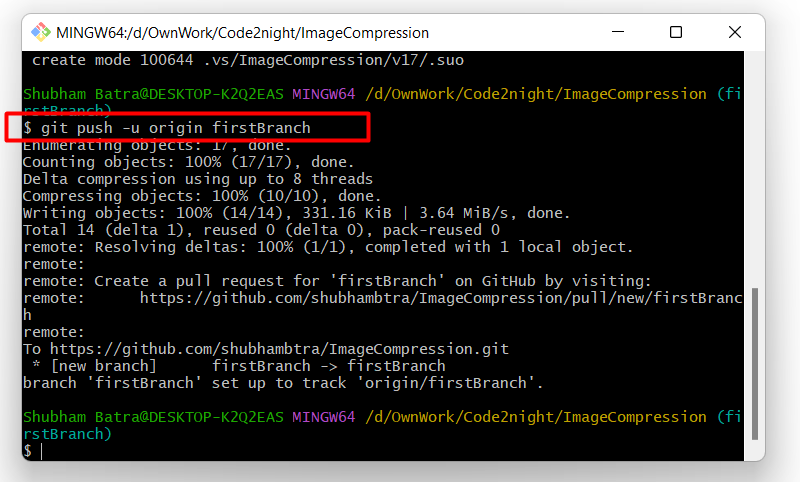
Once you have committed your changes, the next step is to push the branch to the remote repository on GitHub. Use the following command to push your newly created branch:
git push -u origin firstBranchThe -u flag sets the upstream tracking relationship, meaning that future pushes and pulls will default to this branch. After executing this command, your changes will be uploaded to GitHub, and the branch will be created on the remote repository.
Merging Branches
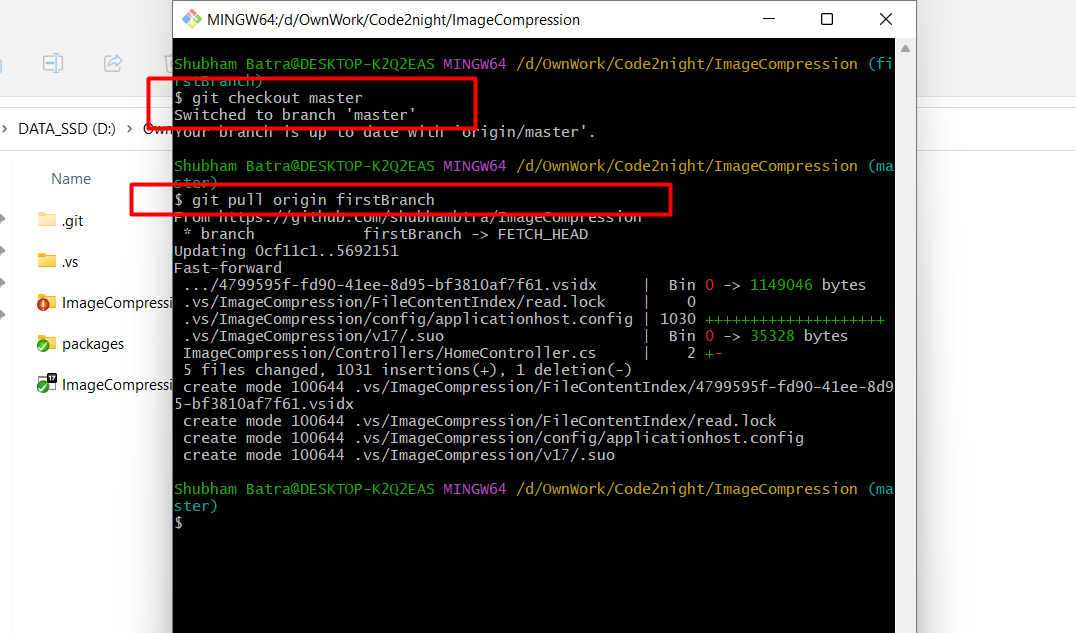
Merging is the process of integrating changes from one branch into another. In this case, we will merge firstBranch into the master branch. First, switch to the master branch:
git checkout masterNext, ensure your local master branch is up to date with the remote repository:
git pull origin masterNow, you can merge the changes from firstBranch into master:
git merge firstBranchAfter merging, if there are no conflicts, your changes will be integrated into the master branch. If conflicts arise, Git will notify you, and you will need to resolve them before completing the merge.

Handling Merge Conflicts
Merge conflicts occur when two branches have changes that cannot be automatically reconciled. Git will mark the conflicting files, and you will need to open these files to resolve the conflicts manually. Look for markers like <<<<<<<, =======, and >>>>>>> in the files, which indicate the conflicting changes.
To resolve a conflict, edit the file to incorporate the desired changes and then stage the resolved files:
git add path/to/conflicted-fileFinally, complete the merge with a commit:
git commit -m "Resolved merge conflict between master and firstBranch"It's essential to test your code after resolving conflicts to ensure that everything works as expected.
Edge Cases & Gotchas
When working with branches, there are several edge cases to consider:
- Deleting a Branch: After merging, if you no longer need a branch, you can delete it using
git branch -d branchName. This helps keep your branch list clean. - Force Pushing: If you need to overwrite changes in a remote branch, use
git push --force. However, be cautious, as this can overwrite others' work. - Branch Naming Conventions: Use meaningful names for branches. Consider using prefixes like feature/ or bugfix/ to categorize branches.
Performance & Best Practices
To maintain a clean and efficient workflow with branches, consider the following best practices:
- Commit Often: Make small, frequent commits with clear messages. This makes it easier to track changes and revert if necessary.
- Pull Before Push: Always pull the latest changes from the remote branch before pushing your changes to avoid conflicts.
- Use Pull Requests: When collaborating, consider using GitHub's pull request feature to review changes before merging them into the main branch. This promotes code quality and team collaboration.
Conclusion
In this article, we covered how to create and merge branches on GitHub. Here are the key takeaways:
- Branches allow for isolated development, enabling multiple developers to work simultaneously.
- Always commit changes before pushing to the remote repository.
- Merge branches carefully, resolving any conflicts that arise.
- Follow best practices to maintain a clean and efficient workflow.