Implement Stripe Payment Gateway In ASP.NET MVC
Overview of Stripe Payment Gateway
Stripe has become a go-to solution for businesses looking to accept online payments due to its robust features and ease of integration. With Stripe, you can accept various payment methods, including credit cards, debit cards, and even digital wallets like Apple Pay and Google Pay. This flexibility makes it suitable for businesses of all sizes, from startups to large enterprises.
Implementing a payment gateway is crucial for any online business, as it directly impacts user experience, conversion rates, and overall revenue. Stripe's Checkout feature simplifies this process by providing a pre-built, customizable payment page that adheres to PCI compliance standards, allowing you to focus on building your application without worrying about security.
In this tutorial, we will guide you through the process of integrating Stripe Checkout in an ASP.NET Core application. We will cover everything from project setup to handling payment processing, ensuring you have a comprehensive understanding of the implementation.
Prerequisites
Before you begin, ensure you have the following prerequisites:
- Visual Studio 2022: You should have Visual Studio 2022 installed on your machine.
- ASP.NET Core Knowledge: Familiarity with ASP.NET Core and MVC architecture is beneficial.
- Stripe Account: Sign up for a Stripe account at stripe.com to obtain your API keys.
- NuGet Package Manager: Ensure you have access to NuGet Package Manager to install the Stripe.net package.
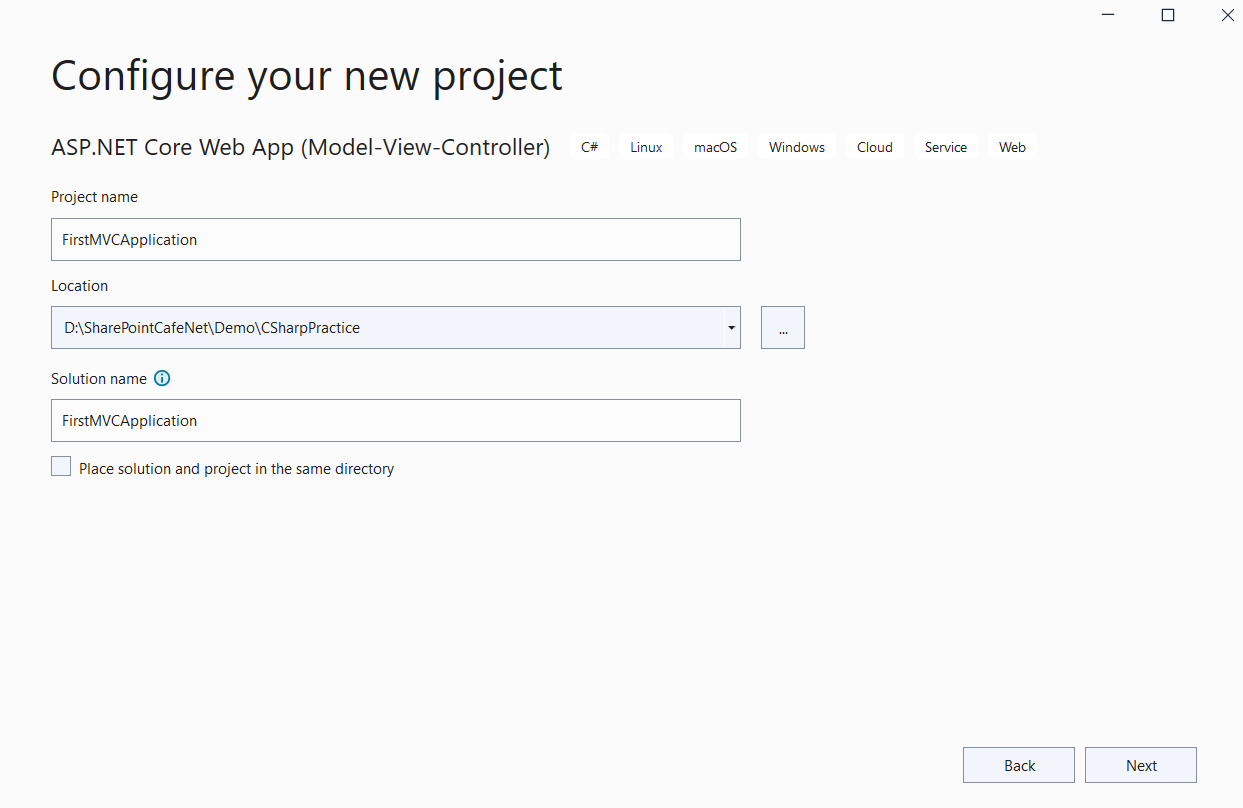
Step 1: Create the Project
To get started, you need to create a new ASP.NET Core MVC project in Visual Studio:
- Open Visual Studio 2022 and click on Create a new Project.
- Search for MVC and select ASP.NET Core Web App (Model-View-Controller).
- Give your project a name and select a location for it.
- Select .NET 6 as the framework, leave other selections as default, and click on Create.

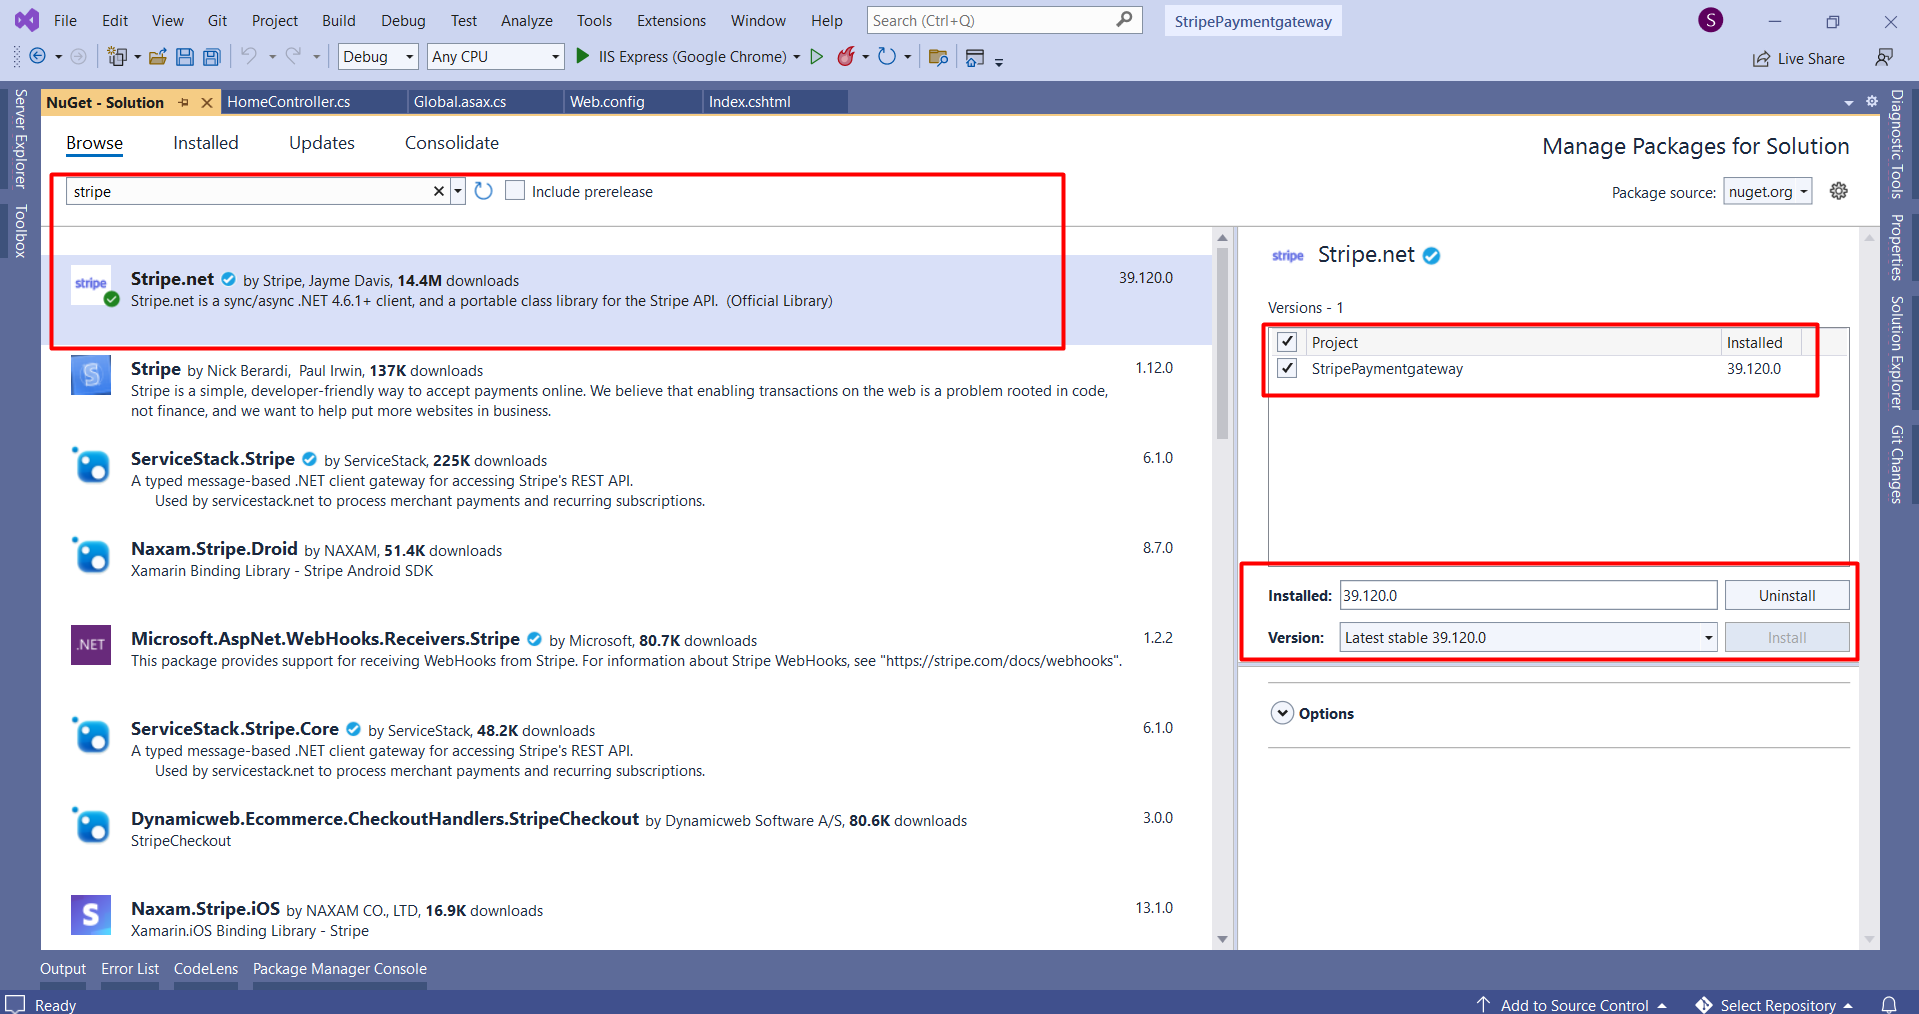
Step 2: Add the Stripe.net Package to Your Project
Next, you will need to add the Stripe.net package to your project. This package provides the necessary libraries to interact with the Stripe API.
Install-Package Stripe.netTo do this, navigate to Manage NuGet Packages in your project, search for Stripe.net, and install the latest version.
Step 3: Configure Stripe API Keys in Web Config
In this step, you will add your Stripe API keys to the Web.config file. These keys are essential for authenticating requests to the Stripe API.
<appSettings>
    <add key="webpages:Version" value="3.0.0.0" />
    <add key="webpages:Enabled" value="false" />
    <add key="ClientValidationEnabled" value="true" />
    <add key="UnobtrusiveJavaScriptEnabled" value="true" />
    <add key="StripeSecretKey" value="sk_test_your_secret_key" />
    <add key="StripePublishableKey" value="pk_test_your_publishable_key" />
</appSettings>
Replace sk_test_your_secret_key and pk_test_your_publishable_key with your actual keys obtained from the Stripe dashboard.
Step 4: Set Up Global.asax.cs
Now, you need to configure the Stripe API by modifying the Global.asax.cs file. This file allows you to set up application-wide settings.
using System.Web.Configuration;
using Stripe;
protected void Application_Start() {
AreaRegistration.RegisterAllAreas();
FilterConfig.RegisterGlobalFilters(GlobalFilters.Filters);
RouteConfig.RegisterRoutes(RouteTable.Routes);
BundleConfig.RegisterBundles(BundleTable.Bundles);
var secretKey = WebConfigurationManager.AppSettings["StripeSecretKey"];
StripeConfiguration.SetApiKey(secretKey);
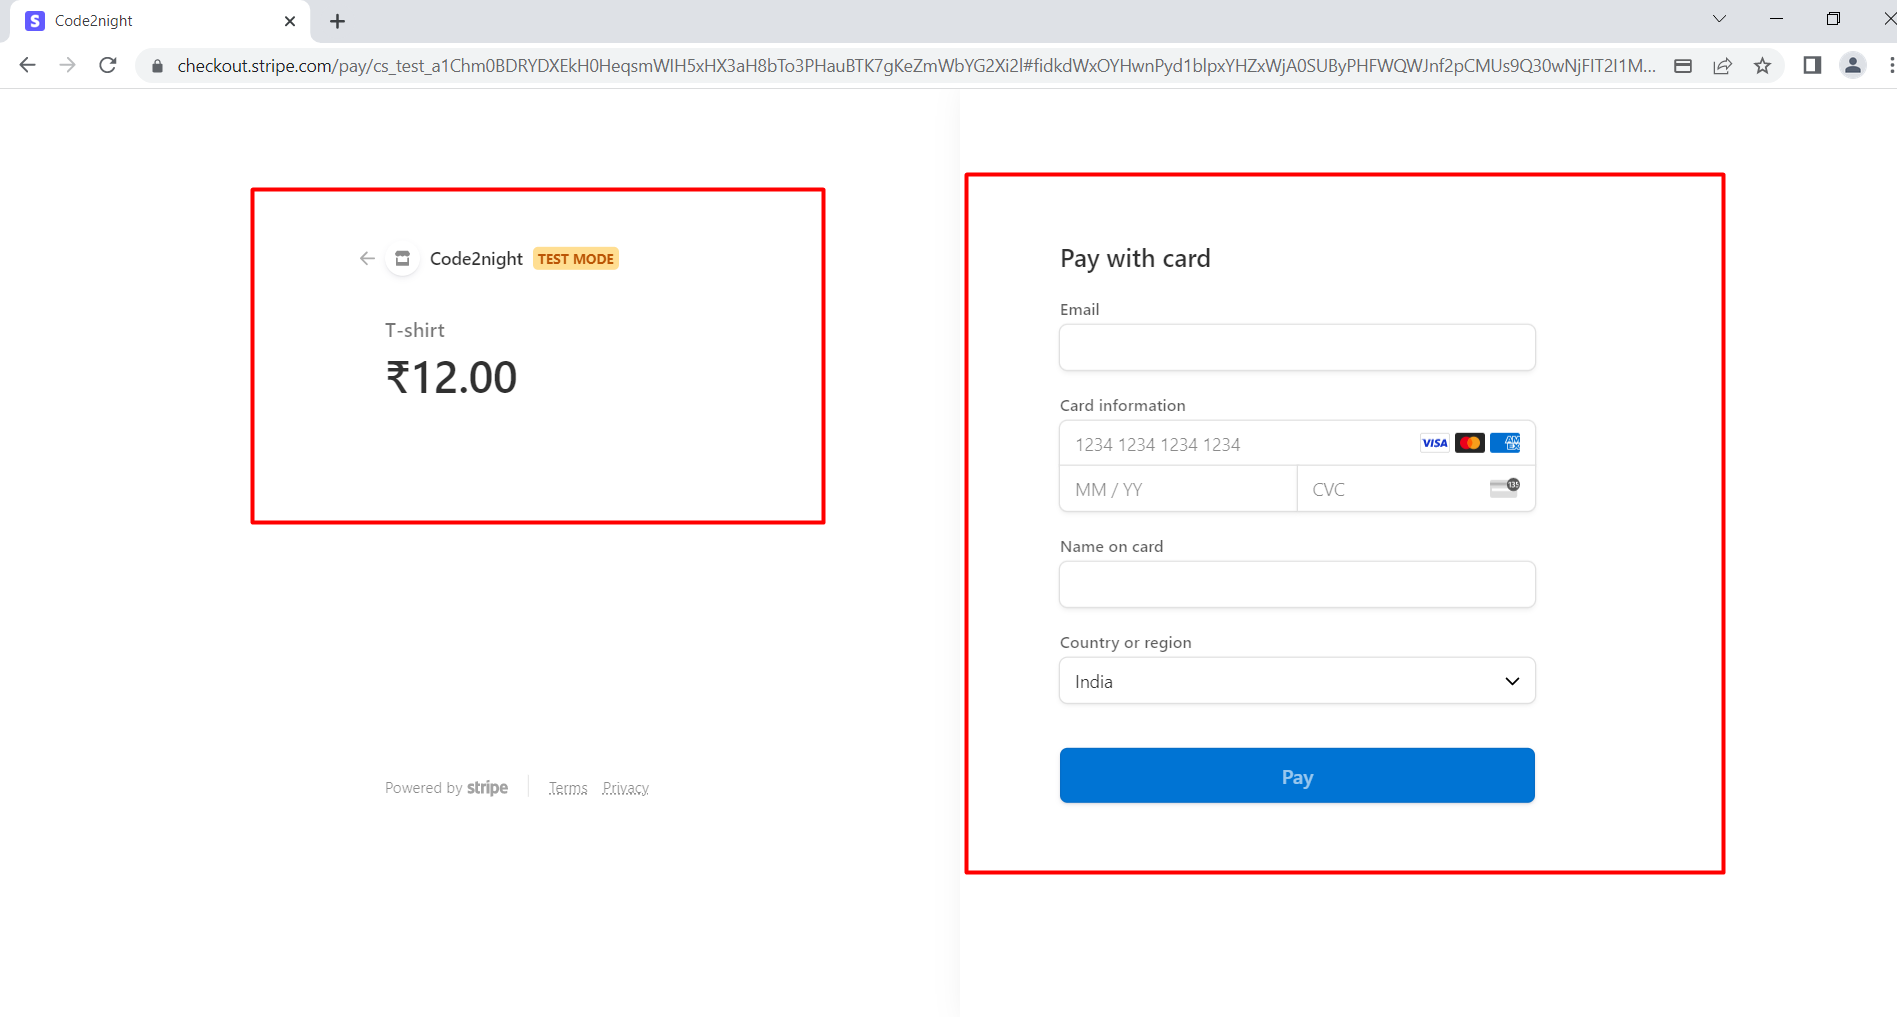
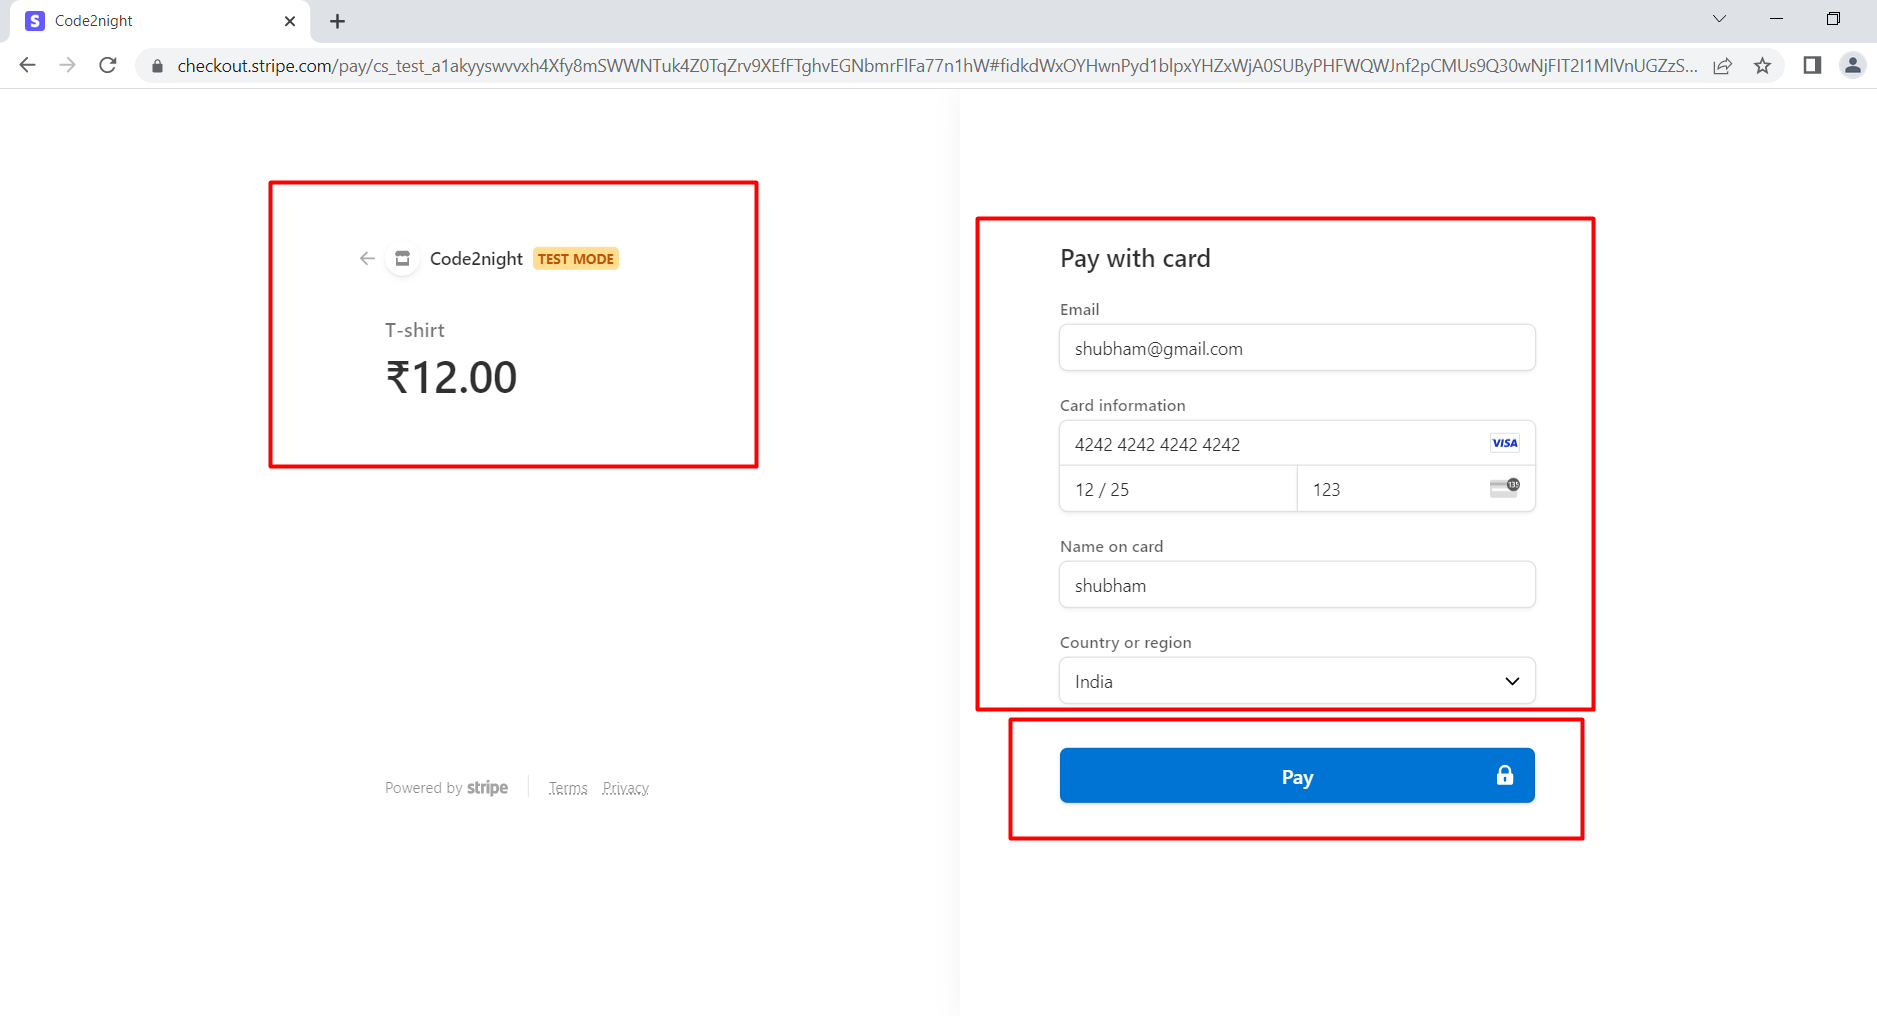
}Step 5: Create the Payment Web Page
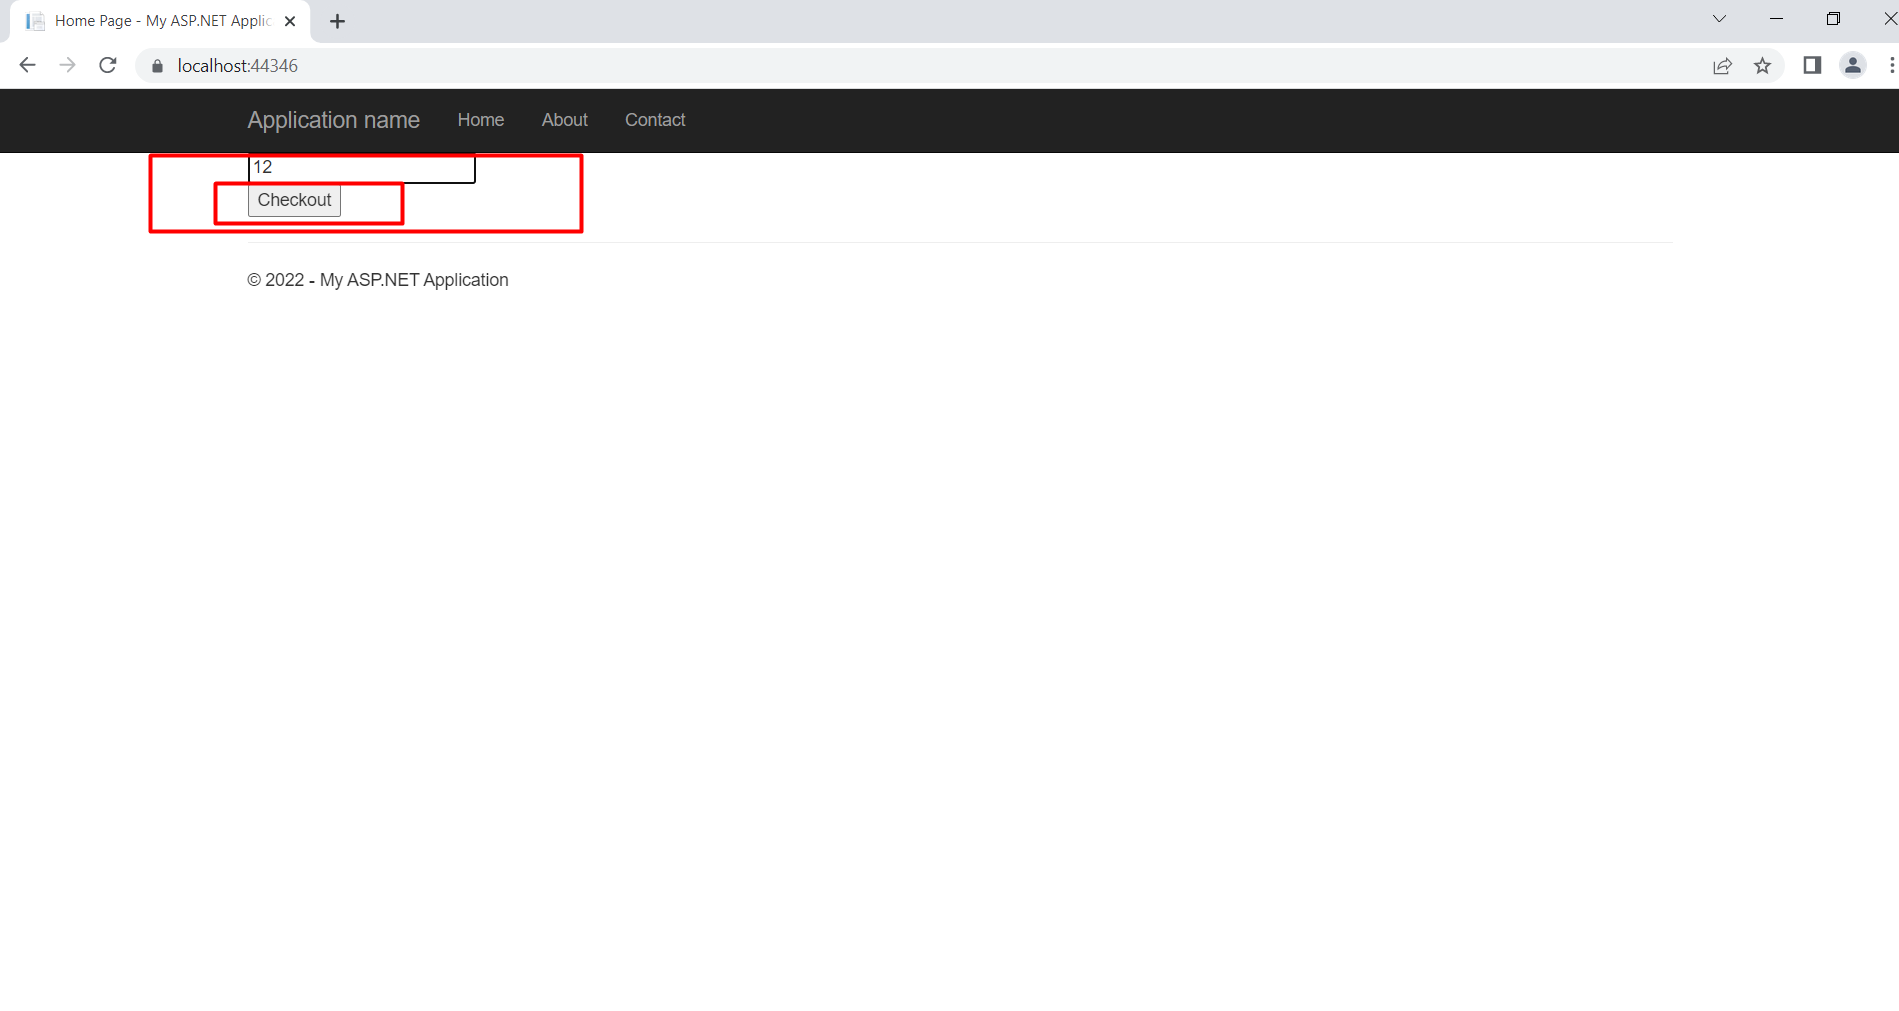
Next, create a new web page called Payment.cshtml where users can enter the payment amount and initiate the checkout process.
<form action="/Home/CreateCheckoutSession" method="POST">
    <input type="text" id="TextBox1" placeholder="amount" name="amount" /><br />
    <button type="submit">Checkout</button>
</form>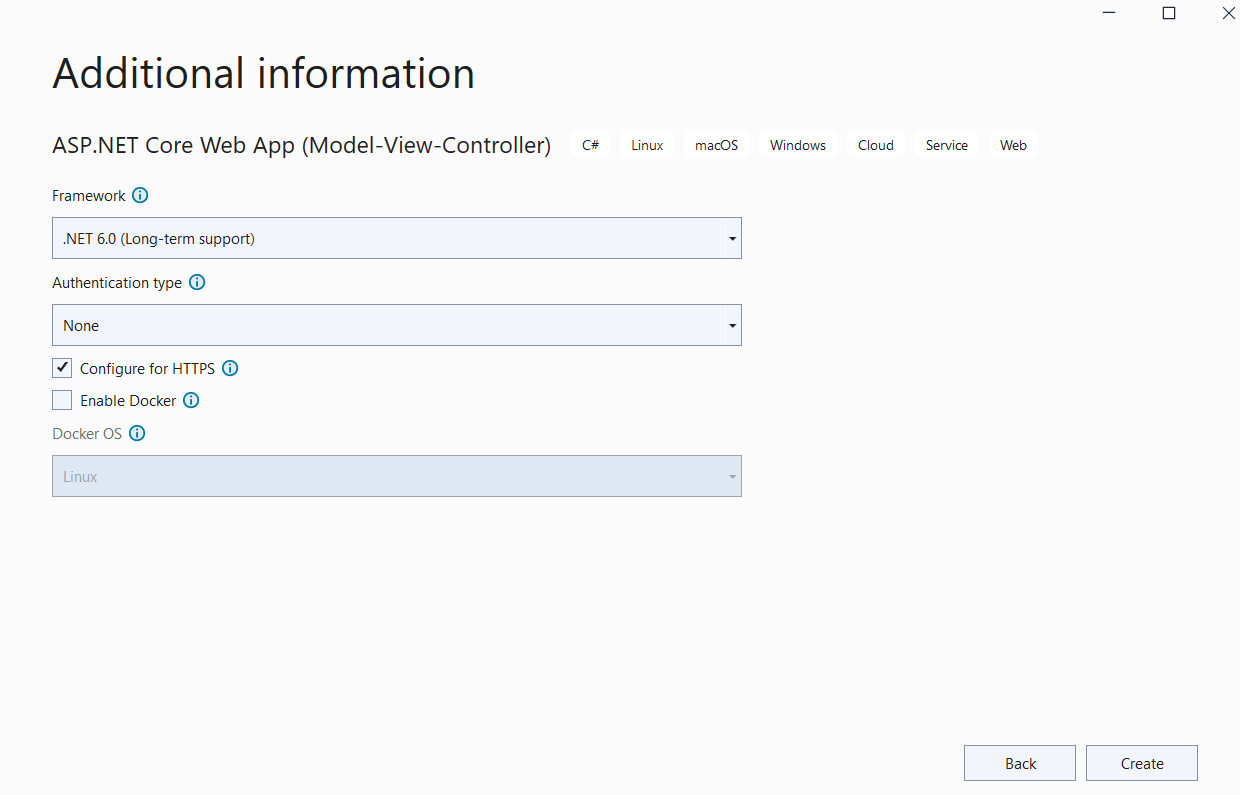
Step 6: Create the Checkout Session
In this step, you will implement the action method CreateCheckoutSession in your Payment Controller. This method will handle the payment request and create a session with Stripe.
[HttpPost]
public ActionResult CreateCheckoutSession(string amount) {
    var options = new Stripe.Checkout.SessionCreateOptions {
        PaymentMethodTypes = new List<string> { "card" },
        LineItems = new List<Stripe.Checkout.SessionLineItemOptions> {
            new Stripe.Checkout.SessionLineItemOptions {
                PriceData = new Stripe.Checkout.SessionLineItemPriceDataOptions {
                    Currency = "usd",
                    ProductData = new Stripe.Checkout.SessionLineItemProductDataOptions {
                        Name = "Sample Product",
                    },
                    UnitAmount = long.Parse(amount) * 100,
                },
                Quantity = 1,
            },
        },
        Mode = "payment",
        SuccessUrl = "https://yourdomain.com/success",
        CancelUrl = "https://yourdomain.com/cancel",
    };
    var service = new Stripe.Checkout.SessionService();
    Stripe.Checkout.Session session = service.Create(options);
    return Json(new { id = session.Id });
}
Step 7: Implement Frontend Logic to Handle Checkout
To handle the checkout process on the frontend, you will need to include the Stripe.js library and implement a function that calls your CreateCheckoutSession method and redirects the user to the Stripe Checkout page.
<script src="https://js.stripe.com/v3/"></script>
<script>
    const stripe = Stripe('pk_test_your_publishable_key');

    const form = document.querySelector('form');
    form.addEventListener('submit', async (event) => {
        event.preventDefault();
        const { id } = await fetch('/Home/CreateCheckoutSession', {
            method: 'POST',
            headers: { 'Content-Type': 'application/json' },
            body: JSON.stringify({ amount: document.getElementById('TextBox1').value })
        }).then((r) => r.json());
        const { error } = await stripe.redirectToCheckout({ sessionId: id });
        if (error) {
            console.error(error);
        }
    });
</script>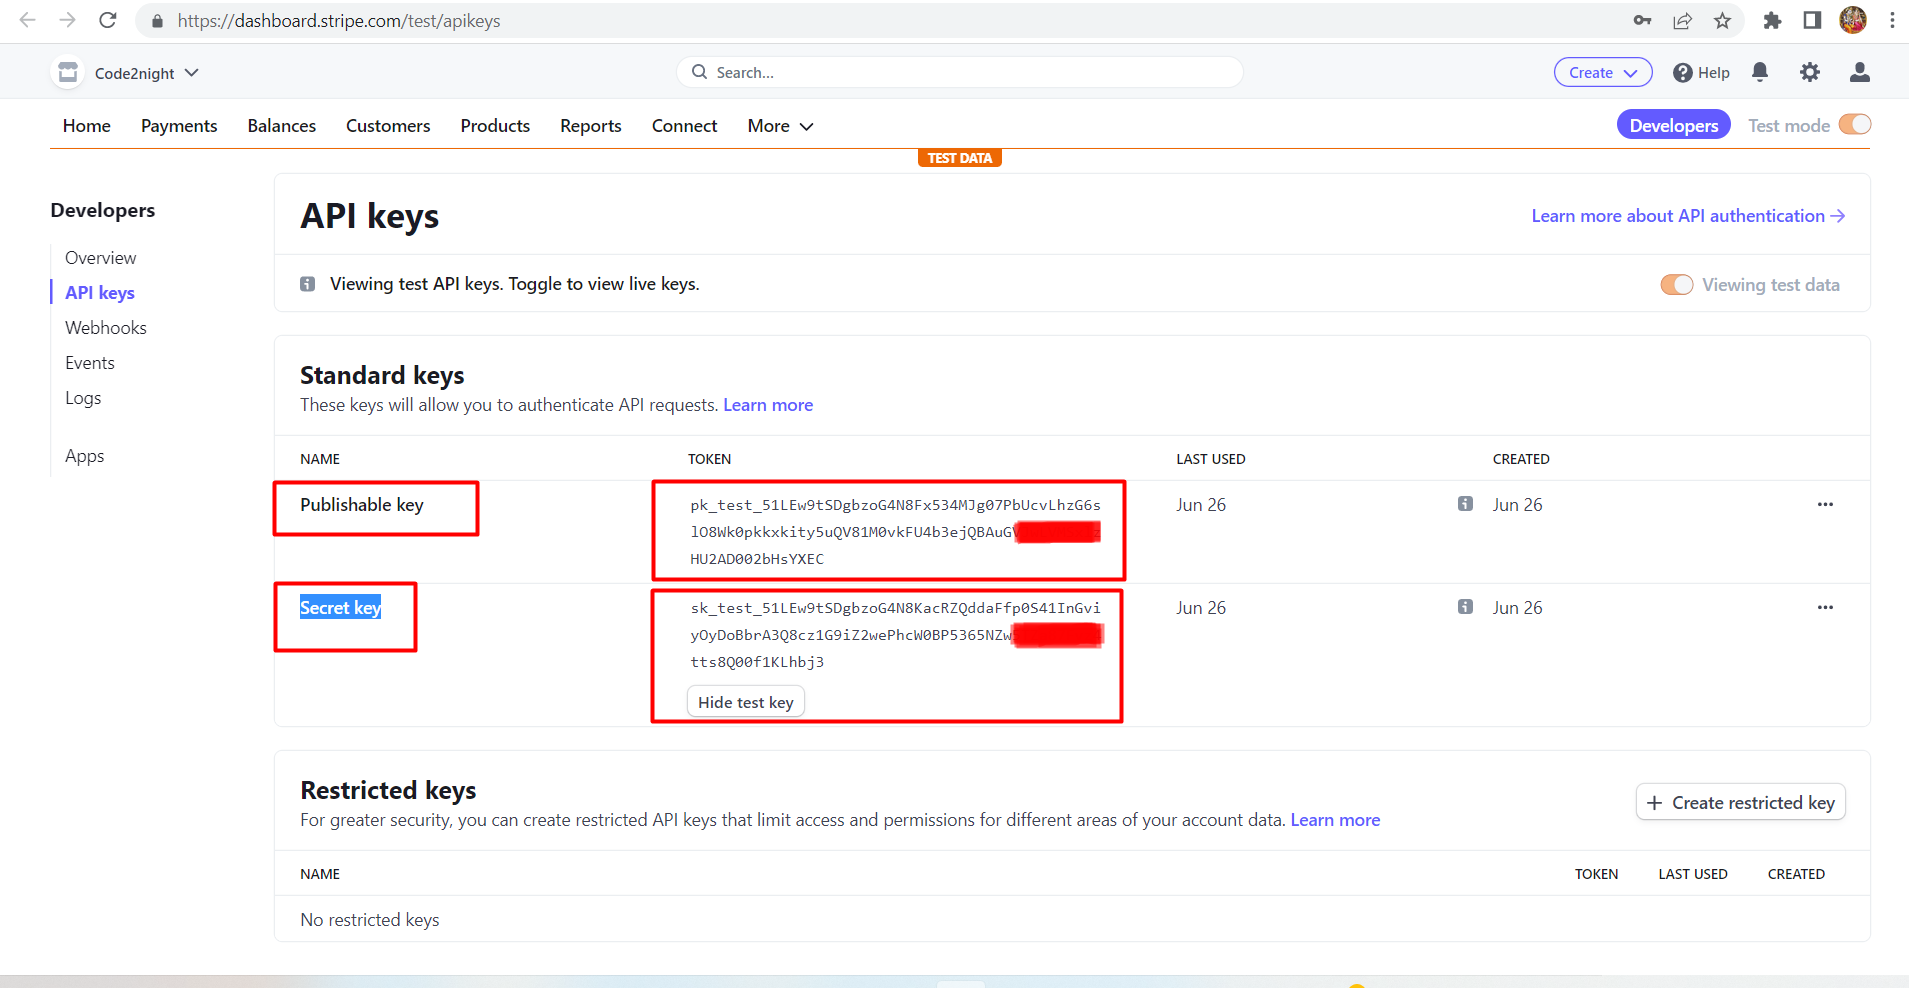
Edge Cases & Gotchas
When implementing Stripe, it's essential to be aware of potential edge cases and gotchas that may arise:
- Currency Handling: Ensure that your application handles multiple currencies if you plan to sell internationally. Stripe supports various currencies, but you need to specify them correctly in your checkout session.
- Amount Validation: Always validate the amount entered by the user before processing. For instance, ensure that it is a positive integer and within acceptable limits.
- Network Issues: Be prepared to handle network issues that may occur during the payment process. Implement retry logic and graceful error handling to enhance user experience.
Performance & Best Practices
To ensure optimal performance and security when implementing Stripe, consider the following best practices:
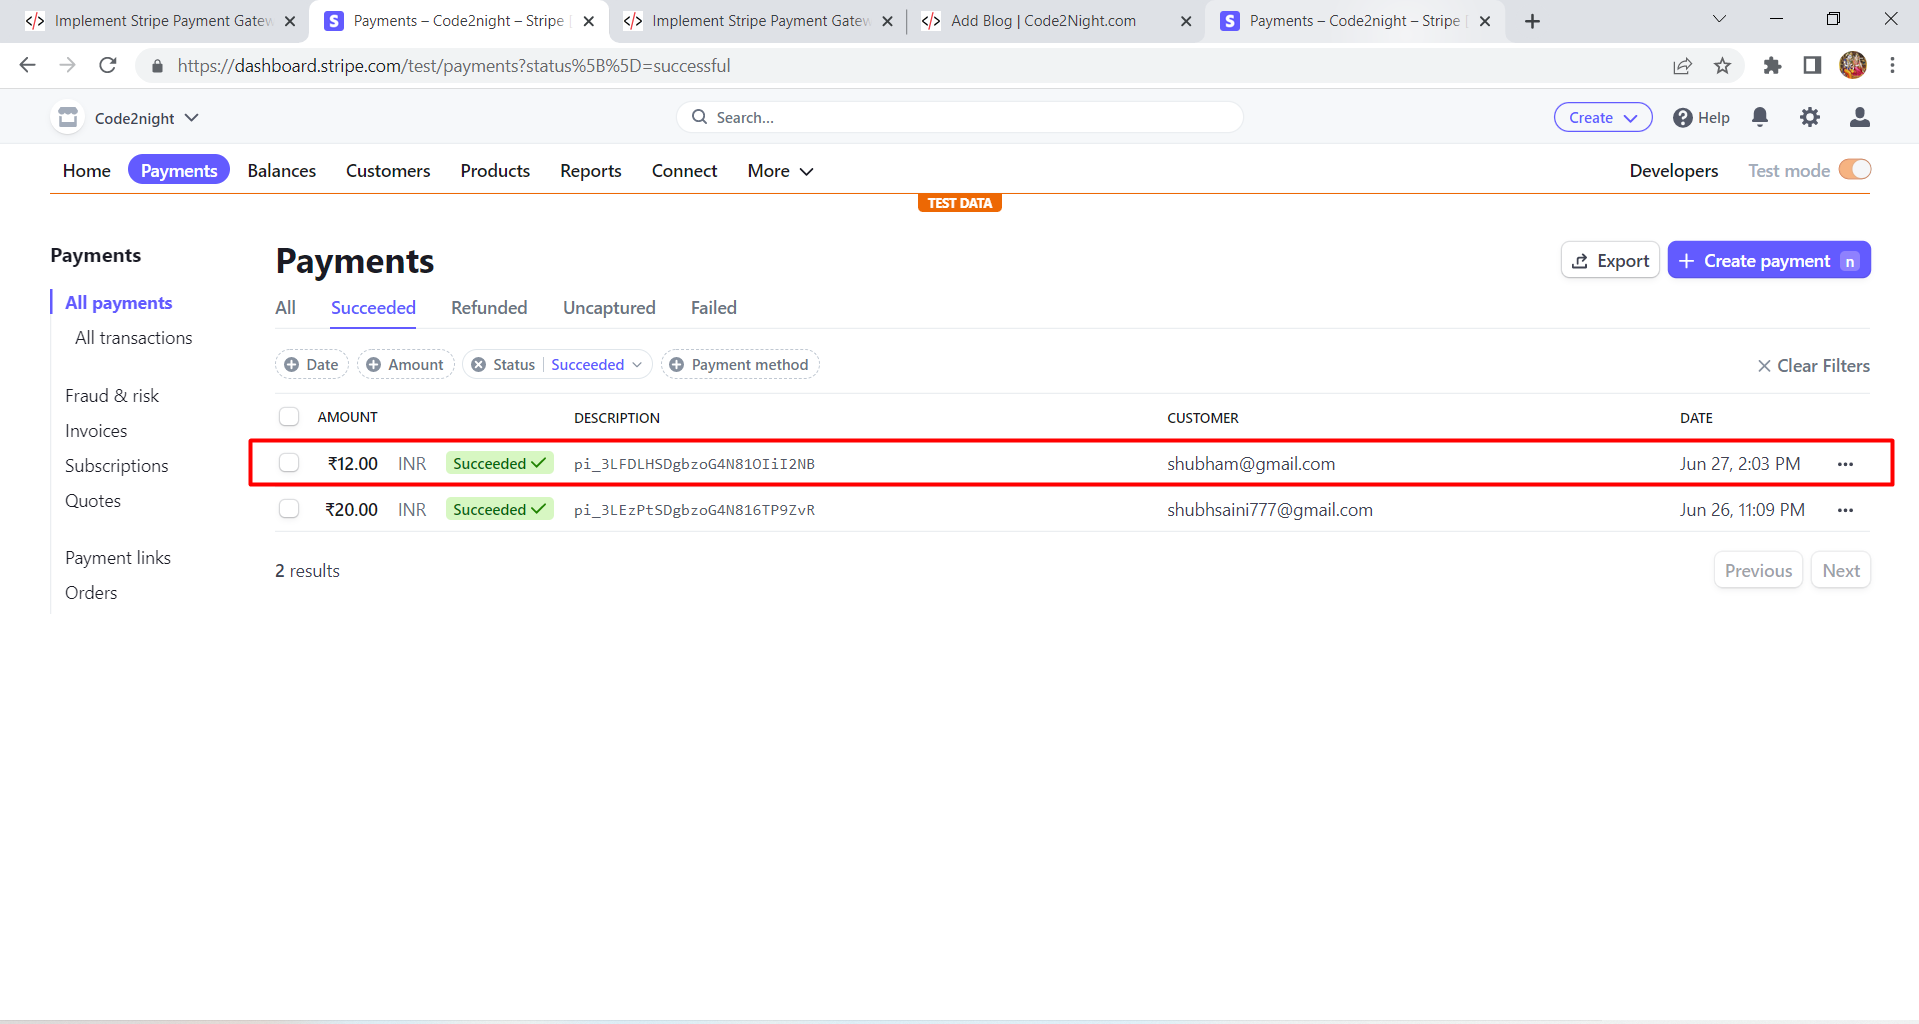
- Use Webhooks: Implement webhooks to handle events such as successful payments, refunds, or subscription updates. This allows your application to respond to changes in payment status in real time.
- Secure Your API Keys: Never expose your secret keys in client-side code. Always store them securely on the server side.
- Test Your Integration: Use Stripe's test mode to simulate various payment scenarios. This helps ensure that your integration works as expected before going live.
- Optimize User Experience: Make the payment process as seamless as possible. Use Stripe's pre-built UI components to minimize friction during checkout.
Conclusion
Integrating Stripe Payment Gateway into your ASP.NET Core application can significantly enhance your online payment processing capabilities. By following the steps outlined in this tutorial, you can set up a secure and efficient payment system that meets your business needs.
- Stripe provides a flexible and secure payment processing platform.
- Ensure you handle API keys securely and validate user inputs.
- Implement webhooks for real-time updates on payment status.
- Test thoroughly before going live to ensure a smooth user experience.