How to create a read-only MySQL user
Overview of MySQL User Privileges
MySQL user privileges are essential to maintaining security and control over your database. User privileges define what operations a user can perform, ranging from read-only access to full administrative rights. Understanding these privileges is crucial for ensuring that sensitive data remains protected while still being accessible to authorized users.
In a typical scenario, you may want to allow developers, analysts, or applications to access data without allowing them to alter it. This is where the concept of a read-only MySQL user comes into play. By granting SELECT privileges, you ensure that users can retrieve data without the risk of accidental deletions or modifications.
Prerequisites
Before you begin the process of creating a read-only MySQL user, ensure you have the following:
- A MySQL server installed and running.
- Access to MySQL with administrative privileges.
- MySQL Workbench or any other MySQL client for managing users and permissions.
Step 1: Open MySQL Workbench and Log In
To start, open MySQL Workbench and log in using your administrator credentials. This step is crucial as only an administrator can create new users and assign privileges.
Step 2: Create a New MySQL User Account
To create a new user account, execute the following SQL command:
CREATE USER 'report'@'%' IDENTIFIED BY '12345';The % symbol indicates that the user can connect from any host. If you want to restrict access to a specific host, replace % with the hostname or IP address of that machine. For example, to allow access only from localhost, use:
CREATE USER 'report'@'localhost' IDENTIFIED BY '12345';Step 3: Grant SELECT Privilege to the User
Next, you need to grant the SELECT privilege to the newly created user. This privilege allows the user to read data from the database:
GRANT SELECT ON DatabaseName.* TO 'report'@'%';Replace DatabaseName with the actual name of your database. This command permits the user to read all tables in the specified database.
Step 4: Verify User Privileges
After granting privileges, it's a good practice to verify that the user has the correct permissions. You can check the privileges assigned to the user with the following command:
SHOW GRANTS FOR 'report'@'%';This command will display the privileges assigned to the user, confirming that they have read-only access.
Step 5: Connect to a Database with MySQL Workbench
To connect to the database with the new user, follow the instructions in the article How to Connect to a Database with MySQL Workbench. This step is essential to test the new user account and ensure it functions as intended.
Step 6: Testing Read-Only Access
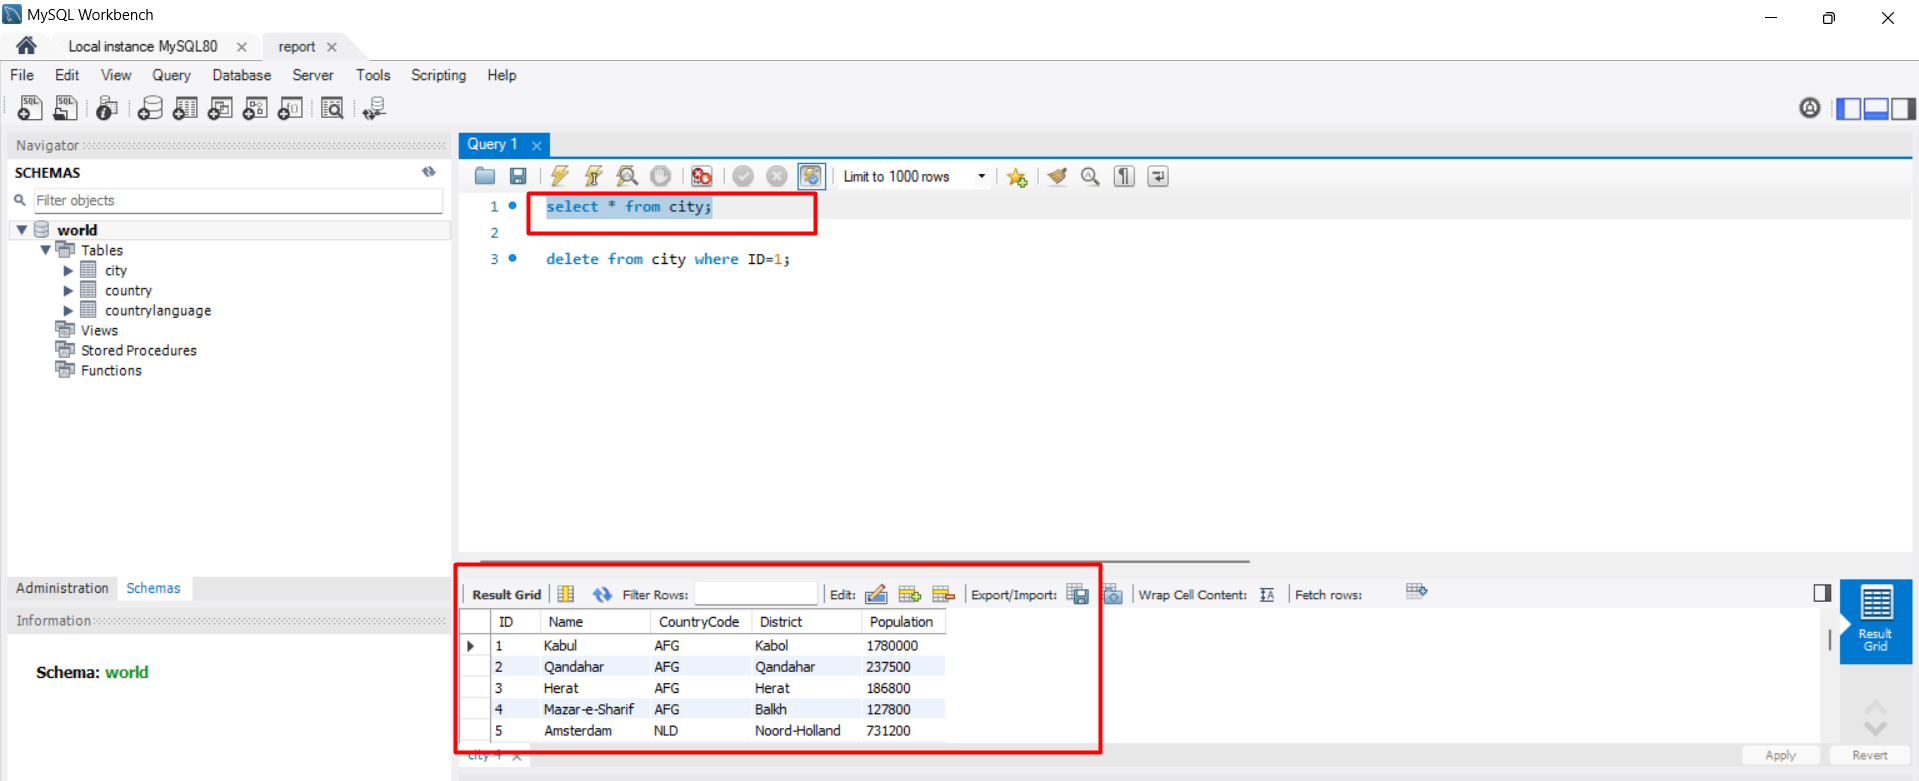
Once connected as the read-only user, you can attempt to run various SQL commands. For example, executing a SELECT statement should return results:
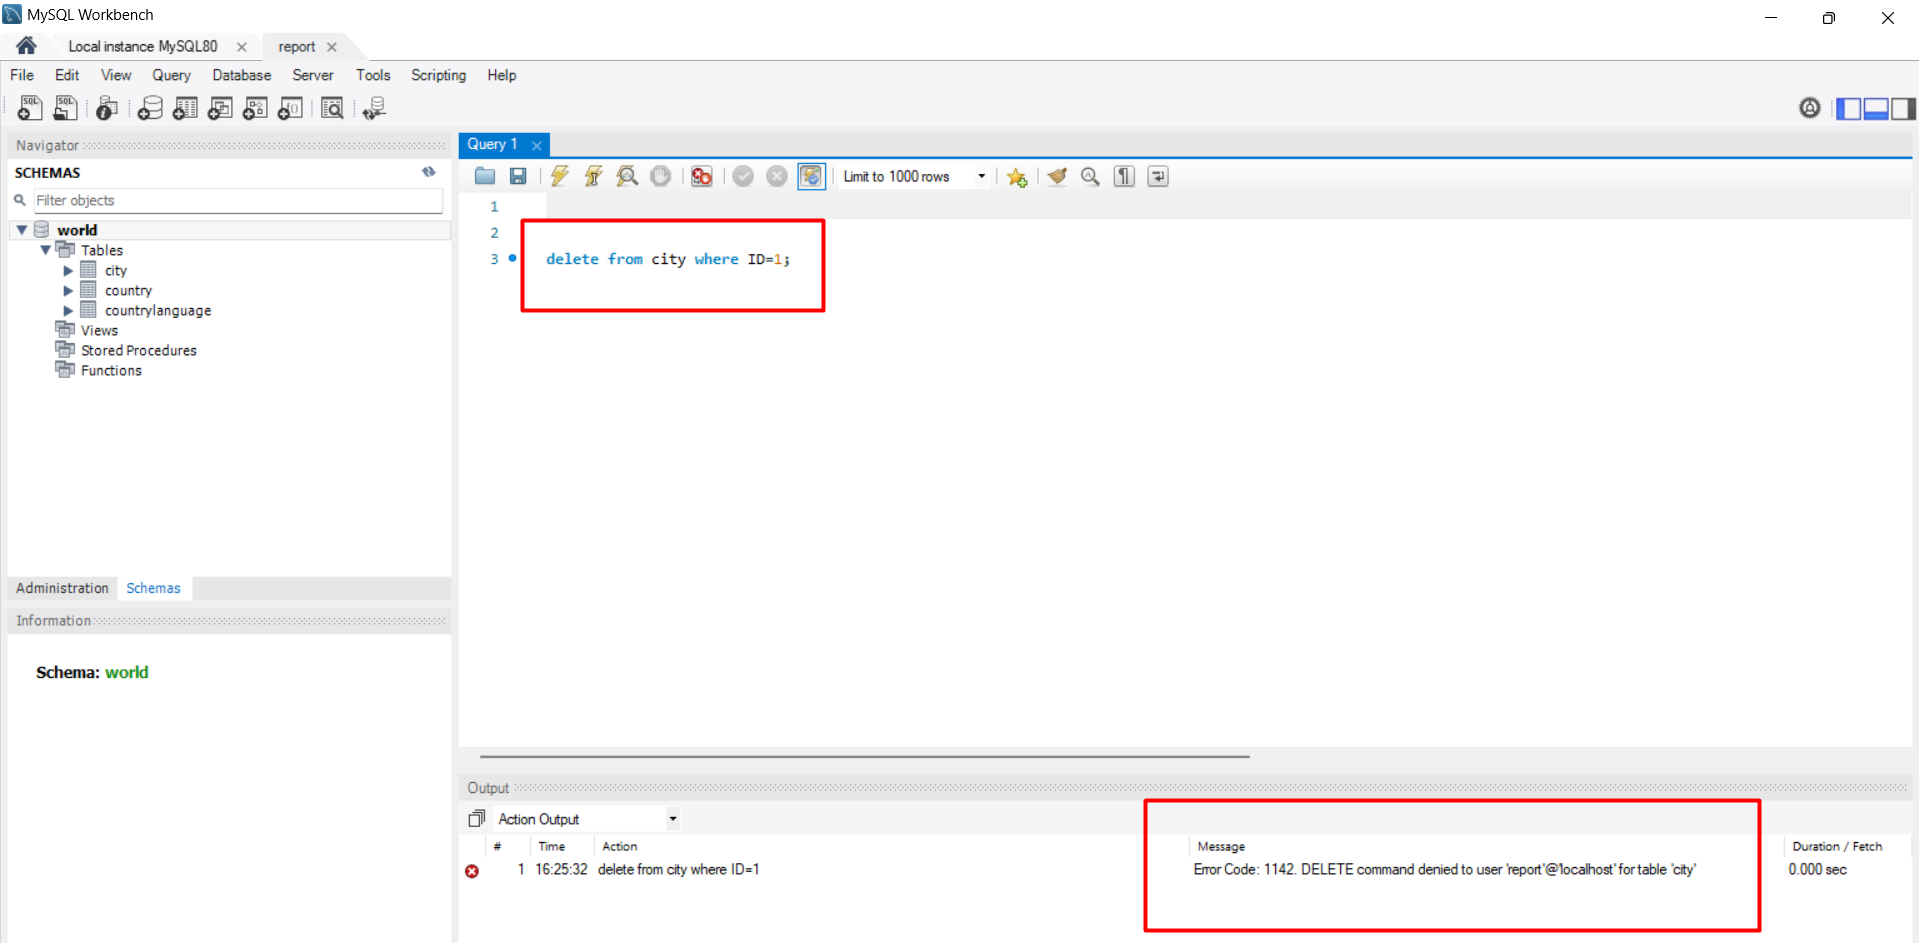
SELECT * FROM city;However, if you try to delete a record, you should encounter an error message indicating that the user does not have permission:
DELETE FROM city WHERE ID=1;This command will result in an error similar to: Error Code: 1142. DELETE command denied to user 'report'@'localhost' for table 'city'.
Edge Cases & Gotchas
While creating a read-only user is generally straightforward, there are some edge cases and common pitfalls to be aware of:
- Default Privileges: If you create a user without specifying host access, the user may only be able to connect from localhost. Ensure you specify the correct host if remote access is necessary.
- Database Name Changes: If the name of the database changes, you will need to re-grant privileges to the user. Always check after any major changes to your database structure.
- Permissions Inheritance: Be cautious with inherited permissions when using roles. Ensure that roles do not grant more privileges than intended.
Performance & Best Practices
When managing user privileges in MySQL, consider the following best practices:
- Principle of Least Privilege: Always grant the minimum permissions necessary for a user to perform their tasks. This minimizes the risk of accidental data modification.
- Regular Audits: Periodically review user accounts and their privileges. Remove any accounts that are no longer needed.
- Use Roles: For complex applications with multiple users, consider using roles to group permissions. This simplifies management and reduces errors.
Conclusion
Creating a read-only MySQL user is a critical step in securing your database. By following the steps outlined in this article, you can effectively manage user access while maintaining data integrity.
- Understand the importance of user privileges in MySQL.
- Follow the step-by-step process to create a read-only user.
- Test the user's permissions to ensure they function as expected.
- Be aware of edge cases and best practices for managing user accounts.