How to use Swagger in Existing Asp.Net Core MVC Project
Swagger UI
Swagger is one of the popular tools which is widely used now a days for generating an interactive documentation UI. It generates an interactive API for the users so that they can understand about the API and use those more easily. The OpenAPI is a specification whereas the Swagger is a tool used for implementing the specification.
Integrating Swagger UI in existing Asp.Net Core Project
For integrating swagger in existing Asp.net Core project we have to install these swashbuckle packages
 Install-Package Swashbuckle -Version 5.6.0

 Install-Package Swashbuckle.AspNetCore -Version 6.3.1

 Install-Package Swashbuckle.AspNetCore.Swagger -Version 6.3.1
You can also install these packages in your Asp.Net Core project using nuget packages. You can have a look at the image.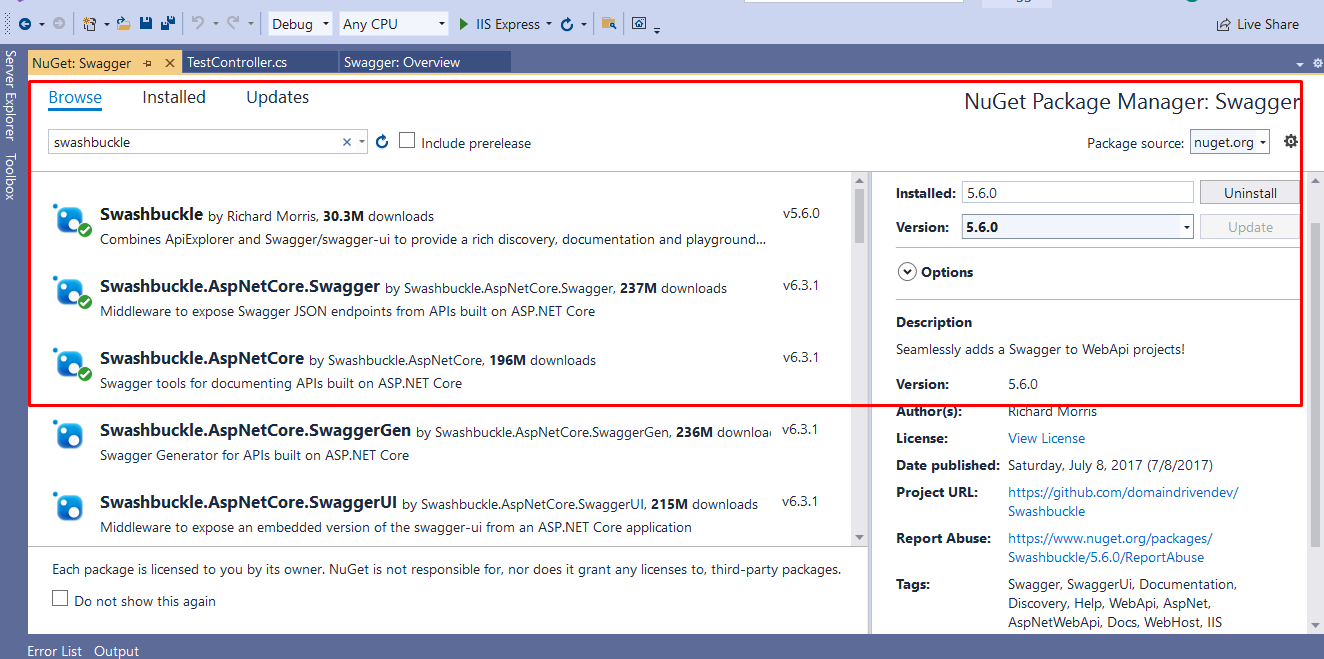
After you have installed all these packages , now you have to go to startup.cs file and add the follow lines for swagger UI in Configure method. First of all add following namespace on startup.cs
using Swashbuckle.Swagger;
Now add following lines for swagger UI in the configure method
 public void Configure(IApplicationBuilder app, IWebHostEnvironment env)
        {
            if (env.IsDevelopment())
            {
                app.UseDeveloperExceptionPage();
            }
            else
            {
                app.UseExceptionHandler("/Error");
                // The default HSTS value is 30 days. You may want to change this for production scenarios, see https://aka.ms/aspnetcore-hsts.
                app.UseHsts();
            }

            app.UseHttpsRedirection();
            app.UseStaticFiles();

            app.UseRouting();

            app.UseAuthorization();


            //Add These lines for swagger

            app.UseSwagger();
            app.UseSwaggerUI(c =>
            {
                c.SwaggerEndpoint("/swagger/v1/swagger.json", "My Test1 Api v1");
            });
            app.UseEndpoints(endpoints =>
            {
                endpoints.MapRazorPages();


            });
            app.UseEndpoints(endpoints =>
            {
                endpoints.MapControllerRoute("areaRoute", "{area:exists}/{controller=Home}/{action=Index}/{id?}");

                endpoints.MapControllerRoute(
                    name: "default",
                    pattern: "{controller=Home}/{action=Index}/{id?}");


            });
        }
So, after adding the swagger code in the configure method we have to add following lines in the ConfigureServices method
 services.AddSwaggerGen(c =>
            {
                //c.SwaggerDoc("v1", new Info { Title = "You api title", Version = "v1" });
                c.AddSecurityDefinition("Bearer", new OpenApiSecurityScheme
                {
                    Description = @"JWT Authorization header using the Bearer scheme. \r\n\r\n
                      Enter 'Bearer' [space] and then your token in the text input below.
                      \r\n\r\nExample: 'Bearer 12345abcdef'",
                    Name = "Authorization",
                    In = ParameterLocation.Header,
                    Type = SecuritySchemeType.ApiKey,
                    Scheme = "Bearer"
                });

                c.AddSecurityRequirement(new OpenApiSecurityRequirement()
                  {
                    {
                      new OpenApiSecurityScheme
                      {
                        Reference = new OpenApiReference
                          {
                            Type = ReferenceType.SecurityScheme,
                            Id = "Bearer"
                        },
                          Scheme = "oauth2",
                          Name = "Bearer",
                          In = ParameterLocation.Header,

                      },
                        new List<string>()
                    }
                  });


            });
Please match your configureservices method to this code
public void ConfigureServices(IServiceCollection services)
{
services.AddControllersWithViews();
services.AddRazorPages();
services.AddSwaggerGen(c =>
{
//c.SwaggerDoc("v1", new Info { Title = "You api title", Version = "v1" });
c.AddSecurityDefinition("Bearer", new OpenApiSecurityScheme
{
Description = @"JWT Authorization header using the Bearer scheme. \r\n\r\n
Enter 'Bearer' [space] and then your token in the text input below.
\r\n\r\nExample: 'Bearer 12345abcdef'",
Name = "Authorization",
In = ParameterLocation.Header,
Type = SecuritySchemeType.ApiKey,
Scheme = "Bearer"
});
c.AddSecurityRequirement(new OpenApiSecurityRequirement()
{
{
new OpenApiSecurityScheme
{
Reference = new OpenApiReference
{
Type = ReferenceType.SecurityScheme,
Id = "Bearer"
},
Scheme = "oauth2",
Name = "Bearer",
In = ParameterLocation.Header,
},
new List<string>()
}
});
});
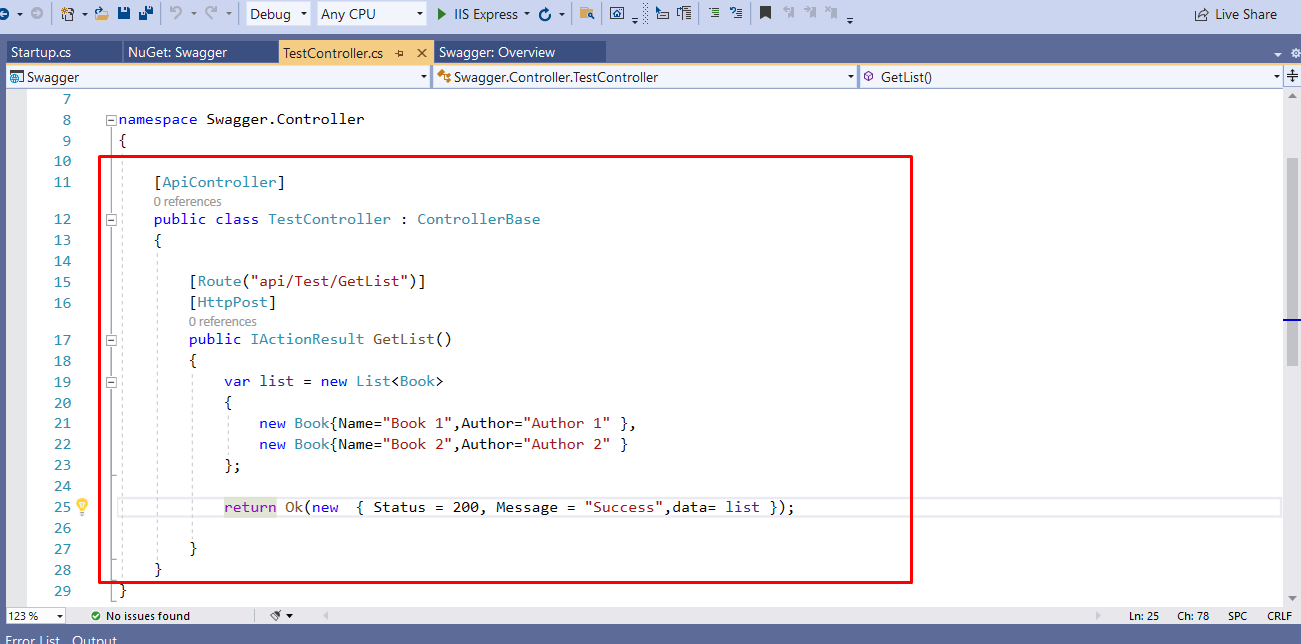
}So, Now we had done setting up swagger. Now we will add one api controller with name TestController. Now add one api for test purpose like we did in this image.
Now , run your application and navigate to
/swagger/Index.html
You will see your swagger documentation here
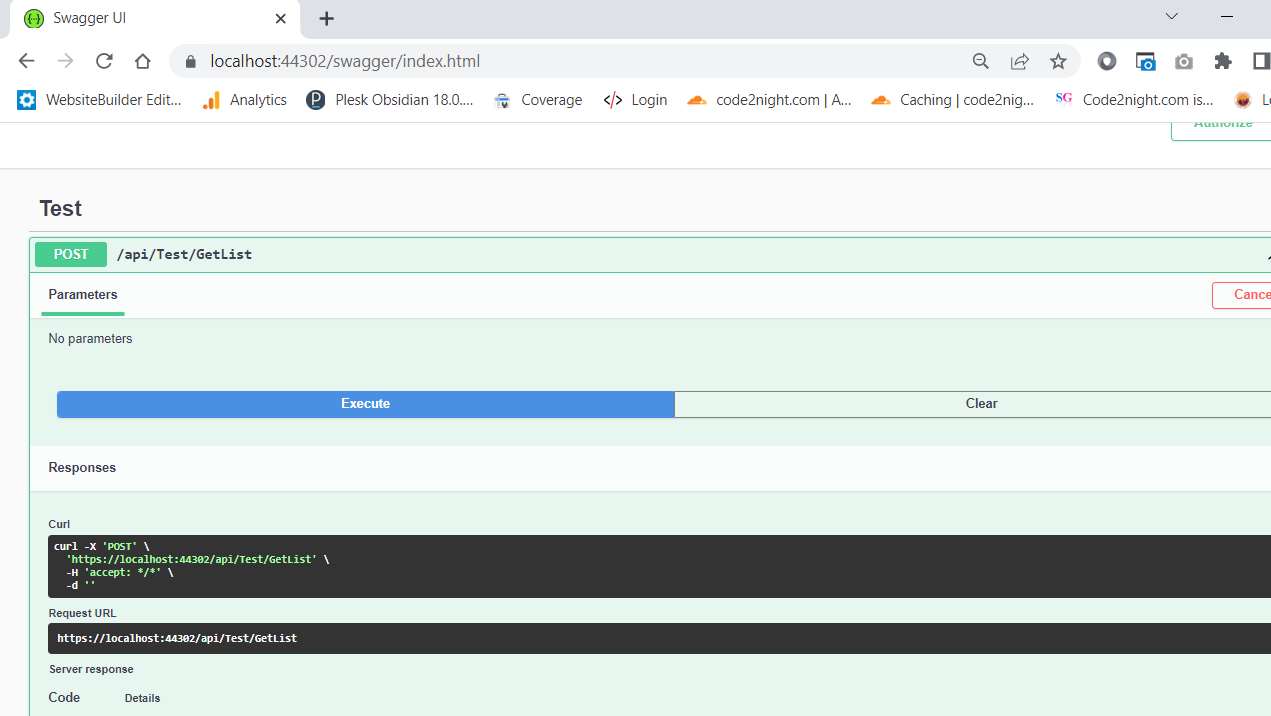
Here you will see your all api's listed. As soon as you will add any new api's and run the application. You will notice new api's will automatically show up here in the list. You can click on try out and execute the api with and without parameter . So this is how you can add swagger in you existing Asp.Net core application. You can download the attachment and check the source code to check swagger.
