Payumoney Integration With Asp.Net MVC
Hello guys and welcome to Code2Night. In today's blog post, we will be discussing how to integrate PayUMoney with ASP.NET MVC. PayUMoney is a popular payment gateway that allows businesses to securely accept online payments from customers. Integrating PayUMoney with your ASP.NET MVC application can be a great way to streamline your online payment process and make it more efficient for your customers. Whether you are running an e-commerce website or a subscription-based service, integrating PayUMoney with your ASP.NET MVC application can help you provide a seamless payment experience for your users. So, let's dive in and learn how to integrate PayUMoney with your ASP.NET MVC application.
PayU or PayuMoney is the fastest-growing Payment Gateway in India that supports all major banks and credit/debit cards for payment settlement. PayUMoney provides support to enterprise users on behalf of PayUbiz Payment Gateway. As PayuBiz support more number of service than Payumoney.
PayuMoney-
It is a payment gateway getting popular nowadays. Actually, there are a few other payment gateways like Stripe and Paypal. And PayuMoney is also getting more popular nowadays.
So in this article, we will learn how to do Payumoney Integration With Asp.Net MVC.
So for this purpose, you must have Client Key and Secret before starting the integration of PayuMoney. You can go through https://www.payu.in/developer-guide. There you can generate a merchant key for your project. After having the merchant key and test credentials we can move to the next steps as described below:-
Step 1: Paste the code in the controller
So for this step, we have to copy the Action method given below in our controller. The index method will be used to run the page. While Payment Success method will be called after the payment is successful and Payment Failed method will be called in case our payment transaction is failed.
Here we have to know how those two actions will be hit. Those two will be passed in surl and furl. Which basically stands for success url and failure URL.
surl- It is basically the URL where your website will redirect after successful payment. Or in short, it's the success URL.
furl-It is basically the URL where your website will redirect after failure of payment. Failure can happen due to wrong otp or wrong card details. So in that case it will go to furl.
Hash: PayuMoney actually expects a few parameters as mandatory. And after surl,furl Hash is a mandatory parameter. It is basically an encrypted form of values. You can use the action provided in the code snippet for generating a hash.
The hash must be created based on the following formula
sha512(key|txnid|amount|productinfo|firstname|email|udf1|udf2|udf3|udf4|udf5||||||SALT)
public ActionResult Index()
{
return View();
}
[HttpPost]
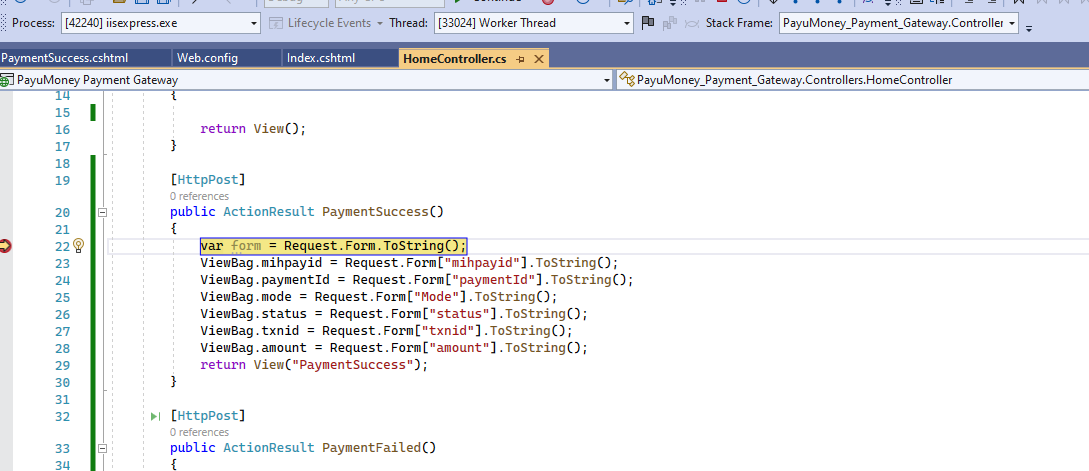
public ActionResult PaymentSuccess()
{
var form = Request.Form.ToString();
ViewBag.mihpayid = Request.Form["mihpayid"].ToString();
ViewBag.paymentId = Request.Form["paymentId"].ToString();
ViewBag.mode = Request.Form["Mode"].ToString();
ViewBag.status = Request.Form["status"].ToString();
ViewBag.txnid = Request.Form["txnid"].ToString();
ViewBag.amount = Request.Form["amount"].ToString();
return View("PaymentSuccess");
}
[HttpPost]
public ActionResult PaymentFailed()
{
var form = Request.Form.ToString();
return View("Index");
}
public ActionResult Hash(string txnid, string key, string salt, string amount, string productinfo, string firstname, string email, string phone, string udf5,string udf1)
{
string d = key + "|" + txnid + "|" + amount + "|" + productinfo + "|" + firstname + "|" + email + "|"+ udf1 +"||||" + udf5 + "||||||" + salt;
return Json(GetStringFromHash(d), JsonRequestBehavior.AllowGet);
}
private static string GetStringFromHash(string text)
{
byte[] message = Encoding.UTF8.GetBytes(text);
UnicodeEncoding UE = new UnicodeEncoding();
byte[] hashValue;
SHA512Managed hashString = new SHA512Managed();
string hex = "";
hashValue = hashString.ComputeHash(message);
foreach (byte x in hashValue)
{
hex += String.Format("{0:x2}", x);
}
return hex;
}
Step 2: Add this script in _layout.cs.html
<script id="bolt" src="https://sboxcheckout-static.citruspay.com/bolt/run/bolt.min.js" bolt-color="e34524" bolt-logo="http://boltiswatching.com/wp-content/uploads/2015/09/Bolt-Logo-e14421724859591.png"></script>
Step 3: Paste the code in Index.cs.html
After completing the controller part. We can now move to the HTML side. So for using PayuMoney, we have to create a form and have to add a few mandatory fields there as explained in the code snippet. And if you missed any of those your PayuMoney will not work.
TestUrl- https://test.payu.in/_payment
Production Url- https://secure.payu.in/_payment
We have to pass these URL in the action attribute of the form
@{
ViewBag.Title = "Home Page";
}
<div class="jumbotron">
<h1>ASP.NET</h1>
<p class="lead">ASP.NET is a free web framework for building great Web sites and Web applications using HTML, CSS and JavaScript.</p>
<p><a href="https://asp.net" class="btn btn-primary btn-lg">Learn more »</a></p>
</div>
<form action="https://secure.payu.in/_payment" method="post" id="payment_form">
<input type="hidden" id="udf5" name="udf5" value="payu_paisa" />
<input type="hidden" id="udf1" name="udf1" value="91" />
<input type="hidden" id="surl" name="surl" value="https://localhost:44301/Home/PaymentSuccess" />
<input type="hidden" id="furl" name="furl" value="https://localhost:44301/Home/PaymentFailed" />
<div class="dv">
<span class="text"><label>Merchant Key:</label></span>
<span><input type="password" id="key" name="key" placeholder="Enter your Merchant Key" value="" /></span>
<input type="text" id="key" name="service_provider" value="payu_paisa" />
</div>
<div class="dv">
<span class="text"><label>Merchant Salt:</label></span>
<span><input type="password" id="salt" name="salt" placeholder="Enter your Merchant Salt" value="" /></span>
</div>
<div class="dv">
<span class="text"><label>Transaction/Order ID:</label></span>
<span><input type="text" id="txnid" name="txnid" placeholder="Transaction ID" value="12345" /></span>
</div>
<div class="dv">
<span class="text"><label>Amount:</label></span>
<span><input type="text" id="amount" name="amount" placeholder="Amount" value="1.00" /></span>
</div>
<div class="dv">
<span class="text"><label>Product Info:</label></span>
<span><input type="text" id="pinfo" name="productinfo" placeholder="Product Info" value="P01" /></span>
</div>
<div class="dv">
<span class="text"><label>First Name:</label></span>
<span><input type="text" id="fname" name="firstname" placeholder="First Name" value="Code2night" /></span>
</div>
<div class="dv">
<span class="text"><label>Email ID:</label></span>
<span><input type="text" id="email" name="email" placeholder="Enter Email ID" value="" /></span>
</div>
<div class="dv">
<span class="text"><label>Mobile/Cell Number:</label></span>
<span><input type="text" id="mobile" name="phone" placeholder="Mobile/Cell Number" value="6767788999" /></span>
</div>
<div class="dv">
<span class="text"><label>Hash:</label></span>
<span><input type="text" id="hash" name="hash" placeholder="Hash" value="" /></span>
</div>
<div id="alertinfo" class="dv"></div>
<div><input type="submit" value="Pay" /></div>
</form>
<script>
$('#payment_form').bind('keyup blur', function () {
$.ajax({
url: '/Home/hash',
type: 'post',
data: JSON.stringify({
key: $('#key').val(),
salt: $('#salt').val(),
txnid: $('#txnid').val(),
amount: $('#amount').val(),
productinfo: $('#pinfo').val(),
firstname: $('#fname').val(),
email: $('#email').val(),
mobile: $('#mobile').val(),
udf5: $('#udf5').val(),
udf1: $('#udf1').val()
}),
contentType: "application/json",
dataType: 'json',
success: function (json) {
$('#hash').val(json);
}
});
});
</script>
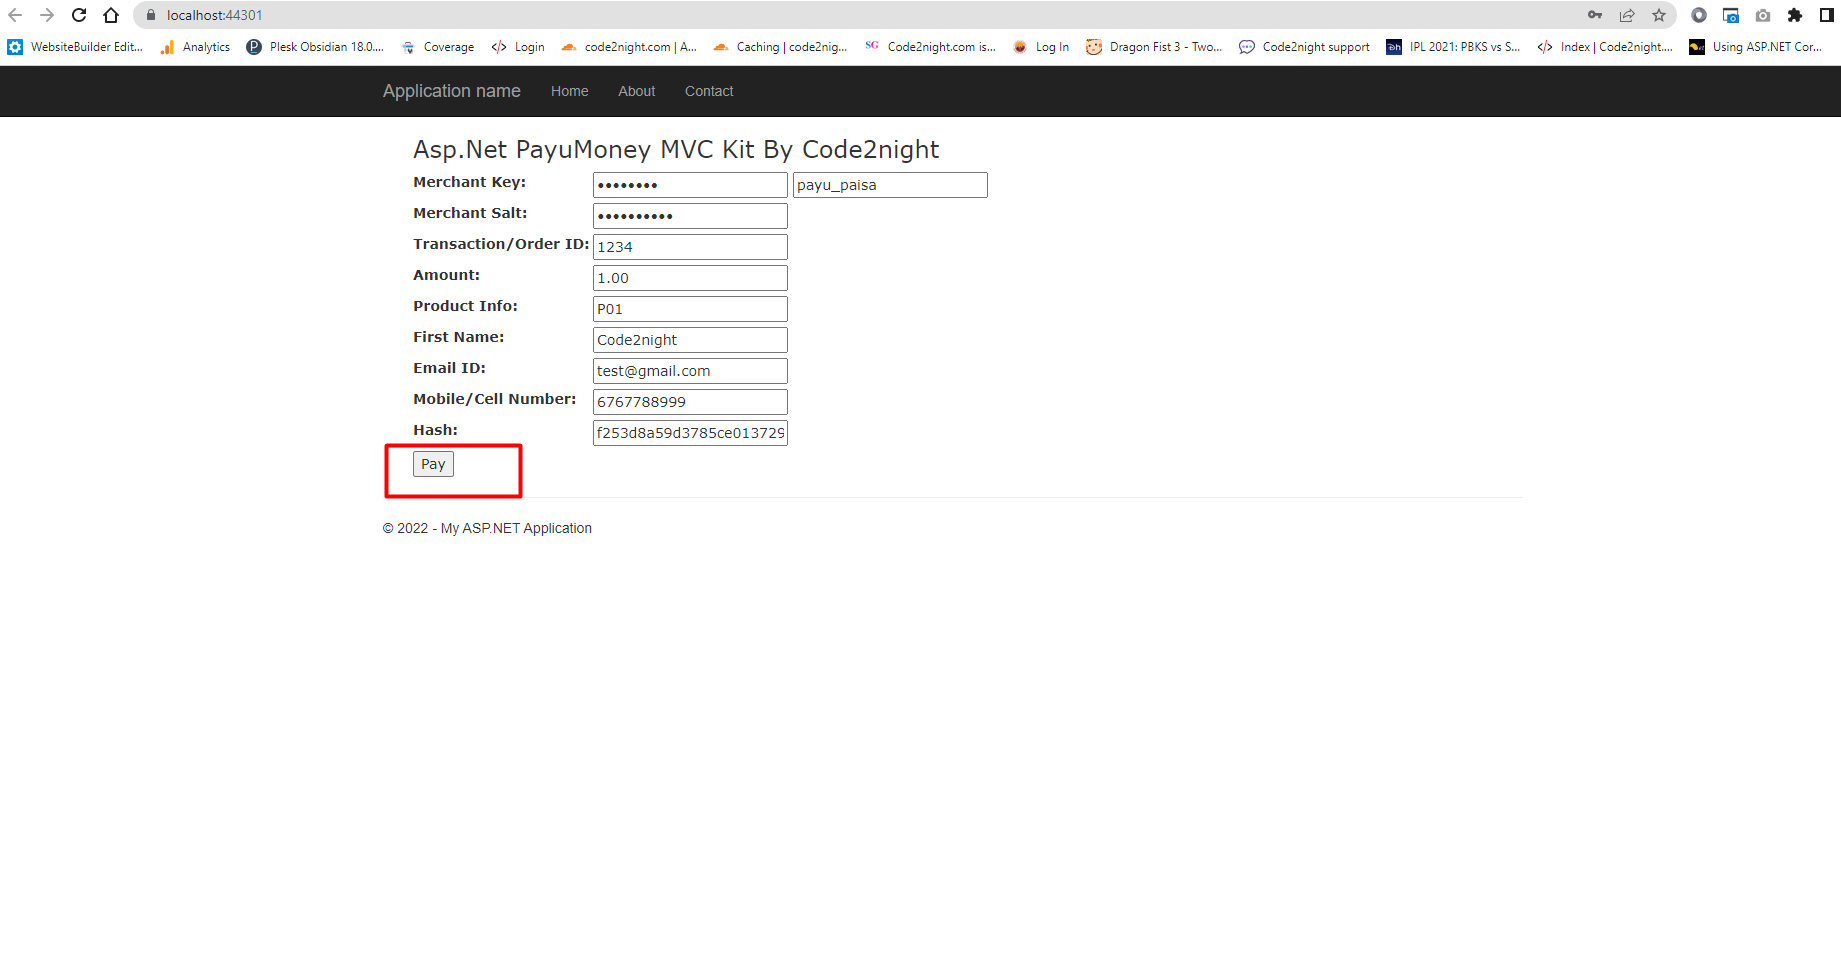
Final Output
Now run the application and you will see a form. Fill in data in the form and click on pay. While filling out the form make sure your merchant key and merchant salt are correct.
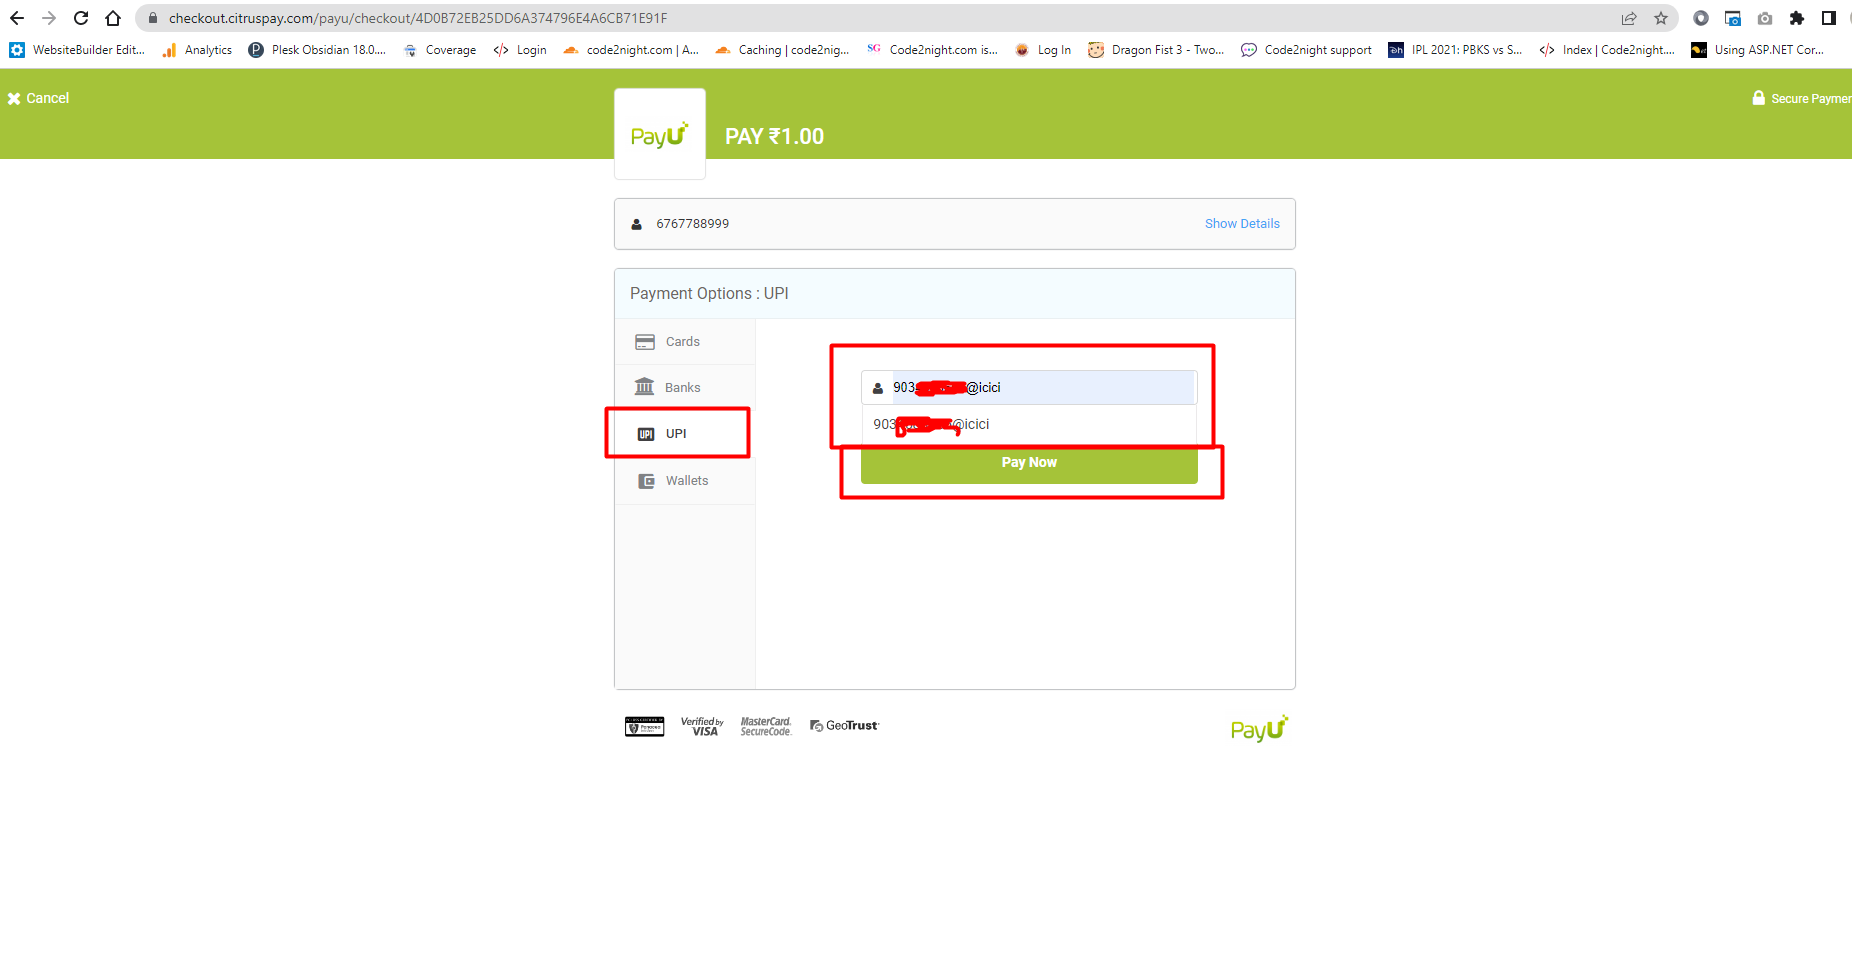
 After clicking on Pay you will be redirected to this screen. Here you will find various options to complete payment. you can choose any of the options and fill correct details and click on Pay now.
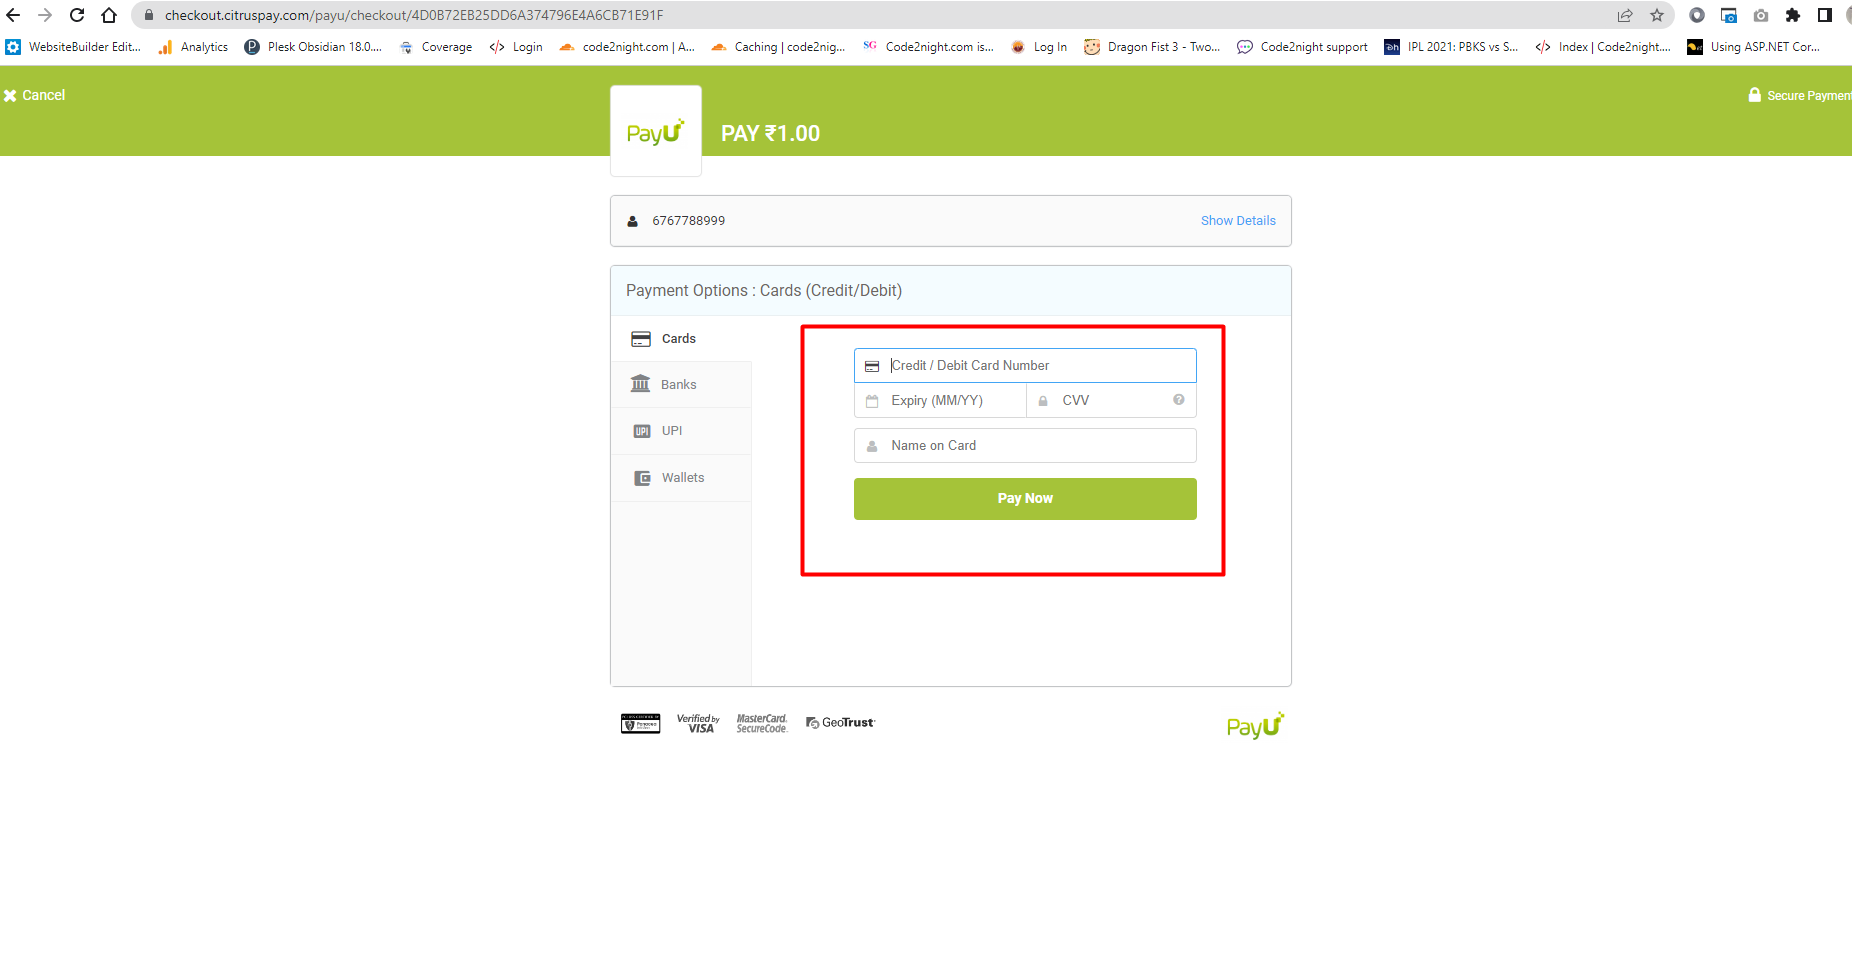 you can also use UPI system for payment in India.
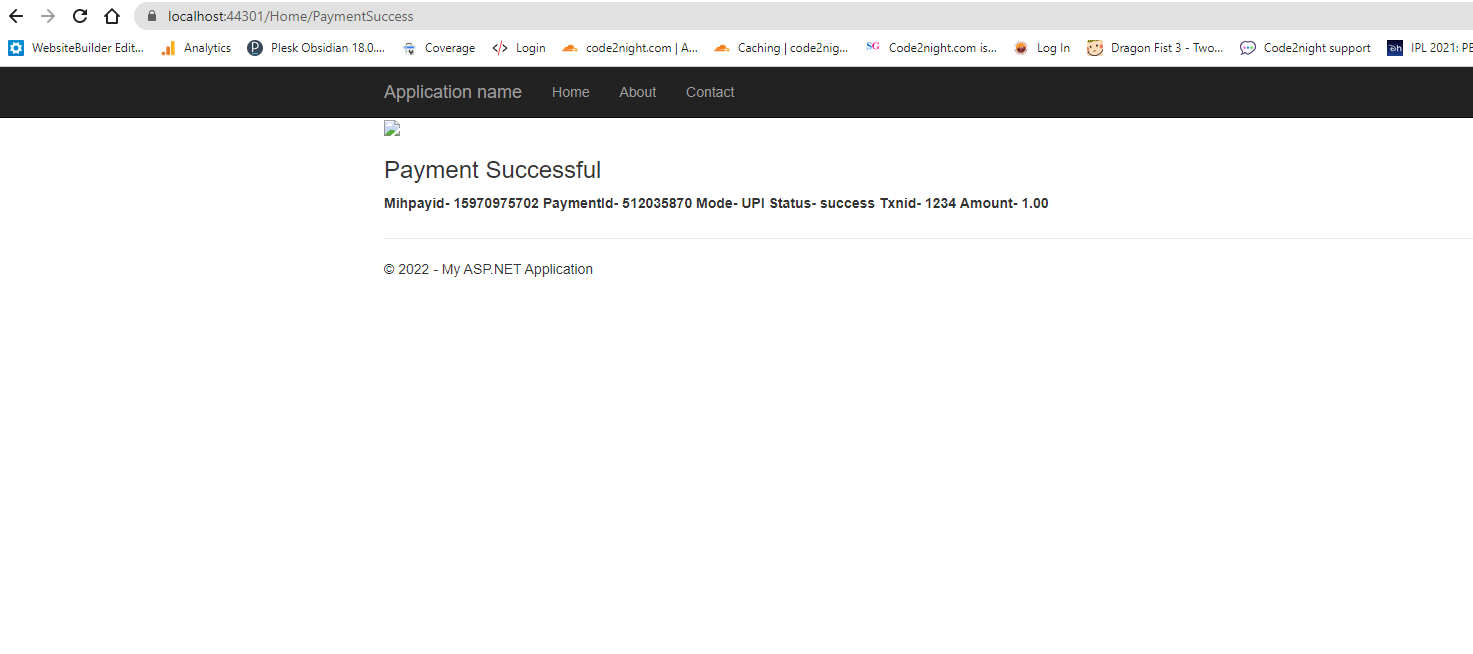
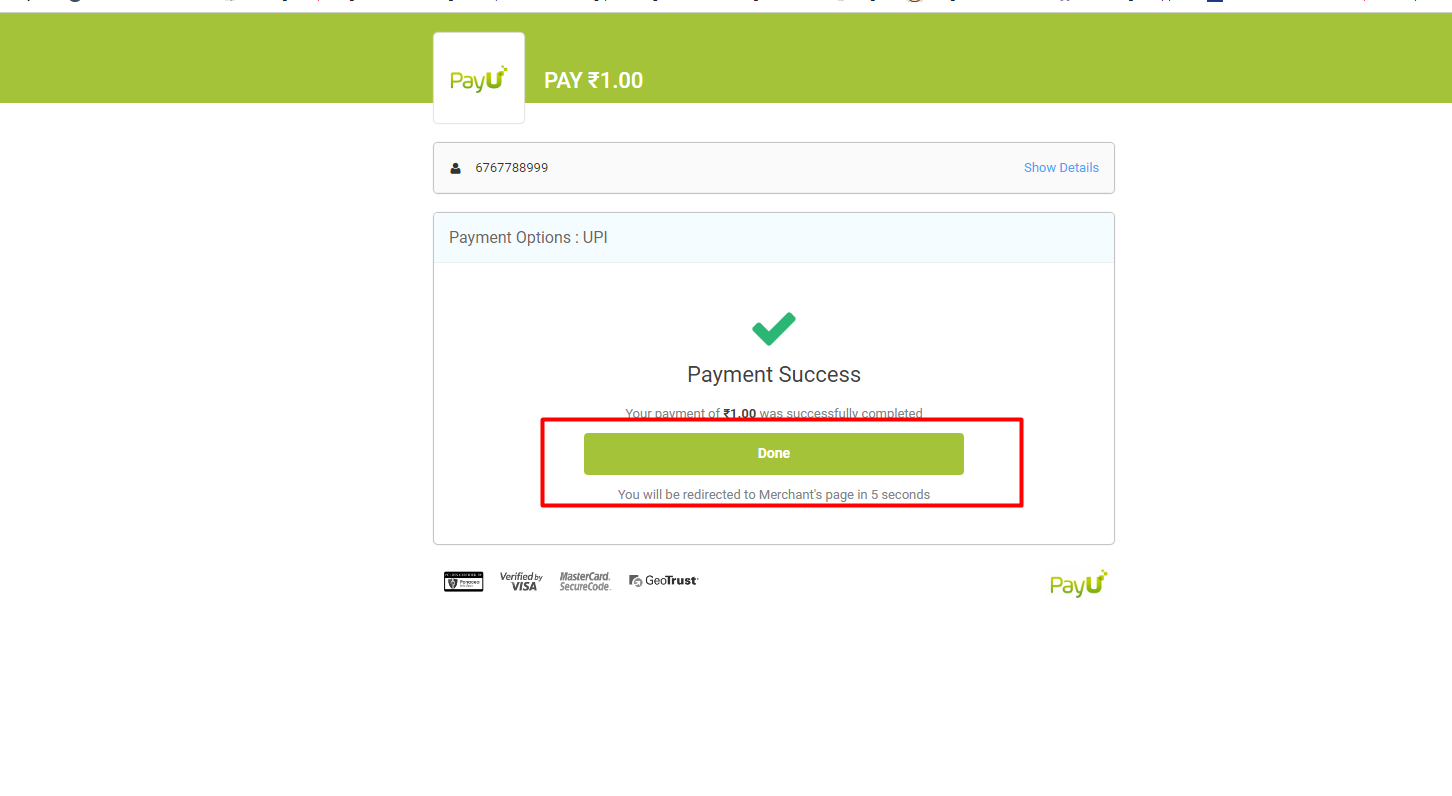
After the payment is completed. you will see this popup. Click on done and it will redirect to the URL which is present inside sure parameter.
In this action, you will get all the returned parameters from PayuMoney. You can get all the details related to payment for your use. You can see some of them in the below screenshot like how to get those.