Model Validation In ASP.NET Core MVC 6.0
Understanding Model Validation in ASP.NET Core MVC 6.0
Model validation in ASP.NET Core MVC is the process of checking whether the data entered into a model meets certain criteria. This is essential for ensuring that your application processes only valid data, preventing errors and potential security issues. In real-world applications, this could mean validating user input on registration forms, ensuring that required fields are filled out, or that data formats are correct.
ASP.NET Core provides a powerful and flexible validation framework that leverages data annotations. These annotations are attributes that can be applied to model properties to enforce validation rules. When a model is bound to a form submission, the framework automatically validates the data based on these annotations, populating the ModelState with any validation errors.
Prerequisites
To follow along with this tutorial, you will need:
- Visual Studio 2022 or later installed on your machine.
- Basic knowledge of C# and ASP.NET Core MVC.
- Familiarity with creating and managing projects in Visual Studio.
Creating the Student Model
The first step in implementing model validation is to create a model that represents the data structure you want to validate. In this case, we will create a Student model. This model will include various properties, each decorated with validation attributes that enforce rules such as required fields, string length limits, and format checks.
using System.ComponentModel.DataAnnotations;

namespace CoreValidation.Models {
    public class Student {
        [Key]
        public int Id { get; set; }

        [Required(ErrorMessage = "Please enter name")]
        [StringLength(50)]
        public string Name { get; set; }

        [Required(ErrorMessage = "Please enter date of birth")]
        [Display(Name = "Date of Birth")]
        [DataType(DataType.Date)]
        public DateTime DateofBirth { get; set; }

        [Required(ErrorMessage = "Choose batch time")]
        [Display(Name = "Batch Time")]
        [DataType(DataType.Time)]
        public DateTime BatchTime { get; set; }

        [Required(ErrorMessage = "Please enter phone number")]
        [Display(Name = "Phone Number")]
        [Phone]
        public string PhoneNumber { get; set; }

        [Required(ErrorMessage = "Please enter email address")]
        [Display(Name = "Email Address")]
        [EmailAddress]
        public string Email { get; set; }

        [Required(ErrorMessage = "Please enter website url")]
        [Display(Name = "Website Url")]
        [Url]
        public string WebSite { get; set; }

        [Required(ErrorMessage = "Please enter password")]
        [DataType(DataType.Password)]
        public string Password { get; set; }

        [Required(ErrorMessage = "Please enter confirm password")]
        [Display(Name = "Confirm Password")]
        [Compare("Password", ErrorMessage = "Password and confirm password does not match")]
        public string ConfirmPassword { get; set; }
    }
}
Implementing Model Validation in the Controller
Once the model is created, the next step is to implement validation in the controller. The controller will handle the incoming HTTP requests, process the model data, and return the appropriate views. In the HomeController, we will create two actions: one for displaying the form and another for processing the submitted data.
using CoreValidation.Models;
using Microsoft.AspNetCore.Mvc;
namespace CoreValidation.Controllers {
public class HomeController : Controller {
private readonly ILogger<HomeController> _logger;
public HomeController(ILogger<HomeController> logger) {
_logger = logger;
}
public IActionResult Index() {
return View();
}
[HttpPost]
[ValidateAntiForgeryToken]
public IActionResult Index(Student student) {
if (ModelState.IsValid) {
// Process the valid data (e.g., save to database)
// Redirect or return a success message
}
return View(student);
}
}
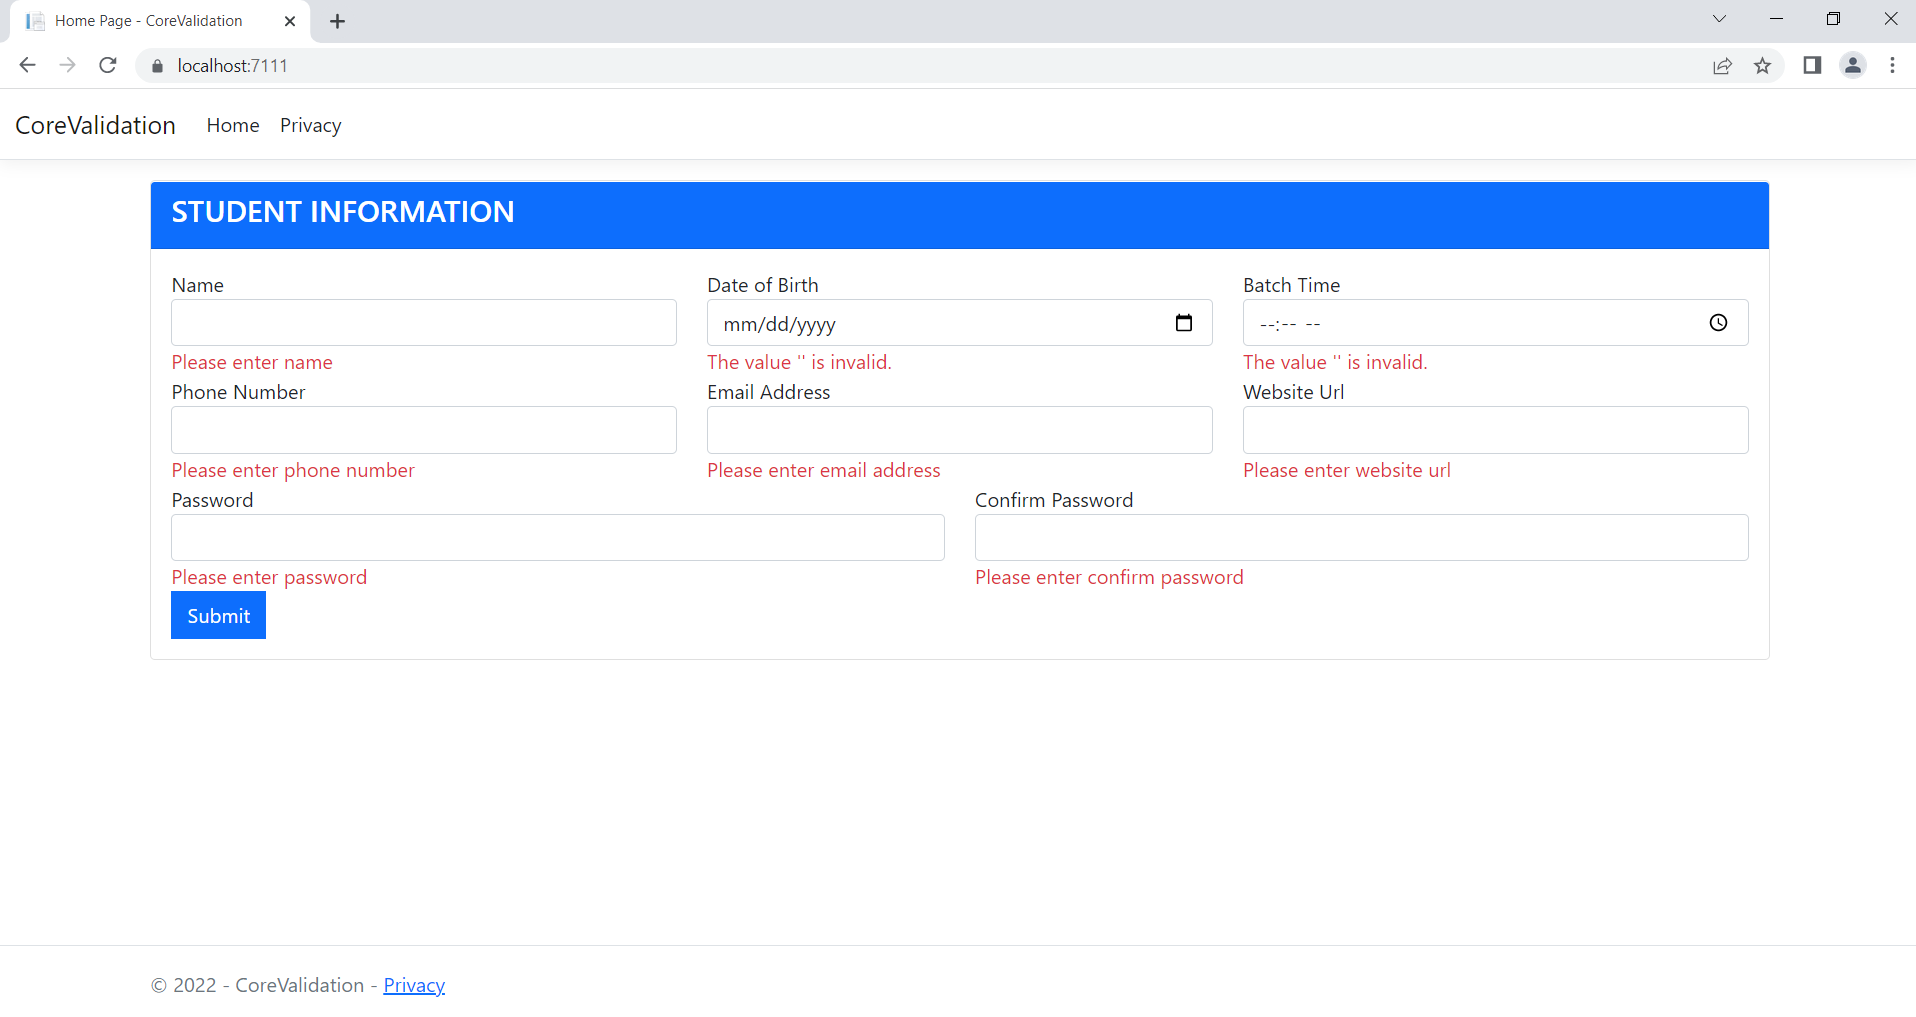
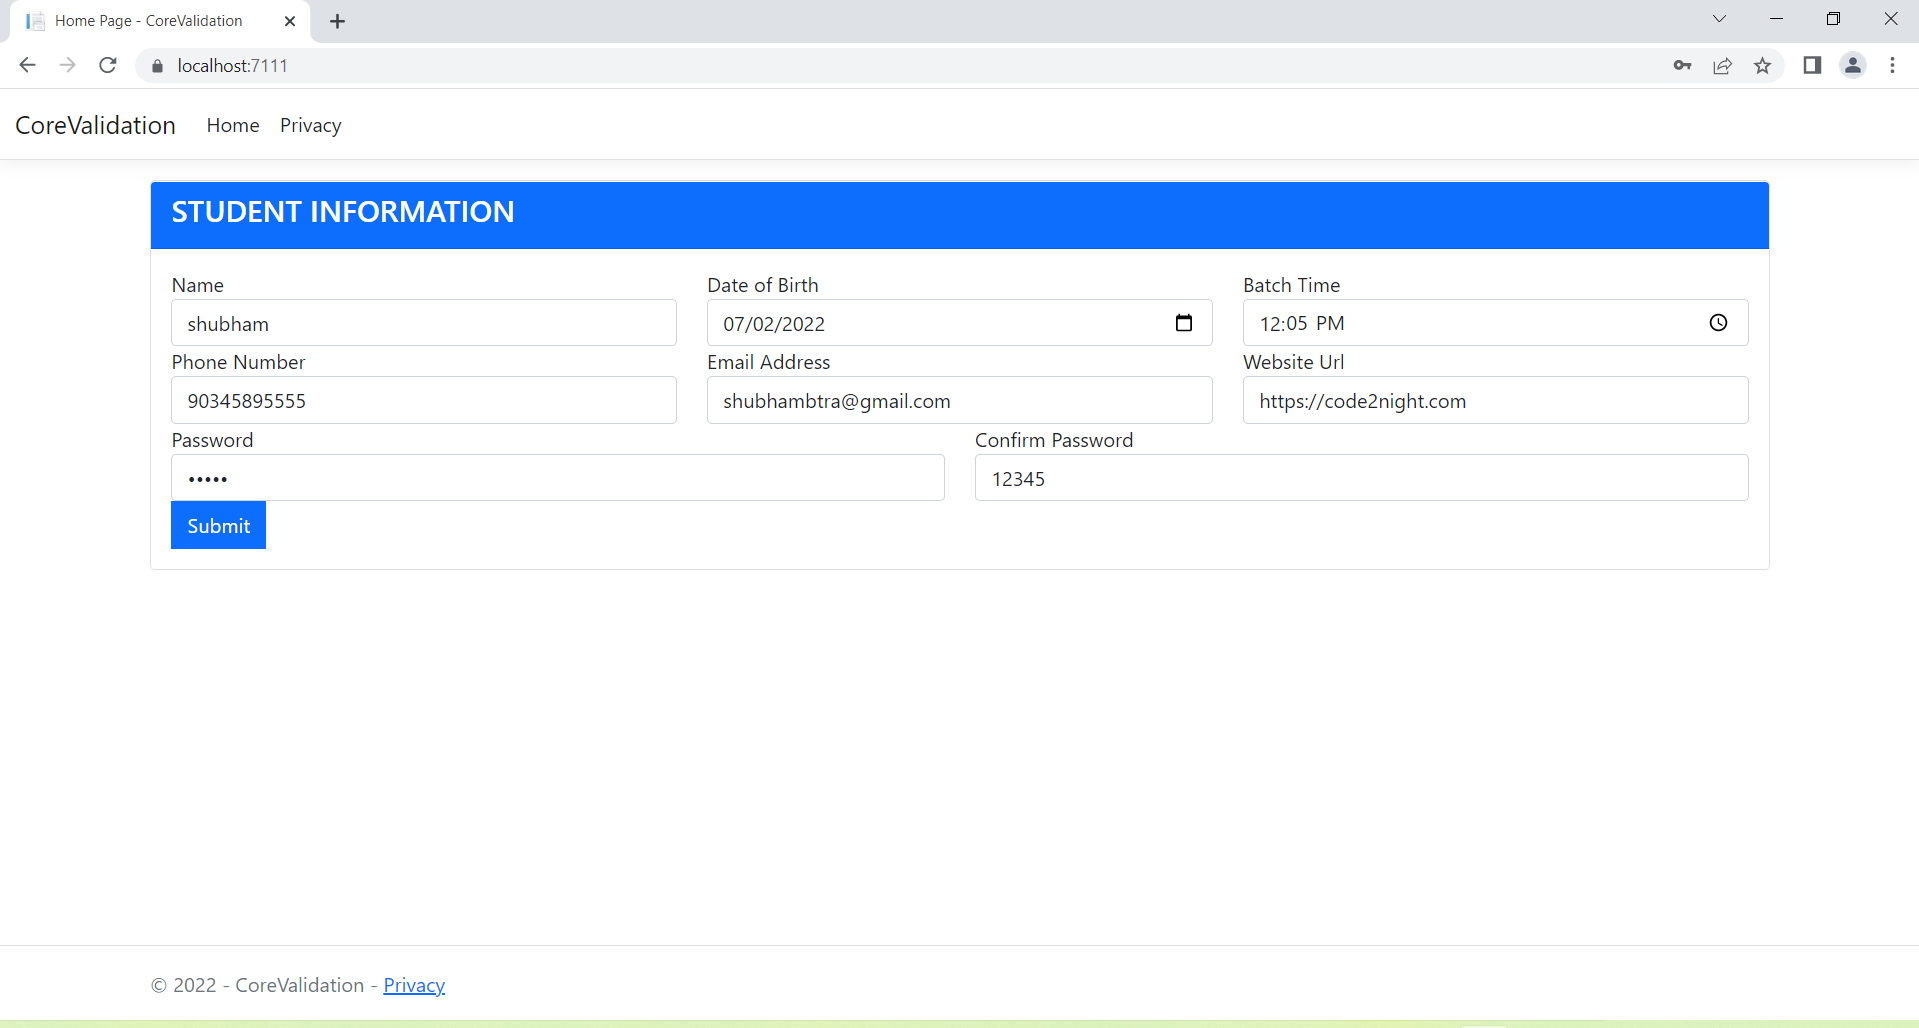
} Creating the View for Input
With the model and controller in place, we can now create the view that will allow users to input their data. The view will use Razor syntax to generate a form for the Student model, displaying validation messages where necessary.
@model CoreValidation.Models.Student
@{ ViewData["Title"] = "Home Page"; }
Student Information
Edge Cases & Gotchas
When implementing model validation, it’s important to consider edge cases that may not be immediately obvious. For example, users may enter unexpected formats or values that could lead to validation failures. Always ensure that your validation messages are clear and helpful.
Another common issue is the handling of optional fields. If a field is not required, ensure that your validation logic accounts for this. Additionally, be aware of client-side validation and how it interacts with server-side validation; discrepancies can lead to confusion for users.
Performance & Best Practices
To ensure optimal performance when validating models, consider the following best practices:
- Use Data Annotations Wisely: Only apply validation attributes that are necessary for your business logic to avoid unnecessary overhead.
- Client-Side Validation: Leverage client-side validation to provide immediate feedback to users, reducing server load and improving user experience.
- Custom Validation: For complex validation scenarios, consider implementing custom validation attributes that encapsulate business rules.
- Keep Validation Logic in the Model: Maintain separation of concerns by keeping validation logic within the model rather than scattering it across controllers or views.
Conclusion
Model validation is a vital component of ASP.NET Core MVC applications, ensuring that user input is accurate and secure. By leveraging data annotations and adhering to best practices, developers can create robust applications that provide a positive user experience.
- Model validation prevents invalid data from being processed.
- Data annotations provide an easy way to implement validation rules.
- Always consider edge cases to improve user experience.
- Utilize client-side validation to enhance performance.